Showing posts with label bacon. Show all posts

Tuesday, December 27, 2011

Braised Pork Belly (Fresh Bacon)

Anyone who knows me, knows that I love bacon. Pork belly, also known as "fresh bacon," is simply uncured slab bacon. It's where bacon comes from, so it follows that I would love it just as much as I love its smokey, crispy, mouth-watering relative. To no one's surprise, it turns out that I do.

Braised for hours in stock and aromatics, pork belly can be as tender as fillet of beef, but with so much more flavor. Just like a strip of bacon, the belly is composed of layers of fat and meat. Slow cooking helps to soften the tough layers of meat, while also infusing the tender layers of fat with the flavors of the braising liquid. When I buy belly, I try to look for pieces that have a good balance of fat and meat. Too much fat can be overwhelming in the mouth, and too much meat can result in a dry final product.
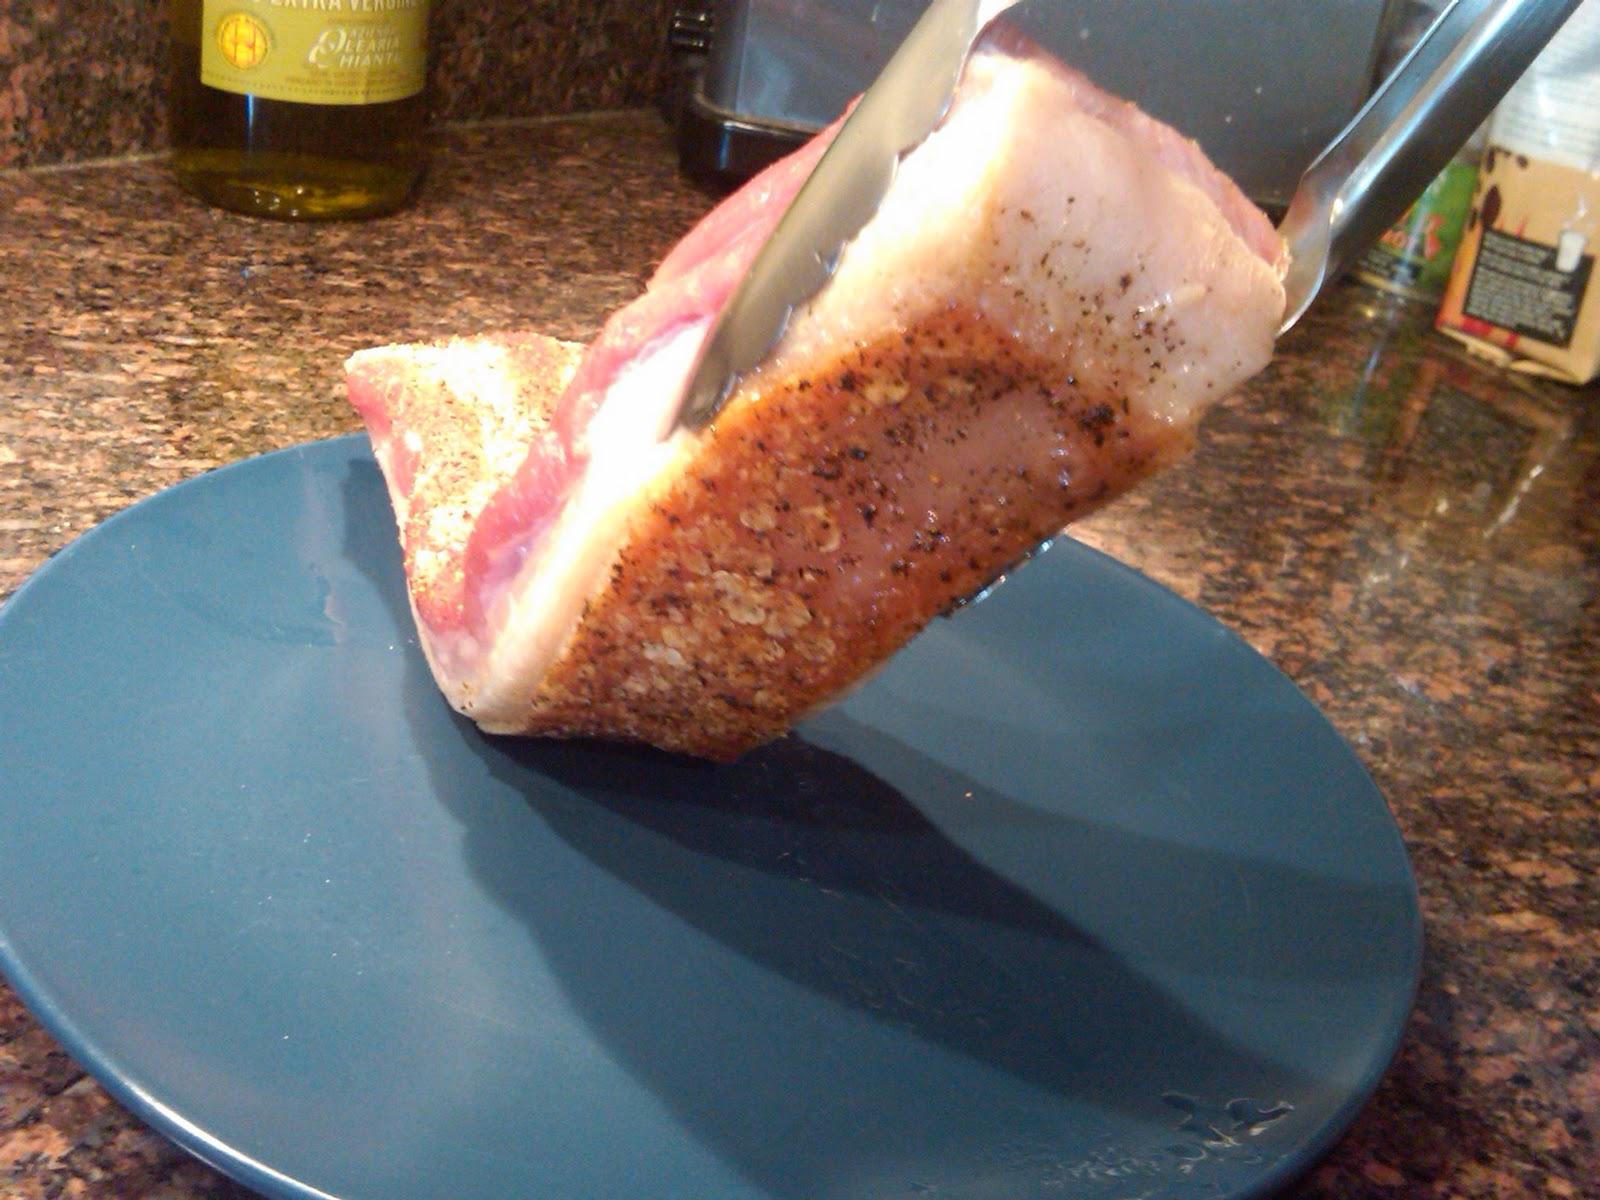
This recipe is based on Tom Colicchio's recipe for fresh bacon in "Think Like A Chef." The first few times I attempted Colicchio's recipe, I was always happy with the belly itself but couldn't quite nail the sauce. The original recipe finished the belly by browning it in a hot oven with the braising liquid still in the skillet. Something about putting that beautiful sauce in a hot oven ruined it every time. As a solution, I strain my braising liquid into a small sauce pan and gently reduce on the stove top until I get it just right. Meanwhile, I brown the belly with a little bit of extra stock, instead of my precious sauce.

The belly can be prepared through step 3 and held for several hours before completing. When buying pork belly, be sure to ask your butcher to leave the skin on. Also, try to pick a piece of belly that is relatively uniform in thickness. Pork belly is so cheap, don't be afraid to buy more than you need and trim it down to the choicest pieces at home. Serve with mashed potatoes, soft polenta, or our polenta cakes.
 

Ingredients

1 tablespoon canola oil
Kosher salt
Freshly ground black pepper
2 pounds pork belly, skin on
1 onion, roughly chopped
2 carrots, roughly chopped
2 celery stalks, roughly chopped
1 leek, white and light green part only, roughly chopped
6 garlic cloves, peeled
 
4 cups chicken stock


Instructions
  1. Heat oven to 350°F. Heat the oil in a large ovenproof skillet over medium heat until shimmering. Generously season the pork with salt and pepper. Add it to the pan, skin side down, and cook until the skin is well browned, about 15 minutes. Transfer the pork to a plate.
  2. Pour off all but about 2 tablespoons of the fat and add the onion, carrots, celery, leek, and garlic to the skillet. Cook the vegetables, stirring occasionally, until they are tender and beginning to brown, about 20 minutes. 
  3. Return the pork belly to the skillet, skin side down and fat side up, and add about 2 cups of stock (it should surround but not cover the meat). Bring the stock to a simmer, then transfer the skillet to the oven. 
  4. Gently simmer the pork, uncovered, for 1 hour, then add another cup of stock. Continue cooking until the pork is tender enough to cut with a fork, about 1 hour longer.
  5. Remove the skillet from the oven and allow the pork to cool in the braising liquid. This will take at least one hour.
  6. When ready to complete, increase the oven temperature to 400°F. 
  7. Remove the pork from the liquid, then gently lift off and discard the skin (use a small knife to separate any pieces that don’t come away from the fat easily). Score the fat, making crosshatch incisions, then cut the pork into 4 portions. This is rich stuff, so I recommend serving no more than one, 2-inch square piece to each guest.
  8. Strain the braising liquid through a fine mesh strainer into a small saucepan and discard the solids. Bring to a simmer over medium-low heat and reduce to a sauce-like consistency, skimming off any fat that rises to the surface. 
  9. Meanwhile, return pork, scored side up, to the skillet. Pour the remaining 1 cup of stock around the pork and transfer to the oven. Allow to cook, without basting, until the pork is heated through and the fat nicely browned, about 20 minutes.
  10. Serve the pork in shallow bowls with some of the sauce ladled over the top and around the meat.

Sunday, December 18, 2011

Bacon Wrapped Dates with Honey Mascarpone

These dates are the hit of our holiday party every year. I first made them after learning that Talula's in Arlington had stopped serving bacon wrapped dates. This was unacceptable, so I had to learn how to make my own bacon-date combination. This is what I have come up with. My first attempt I used thick-cut bacon. Despite being better in most circumstances , it throws off the proper bacon-to-date-ratio in this recipe. I choose mascarpone because of the texture, mild sweetness, creaminess, and because it handles heat well. Letting the cheese warm to room temperature really made filling the dates much easier and resulted in fewer broken bags, as it requires less squeezing. If your ziploc bag starts to ooze out the edges try cutting around the leak and placing a new bag over the old one to keep the spout small. This is much less messy then dealing with an increasing number of bag leaks or trying to change bags.

A word on selecting your dates: The easiest thing to do is buy the box of pre-pitted dates, but often the pitted organic dates are superior in size and deliciousness. The soft ones are really easy to pit as you slice them open. If your dates are a bit harder (such as the ones my parents bring me back from West Coast date country), they can be obnoxious to pit. I have no specific solution to this. The pre-pitted packages are the easiest to wrap and less dependent on tooth picks, but the awesomeness of a nice, plump date is worth noting. We use raw honey in this recipe. If you haven't stopped by an Appalachian road stand recently, regular honey works just as well.

It's warmth and friendliness makes this concotion a perfect candidate for a winter holiday treat. After all, the salt of the bacon and the sweet of the date combined with slightly sweet cheese is a perfect little bite, and great for grazing. Because you can make them ahead and they are relatively to churn out assembly line style once you get going, you can make as many as you want. I try to budget 2-3 dates per person. Some will eat more, some will eat less.

Bacon Wrapped Dates with Honey

Ingredients
2 Bacon Packages (thin sliced, about 32 slices) cut in half
2 lbs Medjool Dates (pref. pitted, better if large, and soft)
1 lbs Mascarpone cheese (2 8 oz tubs), at room temperature
1/3 cup Honey (raw honey if available)
      Olive Oil
      Coarse Sea Salt (such as Fleur de Sel)

Cooking time: 1 hour prep, 25 minutes to cook. Makes 64 dates.

Instructions
  1. Mix together softened mascarpone cheese with 1/3 of a cup honey until soft, smooth and creamy.
  2. Add cheese to gallon ziploc bag, placing cheese as close to one corner as possible. Snip the very edge (1/8") of the corner of the ziploc bag to create an impromptu pastry bag. If you have an actual pastry bag, use it.
  3. Slice dates down the center on one side, revealing the center. If necessary, remove the pit. Open the date so the center of the pit is exposed.
  4. Fill center of the dates with cheese. The dates do not have to close all the way and can have some overflow. The warmer the cheese is, the easier it will be to squeeze.
  5. Slice strips of bacon in half. Try to select bacon with minimum fat content on the edges.
  6. Place the date cheese-side down at the end of the strip of bacon and roll. Dates can be stored rolled up until ready to cook. If dates are large, pick dates with a toothpick to ensure that the bacon stays rolled prior to baking.
  7. Cook at 375 degrees for 25 minutes on a wire rack place on top of a cookie sheet.
  8. Serve immediately. If desired, sprinkle with quality olive oil and fleur de sel before serving.

Menu: Christmas Party Menu

Another  year, another holiday party. This is the one party that we have taken to throwing every year, partially as an excuse to buy a Christmas tree. Partially because this time of the year just makes me want to make cookies, cookies, and yet more cookies. Yet again, we were a little insane in the amount of food we prepared, but there are so many things we've started looking forward to as "something we'll do for the holiday party" that it's just hard to stop yourself. We'll be posting recipes as we find the time, recover from our hangovers, and look with horror at the mess we made.

This year, we added a spicy nut mix, homemade liver mousse, and a second vegetarian option of spicy sweet potato (a recipe I made up and am still working on perfecting). We also made pignoli cookies, which I had for the first time during our recent Tuscany trip. I insisted on trying to replicate them. These aren't quite as good as the ones I had in Italy but were an excellent first attempt and stand up on their own. In addition, we had our old favorites. You just can't go wrong with this beef recipe, or with bacon wrapped dates that matter. There's bacon. There's date. It's perfect.


So enjoy, and have a happy holiday season!


Appetizers -
Chicken "Faux Gras" Mousse with Cucumber Gelee
Truffle Butter Popcorn
Pistachio and Cranberry Stuffed Brie with Raw Honey

Main Courses -
Spanakopita Triangles (Vegetarian) We made these smaller than the dinner-sized portions we usually make. Just cut the phyllo six ways horizontally instead of in half vertically.
Chipotle Sweet Potato Pockets (Vegetarian)
Ginger and Vodka Cured Beef Tenderloin

Cookies -
Molasses Crinkles
Holiday Rice Krispie Treats

Beverages -
Mulled Wine
Egg Nog

Tuesday, February 1, 2011

Super Bowl Chili


Chili is one of my favorite things in the world, and this is not just because you can serve it in a bread bowl. Anything that is beloved to the point of having a ring of competitive contests surrounding it is my type of food, because anything worth doing right is worth sparking unsolvable arguments about the best way to go about doing it.

This chili is from Cooks Illustrated, with slight variation. It's goal is to be the type of chili you expect at a Super Bowl party. That is, not crazy fancy competition chili where the presence of tomatoes is heavily debated, but what you think of when you order chili at a ski area during playoff season.

The best part of the chili is serving it with limes at the end. This was something of a revelation for me as you don't look at a bowl of chili and think "let me cut some limes and squirt them over the sour cream and cheddar". But you SHOULD think that, because it really brightens the flavors and evens out the heartiness. Other toppings include all your chili basics: cheddar, sour cream, scallions, avocados, tomatoes, jalepenos, tabasco, onions, anything you want.

The recipe can easily be cut in half, and a full batch fills our larger dutch oven to the brim. That being said, chili makes awesome leftovers. It might even be better the next day as the flavors marry, another reason this is a winner for guests.

So, without further ado...


Super Bowl Chili:

8
strips thick-cut bacon
2 medium onions , chopped fine (about 2 cups)
1 red bell pepper , cut into 1/2-inch cubes
6 med. cloves garlic , minced or pressed (about 2 tablespoons)
1/4 cup chili powder
1 tablespoon ground cumin
2 teaspoons ground coriander
1 teaspoon red pepper flakes
1 teaspoon dried oregano
1/2teaspoon cayenne pepper
1/4 to
1/2
teaspoon ground chipotle pepper (optional-- instead of tabasco)
2
lbs 85% lean ground beef (or 1 lb. 80% and 1 lb. 90%)
1
1
15-ounce can red kidney beans , drained and rinsed
15 ounce can black beans, drained and rinsed
1 28 ounce can diced tomatoes , with juice
1 28 ounce can tomato puree

Table salt
Tabasco
2
limes , cut into wedges

  1. Fry bacon in Dutch oven over medium heat, stirring frequently, until browned, about 8 minutes. Pour off all but 2 tablespoons fat, leaving bacon in pot.
  2. Add onions, red bell pepper (did I mention it had to be red?), garlic, chili powder, cumin, coriander, pepper flakes, oregano, cayenne, and chipotle (if using, use moderation, adds a lot of heat); cook, stirring occasionally, until vegetables are softened and beginning to brown, about 10 minutes. There will be a fond on the bottom of the pot. This is good. You are not burning anything, just make sure to de-glaze later.
  3. Increase heat to medium-high and add half the beef; cook, breaking up pieces with wooden spoon, until no longer pink and just beginning to brown, 3 to 4 minutes. Add remaining beef and cook, breaking up pieces with wooden spoon, until no longer pink, 3 to 4 minutes. The 85% beef is a good medium between over fatty (80%) and over meaty 90%) according to Cooks Illustrated, but if I had to choose one of the two, I'd go healthy and maybe add an extra strip or two of bacon for some more fat to mellow the beef taste.
  4. Add rinsed beans, tomatoes, tomato puree, and 1/2 teaspoon salt; bring to boil, then reduce heat to low and simmer, covered, stirring occasionally, for 1 hour.
  5. Remove cover and continue to simmer at least 1 hour longer, stirring occasionally (if chili begins to stick to bottom of pot, stir in 1/2 cup water and continue to simmer), until beef is tender and chili is dark, rich, and slightly thickened. If needed, skim any pools of fat off.
  6. Add 3-4 dashes tabasco sauce. Adjust seasoning as desired. Serve with lime wedges.


Total cook time: about 3 hours (2 1/2 hours cook time, 1/2 hour prep)