Sunday, August 28, 2011

Mocha Ice Box Cake (Cookie Cake)

I saw Barefoot Contessa make this cake on her show, and I thought, okay, this is so over-the-top crazy and rich, it just has to be good. Otherwise, how did it get green-lighted? The answer is that this is both completely unexpected and exactly what you think it is going to be. That is, an almost tiramisu like "cake" where chocolate chip cookies replace the lady fingers. The cookies absorb the whip cream and coffee liqueur while the chips remain for welcome chunks of chocolate. This is a diet killer, but if you're going off the diet, go big.

The recipe hinges on choice of cookie. While I make a pretty mean chewy chocolate chip cookie, its fraternal twin the crispy chocolate chip cookie is not something I've mastered. Plus, since the general ease of making this dish is part of its appeal, do you really want to have to make a whole other dessert just to start this recipe? So, the goal should be to score some crispy, thin (absorbant) cookies from the grocer's bakery or the food aisle if you can find it. I realize this can be a little hard to find (we get Otterbein's Chocolate Chip, which they sell at Giant and Calvert Woodley. Tate's cookies or Anna's Ginger Snaps, etc. are also good options). Ginger snaps are a nice variation from the chocolate chip version.

The mocha whipped cream is a rich and complex cream, and is a sneaky little tool to keep in your whip cream arsenal to drop on anything chocolate and sweet as a finisher. Brownie? Dab a little mocha whip cream on that. The shaved chocolate, which seems like a gratuitous thing, actually is more than garnish and really does add a distinct flavor profile to the cake. It's good without the shavings, but the dish tastes way more complete with them on. Again, the tiramisu comparison invites itself and is appropriate here. Before you know it, this recipe will be in your standards list of a quick and easy way to celebrate a special occasion in a classy yet comforting way.


Mocha Ice Box Cake (Cookie Cake)


2 cups cold heavy cream
12 ounces Italian mascarpone cheese
1/2 cup sugar
1/4 cup coffee liqueur, such as Kahlua
2 tablespoons unsweetened cocoa powder, such as Pernigotti
1 teaspoon instant espresso powder
1 teaspoon pure vanilla extract
3 (8-ounce) packages chocolate chip cookies, such as Tate's Bake Shop
Shaved semisweet chocolate, for garnish


Instructions
  1. Using either a hand mixer or standing mixer with a whisk attachment, combine the heavy cream, mascarpone, sugar, coffee liqueur, cocoa powder, espresso powder, and vanilla. Mix on low speed to combine and then slowly raise the speed, until it forms firm peaks (when the whisk is lifted out of the cream the cream remains stiff at the end of the attachment).
  2. To assemble the cake, arrange chocolate chip cookies flat in an 8-inch springform pan, covering the bottom as much as possible like a puzzle. (I break some cookies to fill in the spaces.) Spread a fifth of the mocha whipped cream evenly over the cookies. 
  3. Place another layer of cookies on top, lying flat and touching, followed by another fifth of the cream.
  4. Continue layering cookies and cream until there are 5 layers of each and you've hit the top of the spring form pan, ending with a layer of cream.
  5. Smooth the top, cover with plastic wrap, and refrigerate overnight.
  6. Run a small sharp knife around the outside of the cake and remove the sides of the pan. 
  7. Using a fine grater or rasp, grate thin shaving of chocolate on the top of cake. Cut in wedges, and serve cold. 


Cooking Time: 12 hours Inactive, 30 minutes active

Monday, August 22, 2011

Chilled Cucumber-Avocado Soup with Crab Salad

I love cold soups, especially cold cucumber soup.  It reminds me of hot midday meals in the Caribbean and Mexico.  Of course, eating it at home is pretty good, too.

When I make this dish for guests I want it to transport them the same way it transports me, so I add lots of flavor.  The addition of avocado and coconut milk to pureed cucumber makes the soup creamy-smooth, and adds a pleasant sweetness.  I cut through that sweetness with just enough Thai green curry paste and serrano chile to linger on your palette.  The crab salad, which can be omitted for a vegetarian friendly plate, adds a luxurious element to the dish and compliments the flavors in the soup perfectly.

The soup is best eaten the day after it’s made to give the flavors time to develop.  If your blender is too small to accommodate all of the ingredients (remember to factor the water into your calculation), blend the soup in batches.  It’s worth splurging for jumbo lump crabmeat for this recipe.  The crab is dressed simply, so the relative quality of your product will really show though.

Chilled Cucumber-Avocado Soup with Crab Salad

Ingredients

Cucumber Avocado Soup
2 cucumbers, about 12 ounces each, peeled, seeded and coarsely chopped
2 Hass avocados, coarsely chopped
3 teaspoons Thai green curry paste
2 teaspoons sugar
3 teaspoons finely grated lime zest from 3 limes
2 serrano chiles, seeded and chopped
1 13-ounce can unsweetened coconut milk
3 tablespoons lime juice from 3 limes
Fine sea salt
Cayenne pepper
Ground white pepper
Siracha (optional)

Crab Salad (Optional)
1 pound jumbo lump crab meat, picked over
2-3 tablespoons lemon juice from 1 lemon
1 tablespoon minced chives
Black pepper


How to Pit An Avocado

Instructions

  1. In a blender, puree the cucumbers until smooth.  Add the avocados, curry paste, sugar, lime zest and chile.  Process until blended.  Add 3 1/2 cups of water, the coconut milk and lime juice and process until smooth.  Transfer the soup to a large bowl and season with salt, cayenne and white pepper to taste.  Cover and refrigerate until chilled, or overnight.
  2. When ready to serve the soup, place the crabmeat in a medium bowl and add the lemon juice and chives.  Toss gently to combine.  Season with salt, black pepper and cayenne to taste. 
  3. Taste and season the now developed flavors of the soup with salt, white pepper, and drops of siracha for added heat (optional--be gentle).
  4. To serve, mound a small pile of the crab salad in the center of a wide soup bowl.  Carefully ladle some of the soup around the crab.  The crab should still be visible above the soup.  Don’t’ submerge it.  Repeat with remaining bowls.  Finish the soup with a drizzle of olive oil and a pinch of freshly ground black pepper.

Sunday, August 21, 2011

Osso Buco

My relationship with this dish began when I was only a small child. My parents had taken me out to eat at an Italian restaurant. When the waiter came to the table he announced osso buco as one of the night’s specials. I remember thinking the name sounded silly, and asking my dad what it was. “Veal braised in wine,” he said. Like a fool, I wasn’t impressed. I suppose that’s what prompted him to order it. When it came to table he showed me how the hole in the middle of the bone was filled with marrow. He spread some onto a piece of bread for me to taste, and my life was never the same again.

Osso buco, which literally translates to ‘bone with a hole,’ is a thick slice of veal shank, traditionally braised for many hours in white wine and aromatics. Slow cooking transforms the tough shank meat into fall-off-the-bone deliciousness. Oh, and did I mention the bone marrow? Sometimes, it’s hard to decide which to eat first.

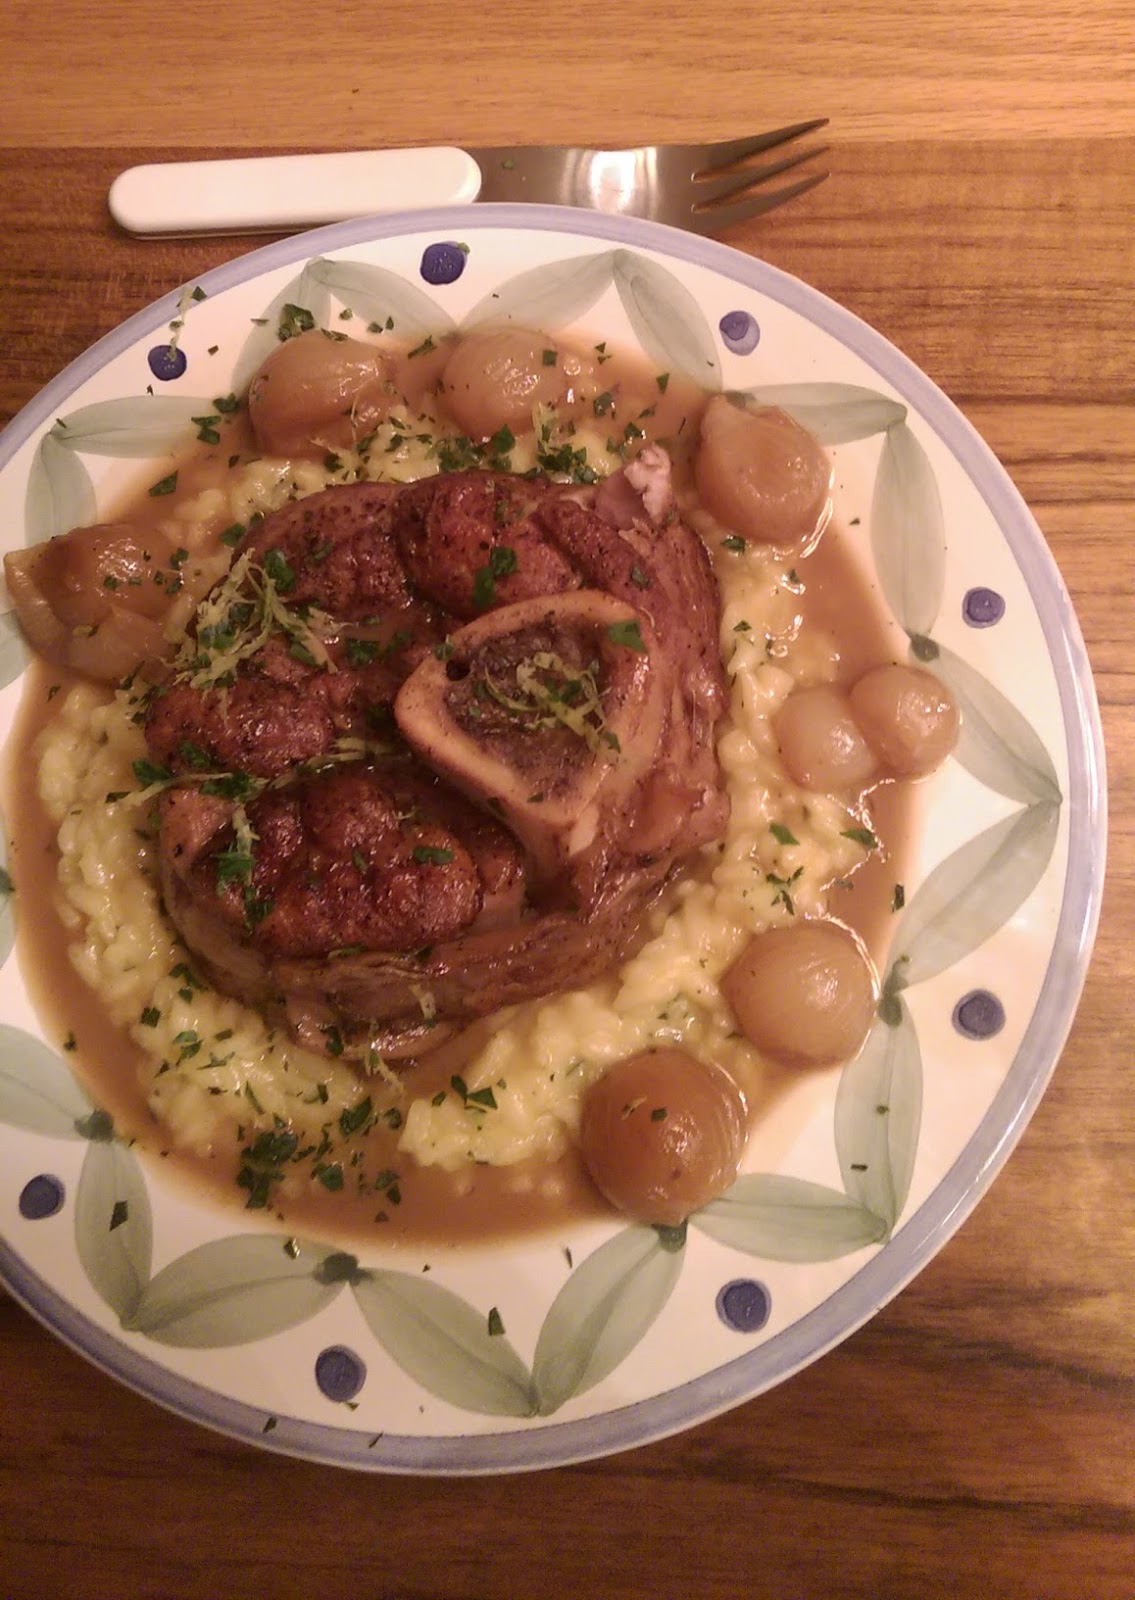
These days, I like to make osso buco for guests because I can throw it into the oven two hours ahead of time and forget about it. It also never fails to impress. When I’m lucky, E.S. will make risotto to accompany the osso buco, but simpler starches like egg noodles or mashed potatoes are equally delicious. I finish the dish with a sprinkling of gremolata, a mixture of parsley and lemon zest, which helps to brighten the dish and cut through the sweetness of the veal.

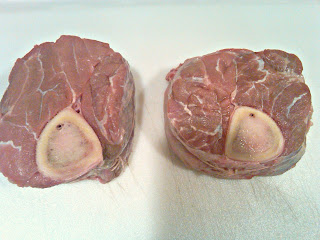
I recommend using slices of veal shank that are at least 1½ inches thick for this recipe. If you only see thinner piece in the case, ask your butcher if he can cut you some thicker pieces (2 inches is ideal). As with my braised lamb shank recipe, I finish the osso buco in the oven, which allows the meat to re-brown and helps the shank to hold their form on the plate. Serve with crusty bread for soaking up the extra braising liquid and, of course, for the bone marrow.

Osso Buco


Ingredients

4 slices veal shank, 1½ to 2 inches thick
Kosher salt
Black pepper
2 tablespoons olive oil
1 medium carrot, chopped
1 medium onion, chopped
½ celery rib, chopped
6 garlic cloves, chopped
5 sprigs parsley
1 sprig thyme
2 bay leaves
10-12 black peppercorns
3 whole cloves
1 cup dry white wine
2 cups veal or chicken stock
1 tablespoon chopped parsley
1 tablespoon grated lemon zest from one lemon


Instructions

1. Preheat oven to 325F. Cut four pieces of kitchen twine, each about a foot long. Place a length of twine on a cutting board and lie a piece of veal shank on its side on top of twine, making sure to center the shank on the twine. Lift the ends of the twine up around the shank and tie as tightly as possible. Pat the shanks dry with paper towels and season generously with salt and pepper.
2. Heat oil in a Dutch oven large enough to hold the shanks in one layer over medium-high heat. When the oil begins to shimmer add the shanks and brown well on all sides, about 6 minutes. Brown the shanks in batches if necessary. Remove to a plate.
3. If the pot looks dry, add a little more oil. Reduce the heat to medium and add the carrot, onion, celery and garlic. Cook the vegetables, stirring frequently, until softened.
4. Place the parsley sprigs, thyme, bay leaves, peppercorns and cloves in a small coffee filter to make a bouquet garni (see pictures). Fold the filter over itself and tie shut with a piece of kitchen twine.
5. When the vegetables are cooked add a little bit of the wine to the pot and, using wooden spoon, scrape up any browned bits from the bottom of the pot. Arrange the shanks over the vegetables in a single layer, along with the bouquet garni. Add the wine and stock to the pot. The liquid should reach about halfway up the shanks. Increase the heat to high and bring to a boil. Cover and place in the oven for 1 hour.
6. After one hour, flip the shanks over and add additional stock to the pot if needed to keep the level halfway up the shanks. Return to the oven and cook for 1 hour more.
7. Remove the pot from the oven and place on the stove top. Increase oven temperature to 400F. Remove shanks from liquid and place on a baking sheet. Once the oven has come up to temperature, place shanks in oven and allow to re-brown. Meanwhile, finish the sauce.
8. Strain the braising liquid into a medium saucepan and bring to a simmer over medium heat. Simmer the sauce until thick and velvety, about 10 minutes, skimming off any fat that rises to the surface. Once thickened, season to taste with Kosher salt and freshly ground black pepper.
9. Combine the chopped parsley and lemon zest in a small bowl.
10. To serve, remove the string from each shank and ladle some of the reduced sauce over the top. Finish with a sprinkling of the parley and lemon zest mixture.
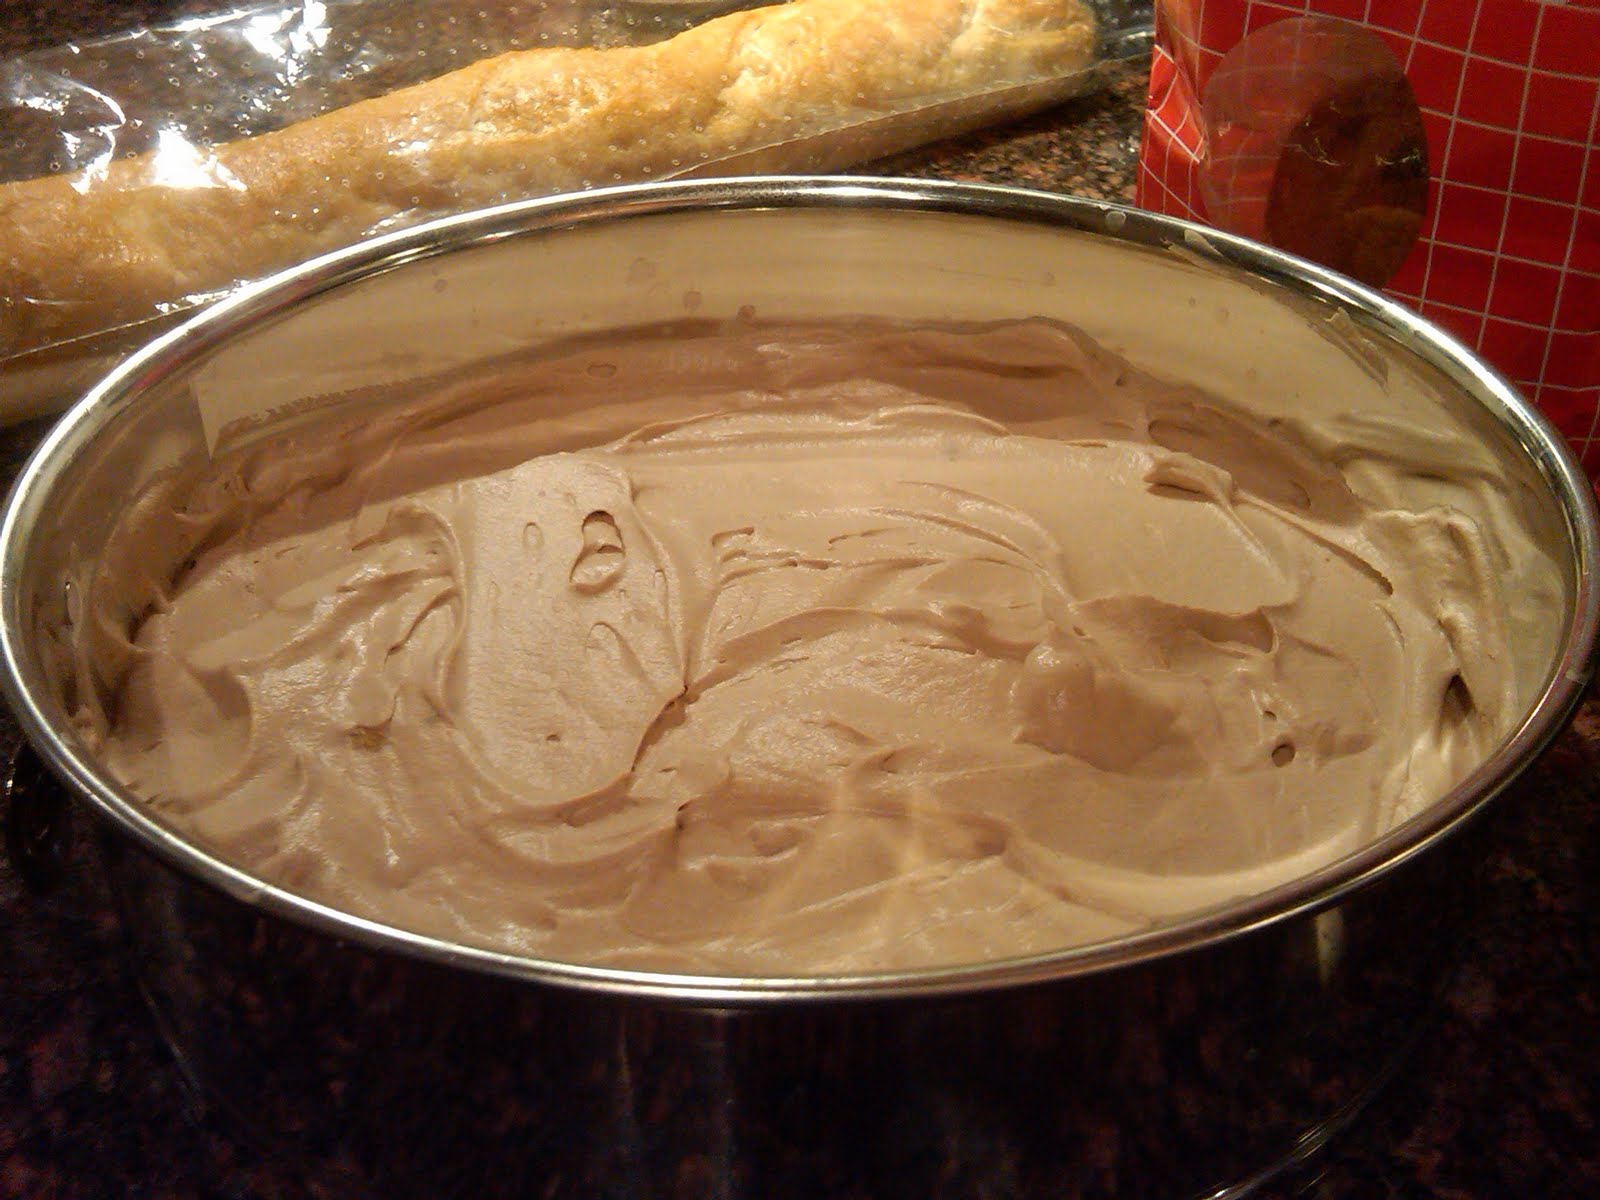
Tuesday, August 9, 2011

Chewy Brownies

Fact: brownies make people happy. It is difficult to be sad when you are eating a brownie. Try it. Try getting through a whole chewy brownie with gooey chocolate chunks in it and then say you aren't feeling even a little bit better. A little more chocolatey. A little more loved.

Well, this is that kind of brownie, designed to make you smile and cover you in the goodness that is deep, chewy chocolate. And the secret to such complex and delicious chocolate? Coffee.  Coffee, and its baking ingredient partner in crime Instant Espresso Powder, makes chocolate taste more like chocolate. It adds complexity and depth and darkness without bitterness.Don't worry if you aren't a coffee drinker, it won't taste like coffee, just like better chocolate. Better chocolate goes a long way. There is a reason why Ghiradelli is more expensive, and it is because it is more delicious. And if you've ever sprung for the ridiculously expensive Whole Foods chocolate bars, you know that you can taste it in the baking. Does this mean that you can't make perfectly good brownies without paying $6 in chocolate? Of course, but just promise me you'll try it once. Just for me. Cooks Illustrated recommends Scharffen Berger for unsweetened chocolate and Callebaut Intense Dark Chocolate L-60-40NV (or Ghiradelli Bittersweet). If you don't have espresso powder, replace 2 tablespoons of water with 2 tablespoons hot coffee.

For the chewiest texture, it is important to let the brownies cool thoroughly before cutting. If your baking dish is glass, cool the brownies 10 minutes, then remove them promptly from the pan (otherwise, the superior heat retention of glass can lead to overbaking). If you have one, try cutting the brownies with a batter scraper. Leftovers can be stored in an airtight container at room temperature for up to 4 days. Why you would let brownies last that long is another mystery.

A note about weighing ingredients: this recipe has the option of weights as opposed to volumes for some measurements. Weights are a far superior method of measuring when it comes to baking, because in baking, precision matters, and the little inaccuracies add up. It is perfectly okay not have a scale, but if you have one, use it even though it's an extra step.


Chewy Brownies
Ingredients

1/3    cup Dutch-processed cocoa powder
1 1/2 teaspoons instant espresso or coffee powder
1/2    cup plus 2 tablespoons boiling water
2       ounces unsweetened chocolate, finely chopped
4       tablespoons (1/2 stick) unsalted butter , melted
1/2    cup plus 2 tablespoons vegetable oil
2       large eggs
2       large egg yolks
2       teaspoons vanilla extract
2 1/2 cups (17 1/2 ounces) sugar
1 3/4 cups (8 3/4 ounces) unbleached all-purpose flour
3/4    teaspoon table salt
6       ounces bittersweet chocolate , cut into 1/2-inch pieces


Making a Foil Sling

Place foil lengthwise
in pyrex
Add foil horizontally.
Press into sides,
Make sure there is
overhang. Spray foil.
Add batter over foil.
Grip sides of foil
to lift brownies out of
pan to cool.


Instructions


  1. Adjust oven rack to lowest position and heat oven to 350 degrees. 
  2. Make a foil sling. Cut 18-inch length foil and fold lengthwise to 8-inch width. Fit foil into length of 13 by 9-inch baking pan, pressing it into the corners and up sides of pan so that there are no air bubbles; allow excess to overhang pan edges. Cut 14-inch length foil and fit into width of pan in the same manner, perpendicular to the first sheet.  Make sure there is overhang in all directions to use as a handle later. 
  3. Spray with nonstick cooking spray (so much faster than butter).
  4. Whisk cocoa, espresso powder (if using), and boiling water together in large bowl until smooth. Add unsweetened chocolate and whisk until chocolate is melted. 
  5. Whisk in melted butter and oil. (Mixture may look curdled and separated.) 
  6. Add eggs, yolks, and vanilla and continue to whisk until smooth and homogeneous. 
  7. Whisk in sugar until fully incorporated. 
  8. Add flour and salt and mix with rubber spatula until combined. 
  9. Fold in bittersweet chocolate pieces.
  10. Scrape batter into prepared pan and bake until toothpick inserted halfway between edge and center comes out with just a few moist crumbs attached, 30 to 35 minutes. 
  11. Transfer pan to wire rack and cool 1½ hours. If using pyrex, remember to remove from pan after 10 minutes.
  12. Using foil overhang, lift brownies from pan. Return brownies to wire rack and let cool completely, about 1 hour. Cut into 2-inch squares and serve.