Showing posts with label garlic. Show all posts

Tuesday, November 25, 2014

Chermoula Marinated Pork Loin

Pork loin is all or nothing for me.  It’s either juicy, succulent, and full of delicious porky flavor, or it’s as dry and chewy as a hockey puck.  When done correctly, the loin is one of my favorite cuts of pork.  Tied and pan roasted, it makes for a roast as beautiful as it is tasty, perfect for a small dinner party.  But pork loin can be finicky.  Because it is relatively lean, it does have a tendency to dry out. And being pork, the loin needs lots of seasoning to be flavorful.

Before the pork loin goes anywhere near a pan, there are steps you can take to ensure that the final product will come out juicy.  First, get a high quality piece of pork.  Look for one in your butcher’s case that has good marbling, has most of its fat cap intact, and that still looks pink and fresh.  If the only pork loin you can find is vacuum sealed in plastic and labeled as “enhanced” pork (i.e., pork that has been injected with salt water), consider using this marinade on a nice pork chop instead.

Brining is an additional step you can take towards keeping your pork loin juicy.  I use a very basic brine for this recipe, because the pork loin is marinated after brining.  As an alternative recipe, try using the brine I call for in my Roast Chicken recipe.  Pan roast the loin as I do below and make a simple pan sauce with all of the delicious brown bits sticking the bottom of the skillet.  The end result would make a Frenchman proud.

Pork loin benefits from heavy seasoning and pairs great with big, intense flavors.  The chermoula marinade I use here – a potent North African marinade traditionally used to season vegetables – penetrates the pork with deep and complex flavors and imparts the loin with an attractive golden brown exterior when seared.
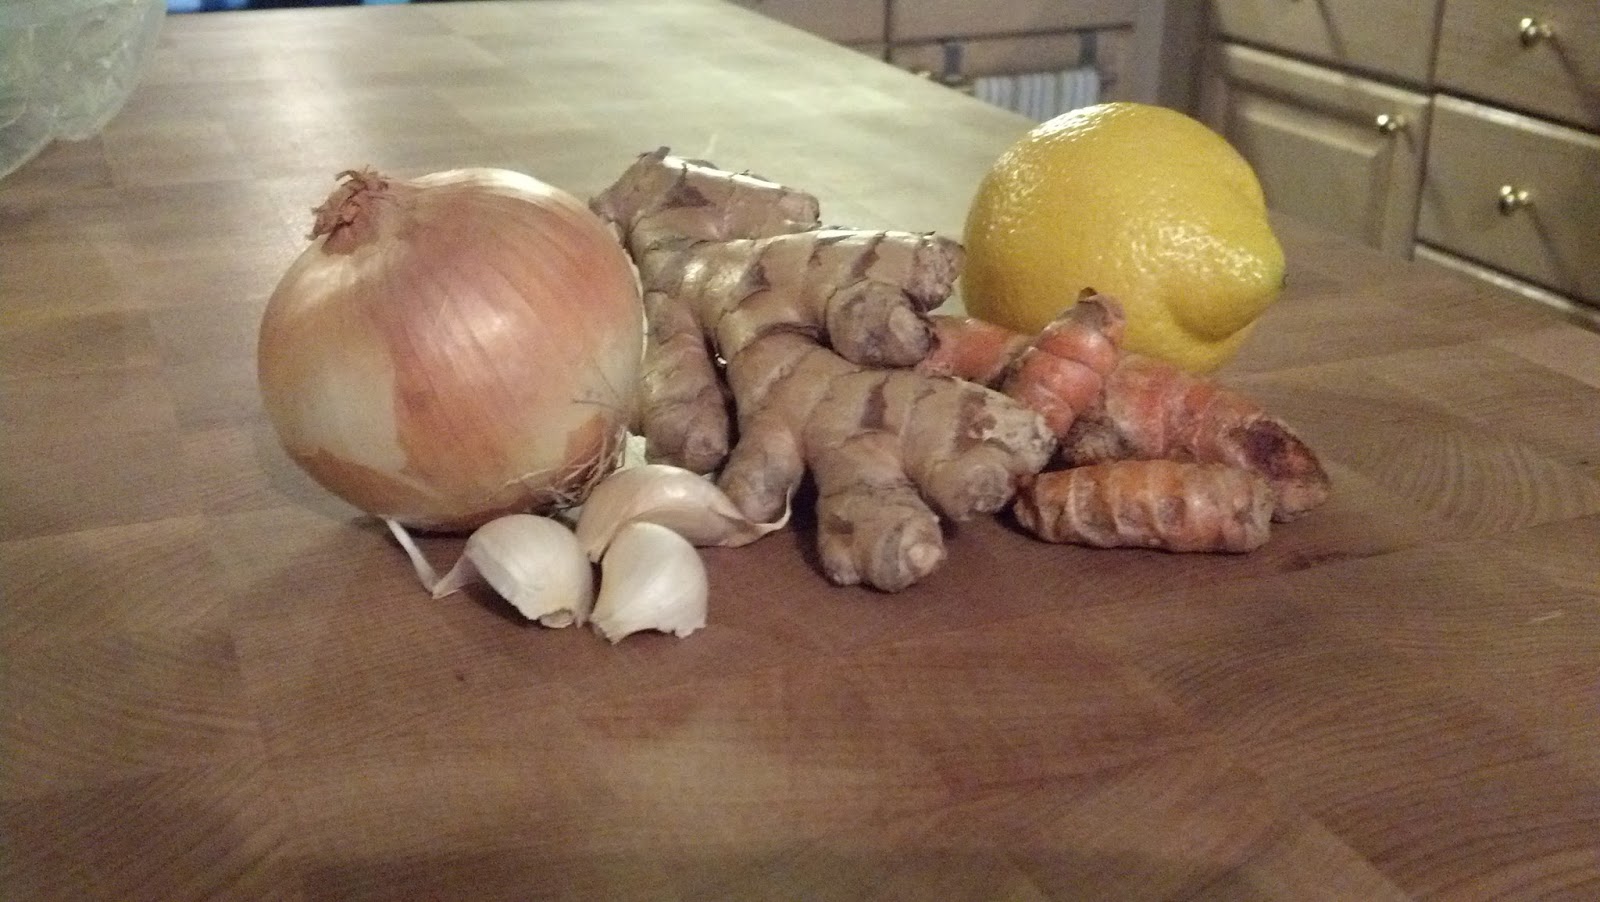
The chermoula calls for both fresh ginger and fresh turmeric.  You can substitute dried ground turmeric if you cannot find fresh, but the fresh ginger is essential. If you have never seen tumeric, it looks like small, orange fresh ginger that is as bright as a carrot when peeled and gets on everything it touches (see photos).  Grating the ginger, turmeric, onion and garlic on a Microplane grater or through the small holes of a box grater intensifies their flavors and will help to tenderize the meat.


Chermoula Marinated Pork Loin


Ingredients


1 boneless pork loin roast, 2-3 pounds

8 cups water
½ cup Kosher salt

1½ teaspoons cumin seeds
½ teaspoon coriander seeds
½ teaspoon black peppercorns
½ teaspoon red chile flakes
2 cloves garlic, grated
¼ cup grated yellow onion
½ teaspoon peeled and grated fresh ginger
1 teaspoon peeled and grated fresh turmeric, or ½ teaspoon ground turmeric
2 teaspoons unsmoked Spanish paprika
Grated zest of ½ lemon
2 tablespoons
2 tablespoons finely chopped flat-leaf parsley
finely chopped cilantro
3 tablespoons olive oil

Instructions


  1. Trim the pork loin of any excess fat, but be sure to leave most of the fat cap intact. Tie the loin at one inch intervals with butcher’s twine, making sure to tie it very tightly so that the roast will maintain its shape during cooking.
  2. Combine the water and salt in a large bowl and stir until the salt is completely dissolved. Add the trimmed and tied pork loin, cover, and refrigerate for 8-10 hours, or overnight.
  3. Toast the cumin and coriander seeds in a small skillet over medium heat, stirring frequently, until fragrant. Remove to the bowl of a spice grinder and add the peppercorns and chile flakes. Grind finely.
  4. Transfer the ground spices to a small bowl and add the garlic, onion, ginger, turmeric, paprika, lemon zest, parsley, cilantro and two tablespoons of the olive oil.  Stir to combine.
  5. Remove the pork loin from the brine and rinse under cold, running water. Dry thoroughly with paper towels.
  6. Rub the chermoula all over the pork loin, then wrap tightly with plastic wrap and refrigerate overnight.
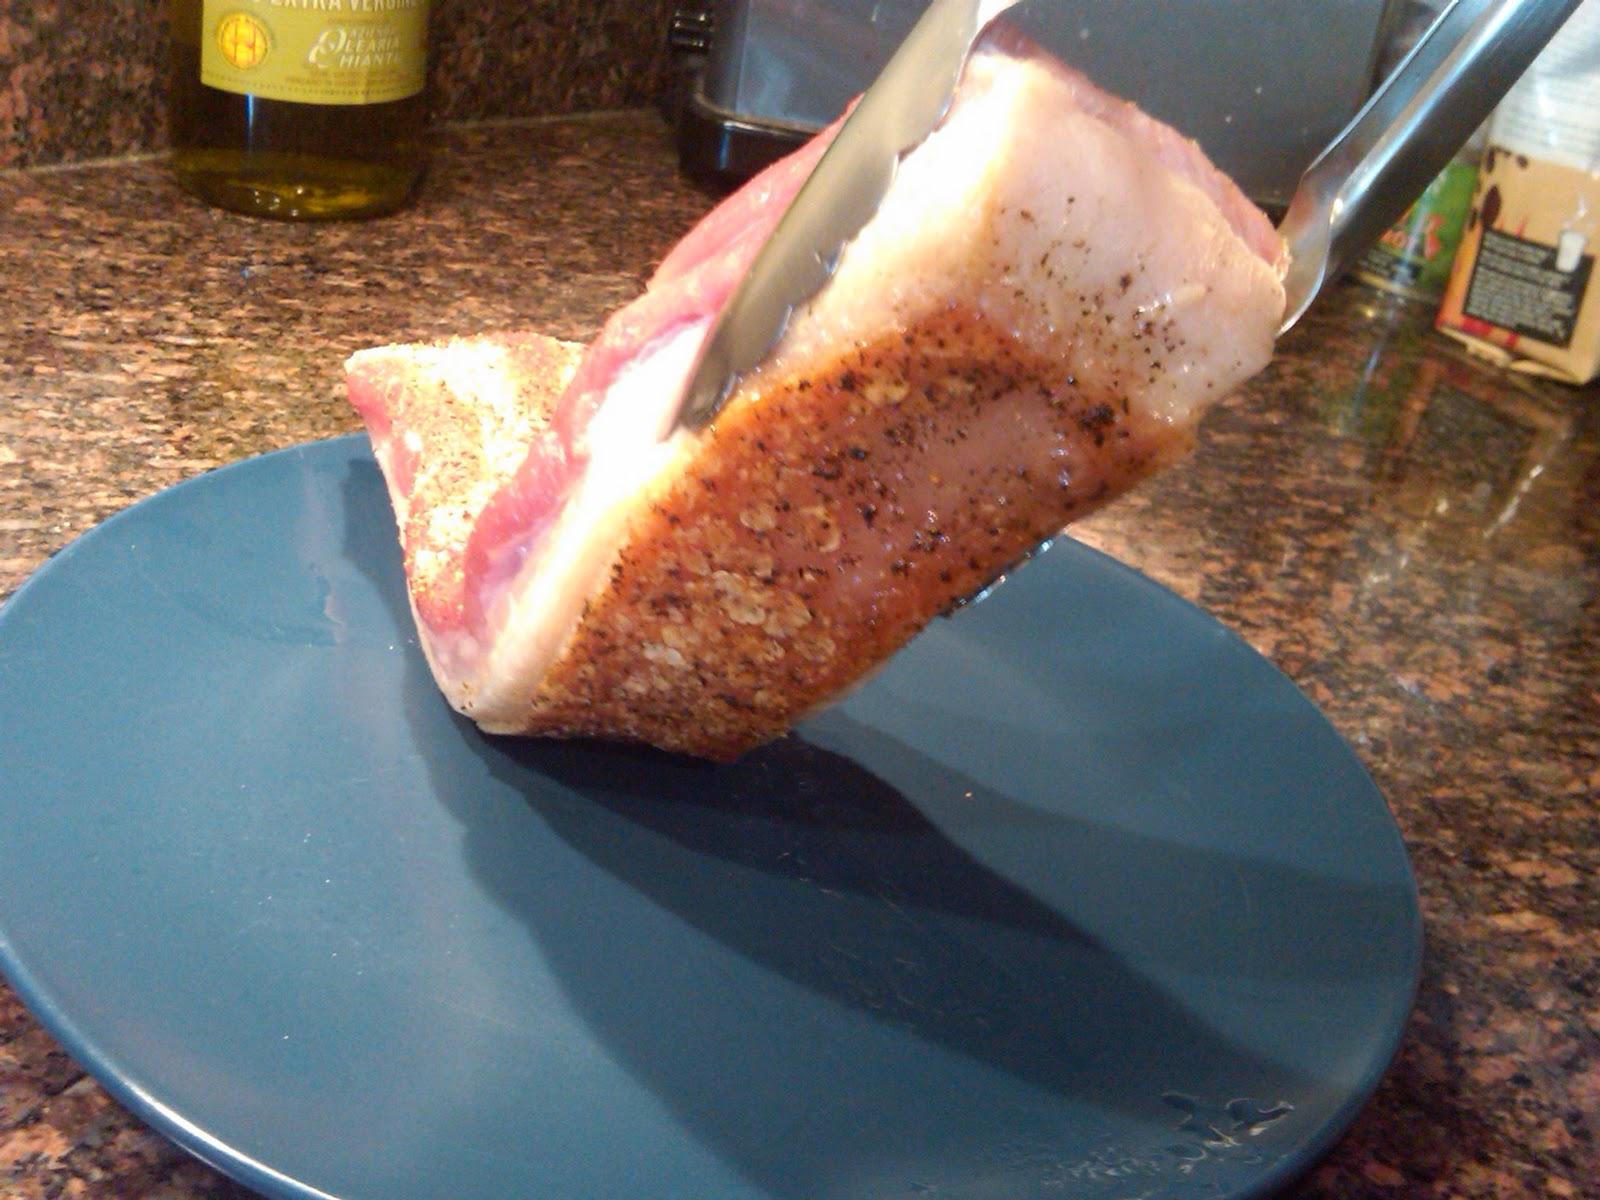
  7. The next day, pre-heat your oven to 325° F. Unwrap the pork loin and wipe most of the chermoula off with your hands. Allow to sit at room temperature for one hour to temper.
  8. Heat the remaining tablespoon of olive oil in a large non-stick or cast iron skillet over medium high heat until shimmering but not smoking. Add the pork loin and sear on all sides until well browned, about 10 minutes.
  9. Turn the pork loin so that the fat cap is on top, and then place the skillet in the oven. Roast until center of roast registers about 135 degrees on an instant-read thermometer, 35 to 45 minutes.
  10. Remove the roast to a plate. Cover with tin foil and allow to rest for 20 minutes.
  11. After the roast has rested, transfer to a carving board. Cut the twine with scissors and discard. Slice the roast into ½ inch to ¾ inch slices. Poor any accumulated juices from the resting plate over the slices and serve.

Thursday, December 19, 2013

Wasabi Deviled Eggs with Sriracha

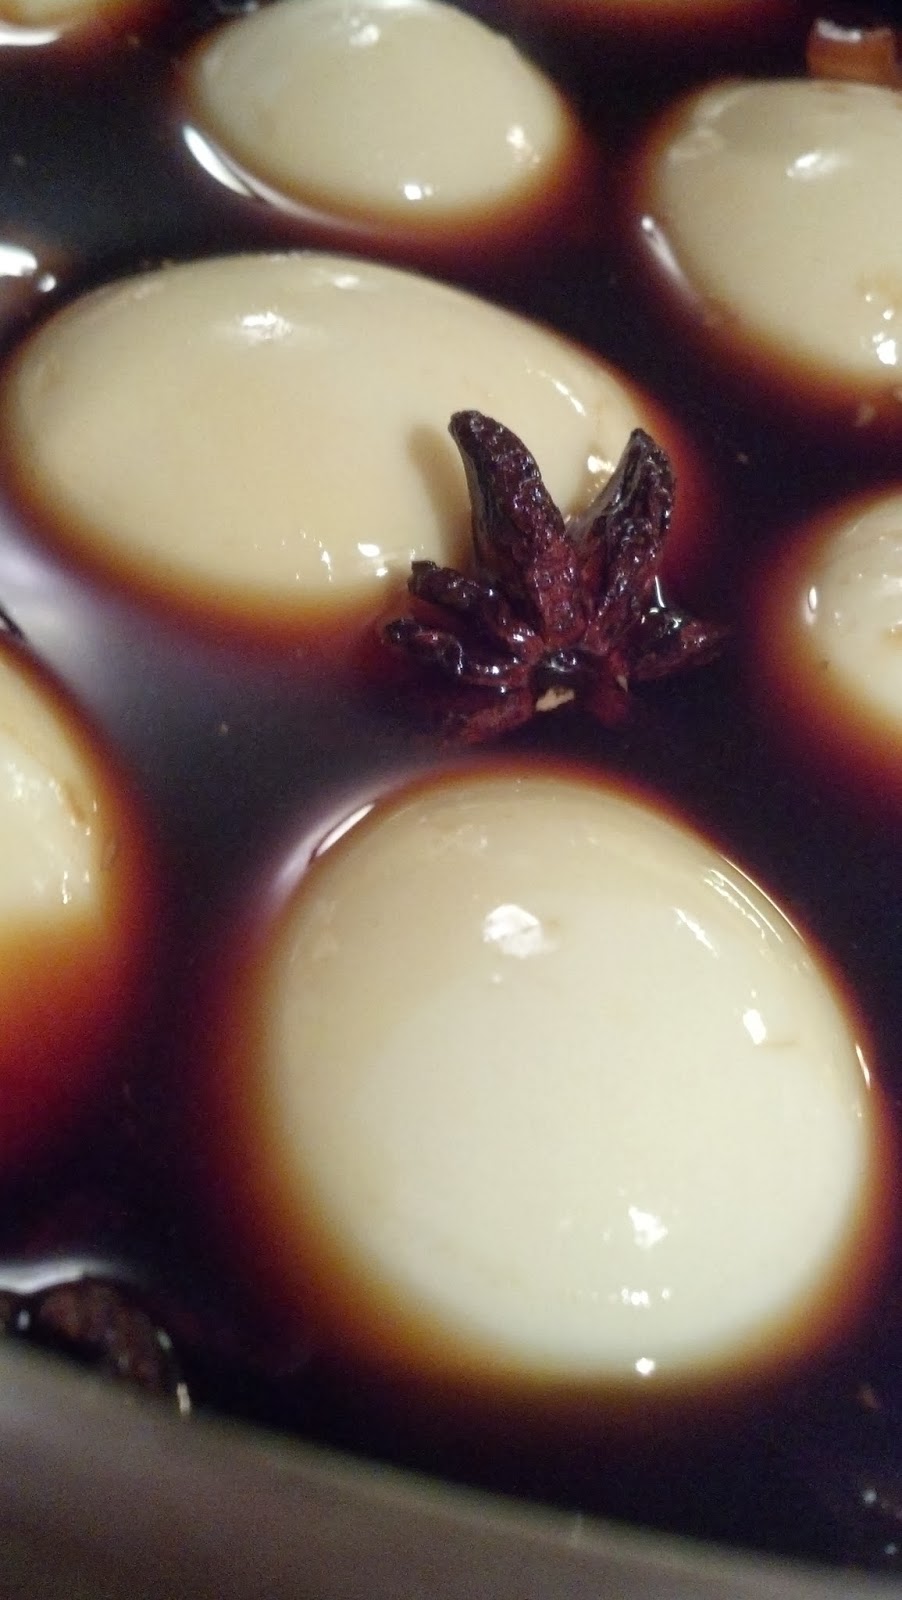
Deviled eggs are a timeless tradition of delectable snacking that lends itself well to pretty much any party or potluck in any season. These deviled eggs are no exception, and were added to our Holiday Party line up. They are salty, spicy, and have a subtle hint of star anise that makes for a more Eastern take of a Southern classic. I love deviled eggs in pretty much every available format, but the only thing better than one kind of deviled egg is SEVERAL kinds of deviled eggs.

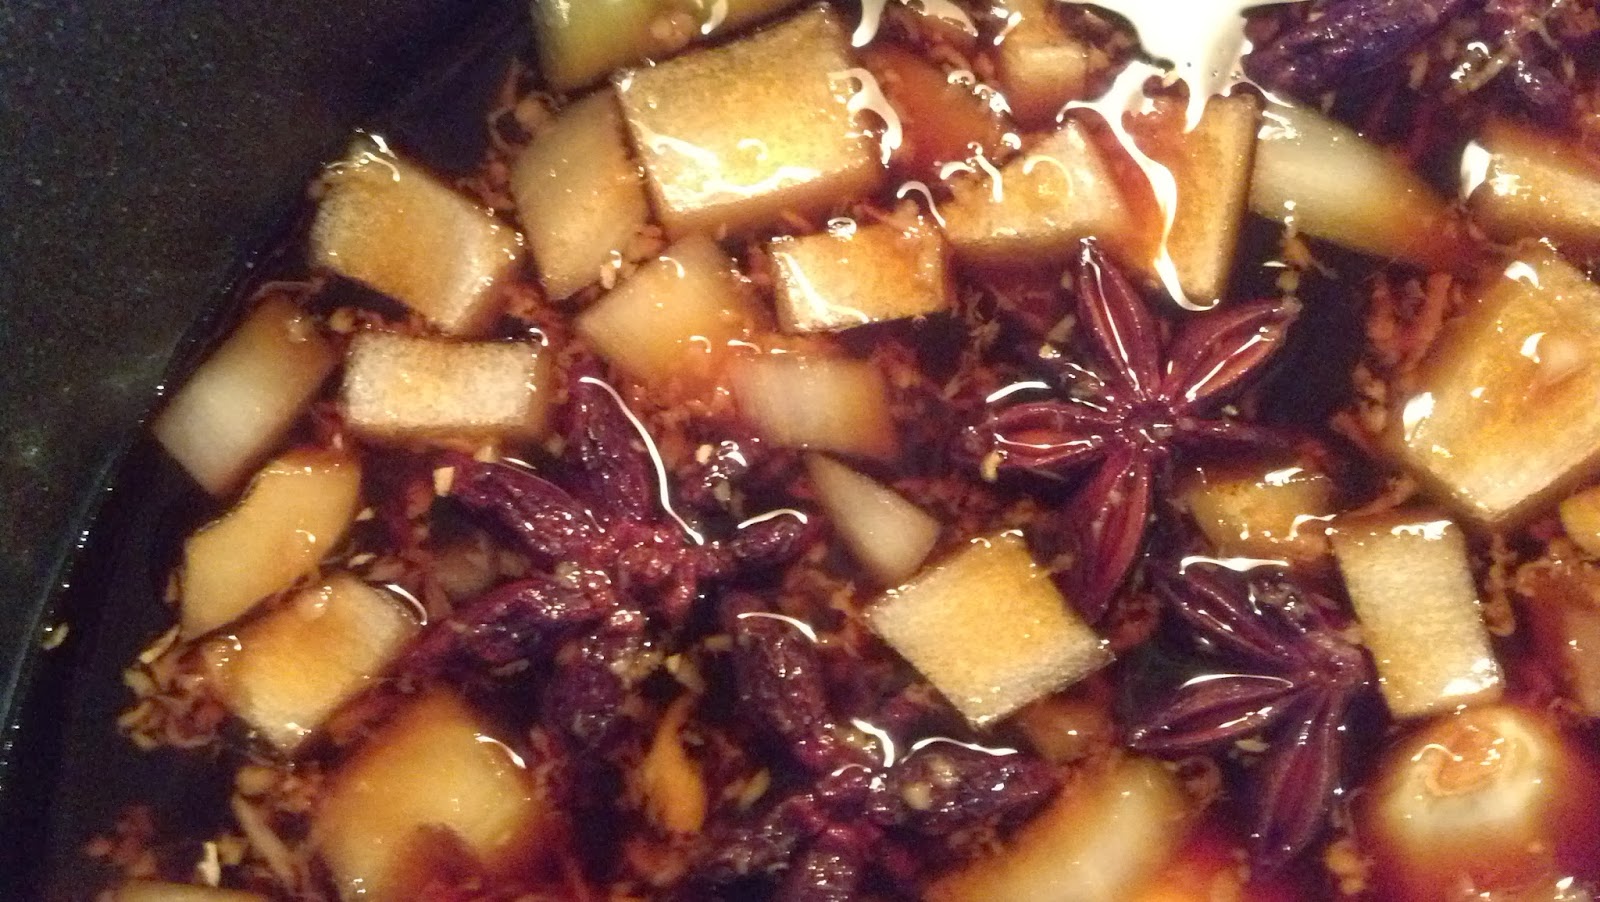
The original recipe (available at the Food and Wine website), uses scallions in the marinade, but we were fresh out of scallions when we first made these and substituted a combination of onions and garlic in its place, as this is essentially a marinade so presentation really isn't an issue. It worked wonderfully. The main flavors from the marinade are fresh ginger, soy, sake, and star anise and the onion is more of a background note. And given we are more likely to have an onion on hand than to have a bunch of scallions, it's been a useful substitute.

The star of this show is the wasabi and sriracha filling, which takes this from just being salty to packing a kick at the end of each bite that makes people eat them before I am able to take the "finished" photo of what they look like, which gives you a sense of their popularity. If you want a quick and dirty version that doesn't involve a bunch of star anise and hours of marinating, you can just make the filling and skip the marinade. Your eggs won't get a cool tint and will not have quite the complexity, but the filling is pretty delicious on its own. Even with the marinade, this still qualifies as a pretty easy recipe. If you want to throw some extra eggs in there, go ahead. We've squeezed in 15 eggs into the marinade without increasing the amounts of the marinade (this might require more stirring for even coating). Above that I would recommend making some extra marinade.
 

Wasabi Deviled Eggs with Sriracha

Makes 24 eggs

Ingredients

1/4 cup sugar
1/4 cup coarsely grated peeled fresh ginger
1/2 cup sake
1 cup water
2 cups soy sauce
10 star anise pods


1 medium yellow onion, chopped (or 1/2 cup of chopped scallions)
6 cloves garlic, peeled
1 dozen large eggs 
1 tablespoon Sriracha  
1/4 cup plus 1 tablespoon mayonnaise
1/4 cup snipped chives
2 1/2 teaspoons wasabi paste 
Chinese five-spice powder 


Instructions 

  1. In a medium saucepan, combine the water, soy sauce with the sake, star anise, onion (or scallions if using), garlic, sugar and grated ginger.
  2. Bring soy mixture to a boil. Transfer the mixture to a heatproof medium bowl and let cool completely. 
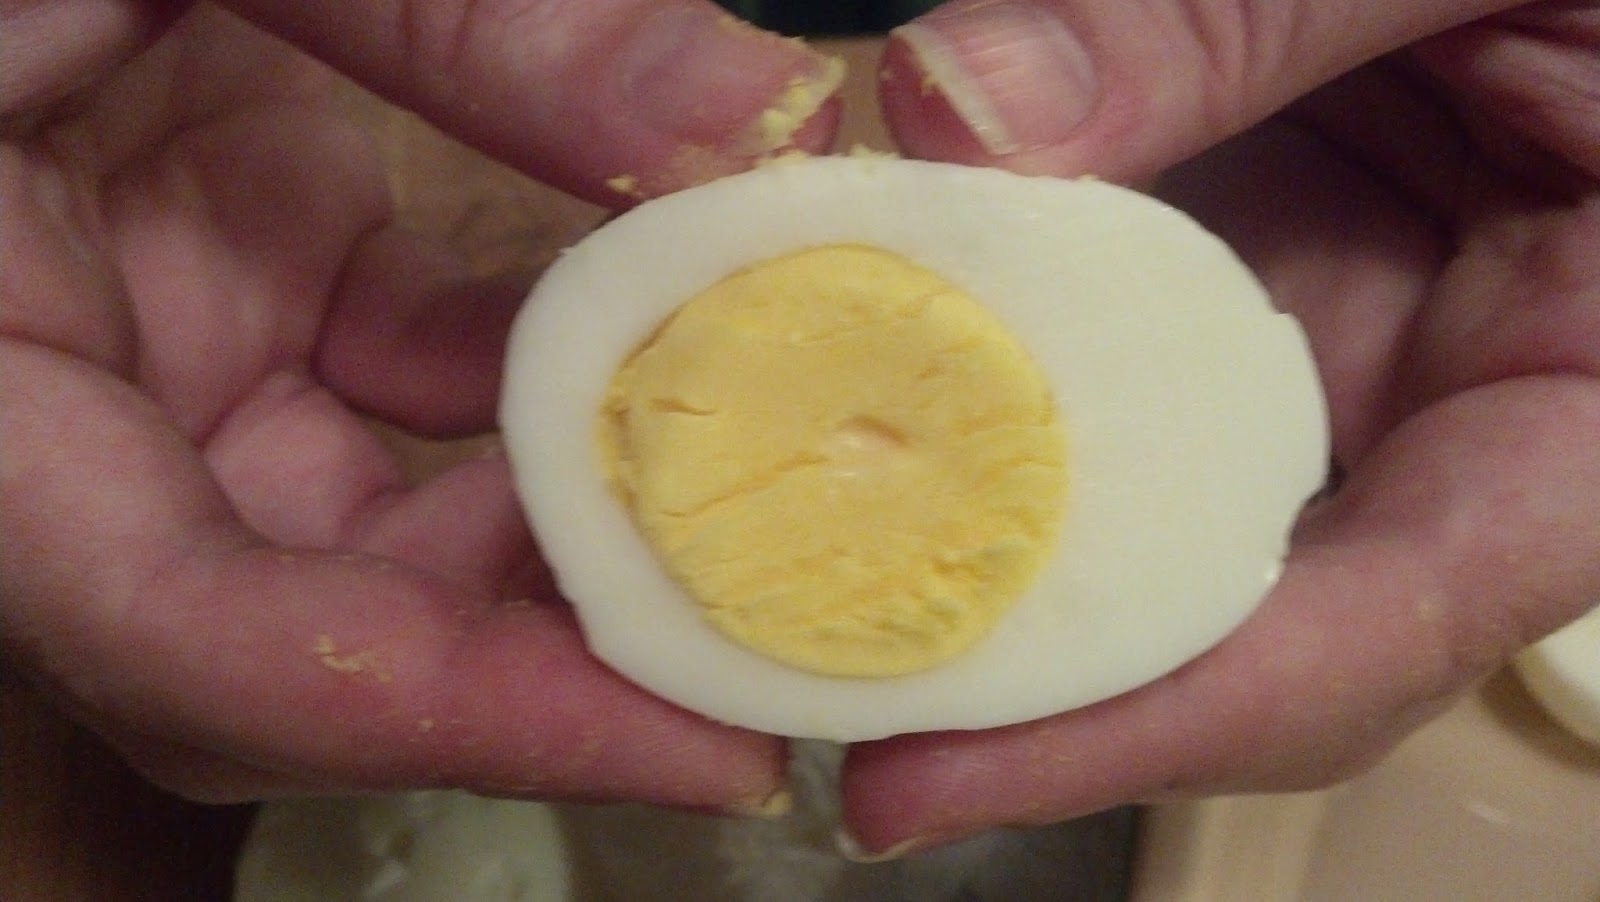
  3. Meanwhile, in a large saucepan, cover the eggs with cold water and bring to a boil. Boil for one minute, then cover the saucepan, remove from heat, and let stand 10 minutes until hard boiled.
  4. Drain the water from the large saucepan. Cool the eggs slightly under cold running water to stop the cooking process, then peel them under cold running water. 
  5. Add the eggs to the completely cooled soy mixture. Cover with plastic wrap and refrigerate the eggs for at least 4 hours, stirring once in awhile to ensure that all the eggs are fully immersed in the soy mixture and will color evenly.
  6. Drain the eggs and rinse lightly to remove any bits of scallion or ginger; pat dry. The outside of the eggs will become a tannish brown color.
  7. Using a slightly moistened thin, sharp knife (non-serrated), cut the eggs in half lengthwise. Yolks should be bright yellow, cooked all the way through, and the knife should cut cleanly through the yolk.
  8. Gently pry the egg yolks into a medium bowl without breaking the cooked white. Leave the whites aside and mash yolks with a fork or potato masher until the mixture is as free of lumps as possible. If some remain, they will be taken care of during the piping process.
  9. Stir the mayonnaise, Sriracha, wasabi and 3 tablespoons of the snipped chives into the mashed yolks until fully combined.
  10. Transfer the mixture to a pastry bag fitted with a star or plain tip. Set the egg whites on a serving platter and pipe in the filling. If you don't have a pastry bag, cut off the corner of a plastic Ziploc bag, or just use a spoon for a slightly more rustic but equally delicious look. At this point, if you are making these ahead of time, you can stop here and store the eggs in a fridge overnight until ready to serve.
  11. Right before serving, sprinkle a pinch of Chinese five-spice powder on each of the deviled eggs then top with the remaining chive snips or thinly sliced scallions if wanted. 

Friday, January 20, 2012

Pasta With Kalamata Olives, Garlic and Basil

This is a pretty easy way to take a simple pasta dish and make it complex and deeply layered. The acid of the tomato paste, brightness of the lemon, salt of the anchovy paste (or olive paste if preparing as vegetarian/no anchovy version), and fresh herb of the basil create flavors all around. It's a warm, flavorful meal that isn't half bad for lunch the next day, either.

To make the recipe vegetarian, just substitute kalamata olive paste for the anchovies/anchovy paste. You can also do this if you are simply scared of the anchovy, as many people are. I encourage you, however, not to fear these salty, oily fish, but embrace it. The easiest way to think of anchovy is as the X factor in a lot of things, such as this dish, or Ceasar salad. You can't fully taste it, but it adds a brine-y note that is distinct and often what people love about these dishes. Admittedly, it can be a mess to work with straight from the jar (always get the white filets). It's oily. That's why we often substitute in a little bit of anchovy paste in place of the filets to save time and clean-up. The filets are better, but so is not cleaning an extra knife and cutting board and figuring out what to do with the rest of the jar of anchovies. Like with tomato paste, we buy the tubes of anchovy paste, and keep the leftovers in the fridge for later. This way we don't feel wasteful buying a whole can of tomato paste and then only using a tablespoon. How many recipes really call for a whole can of tomato paste, anyway?

If you find the salt of kalamata olives is too strong, you can use Manzilla olives in their place. The original recipe for this had bread crumbs to thicken, but we've never really had a problem with the sauce being runny, so we've removed them, though we have continued to use the full amount of garlic. Basil can be expensive, and you can reduce it as low as half a cup if necessary.


Cooking Time: 40 minutes, Serves 4


Ingredients

1/4       cup extra-virgin olive oil
6          medium garlic cloves, minced or pressed through garlic press (about 2 tablespoons)
1          tablespoon minced white anchovy fillets (4 to 6 fillets)  
           OR 1 teaspoon of anchovy paste 
           OR 1 teaspoon kalamata olive paste (if vegetarian)
1          tablespoon tomato paste
1/4-1/2 teaspoon hot red pepper flakes
1/4        cup oil-packed sun-dried tomatoes , drained, rinsed, patted dry, and cut into thin strips
1           cup pitted kalmata olives , well rinsed and coarsely chopped (1 8 oz bottle)
1 3/4     teaspoons table salt
1           pound rigatoni (mezze) or farfalle (any short pasta will work)
2           ounces finely grated Parmesan cheese (about 1 cup)
3           tablespoons chopped fresh parsley leaves
1 1/2     cups lightly packed fresh basil leaves , roughly torn
            Ground black pepper
1           lemon , cut into wedges


Instructions

  1. Combine 2 tablespoons quality olive oil, garlic, anchovies (or paste of choice if substituting), tomato paste, red pepper flakes, sun-dried tomatoes, and olives in medium bowl. Make sure olives are well-rinsed of brine prior to chopping and adding. Set aside.
  2. Meanwhile, bring 4 quarts water to boil in Dutch oven over high heat. Add rigatoni and salt.
  3. While pasta is cooking, heat 12" nonstick skillet to medium heat and add olive mixture and remaining olive oil. Cook until olive mixture is aromatic and oil has turned rusty red, 4 to 6 minutes. 
  4. Remove 1 cup pasta cooking water from pot and add to skillet. Bring to simmer and cook for 2 minutes. Remove pan from heat while pasta finishes cooking.
  5. When pasta is just shy of al dente, drain pasta, reserving 1/2 cup of pasta cooking water, and transfer back to Dutch oven. 
  6. Add olive mixture to pasta and toss over medium heat until pasta absorbs most of liquid, about 2 minutes. Stir in 1/2 cup Parmesan. Adjust consistency of sauce with reserved pasta water. (Sauce should cling to pasta but not be too loose or runny.) 
  7. Remove pot from heat and stir in parsley and basil; adjust seasoning with pepper. 
  8. Sprinkle with parmesan and serve with lemon wedges to be added prior to eating.

Tuesday, December 27, 2011

Braised Pork Belly (Fresh Bacon)

Anyone who knows me, knows that I love bacon. Pork belly, also known as "fresh bacon," is simply uncured slab bacon. It's where bacon comes from, so it follows that I would love it just as much as I love its smokey, crispy, mouth-watering relative. To no one's surprise, it turns out that I do.

Braised for hours in stock and aromatics, pork belly can be as tender as fillet of beef, but with so much more flavor. Just like a strip of bacon, the belly is composed of layers of fat and meat. Slow cooking helps to soften the tough layers of meat, while also infusing the tender layers of fat with the flavors of the braising liquid. When I buy belly, I try to look for pieces that have a good balance of fat and meat. Too much fat can be overwhelming in the mouth, and too much meat can result in a dry final product.

This recipe is based on Tom Colicchio's recipe for fresh bacon in "Think Like A Chef." The first few times I attempted Colicchio's recipe, I was always happy with the belly itself but couldn't quite nail the sauce. The original recipe finished the belly by browning it in a hot oven with the braising liquid still in the skillet. Something about putting that beautiful sauce in a hot oven ruined it every time. As a solution, I strain my braising liquid into a small sauce pan and gently reduce on the stove top until I get it just right. Meanwhile, I brown the belly with a little bit of extra stock, instead of my precious sauce.

The belly can be prepared through step 3 and held for several hours before completing. When buying pork belly, be sure to ask your butcher to leave the skin on. Also, try to pick a piece of belly that is relatively uniform in thickness. Pork belly is so cheap, don't be afraid to buy more than you need and trim it down to the choicest pieces at home. Serve with mashed potatoes, soft polenta, or our polenta cakes.
 

Ingredients

1 tablespoon canola oil
Kosher salt
Freshly ground black pepper
2 pounds pork belly, skin on
1 onion, roughly chopped
2 carrots, roughly chopped
2 celery stalks, roughly chopped
1 leek, white and light green part only, roughly chopped
6 garlic cloves, peeled
 
4 cups chicken stock


Instructions
  1. Heat oven to 350°F. Heat the oil in a large ovenproof skillet over medium heat until shimmering. Generously season the pork with salt and pepper. Add it to the pan, skin side down, and cook until the skin is well browned, about 15 minutes. Transfer the pork to a plate.
  2. Pour off all but about 2 tablespoons of the fat and add the onion, carrots, celery, leek, and garlic to the skillet. Cook the vegetables, stirring occasionally, until they are tender and beginning to brown, about 20 minutes. 
  3. Return the pork belly to the skillet, skin side down and fat side up, and add about 2 cups of stock (it should surround but not cover the meat). Bring the stock to a simmer, then transfer the skillet to the oven. 
  4. Gently simmer the pork, uncovered, for 1 hour, then add another cup of stock. Continue cooking until the pork is tender enough to cut with a fork, about 1 hour longer.
  5. Remove the skillet from the oven and allow the pork to cool in the braising liquid. This will take at least one hour.
  6. When ready to complete, increase the oven temperature to 400°F. 
  7. Remove the pork from the liquid, then gently lift off and discard the skin (use a small knife to separate any pieces that don’t come away from the fat easily). Score the fat, making crosshatch incisions, then cut the pork into 4 portions. This is rich stuff, so I recommend serving no more than one, 2-inch square piece to each guest.
  8. Strain the braising liquid through a fine mesh strainer into a small saucepan and discard the solids. Bring to a simmer over medium-low heat and reduce to a sauce-like consistency, skimming off any fat that rises to the surface. 
  9. Meanwhile, return pork, scored side up, to the skillet. Pour the remaining 1 cup of stock around the pork and transfer to the oven. Allow to cook, without basting, until the pork is heated through and the fat nicely browned, about 20 minutes.
  10. Serve the pork in shallow bowls with some of the sauce ladled over the top and around the meat.

Wednesday, October 5, 2011

Cilantro Pesto

This pesto is one of the very first things I learned to cook, and will always hold a warm place in my heart because of that. I liked this recipe so much, I bought Robin Miller's cookbook. Of course, I've since added sun dried tomatoes, extra olive oil, a little more garlic, and pepper. But all good recipes get adjusted as they age.

In addition to being a quick and easy dinner option (over chicken, pasta, or even peas. Basically anything you would put pesto on), this recipe is neat because you can freeze the leftover pesto (this recipe is the double batch of the original recipe, as I always make enough to freeze when I make it) in an ice cube tray and take out individual ice cubes each time you want to use it. Put the ice cubes in a rammekin, and leave them next to the flame on the stove while you heat water to boil. It'll thaw by the time the pasta is done. Just one ice cube per person.

My favorite pasta to make this with is three cheese tortellini, but any will work. The original recipe is for chicken. Be sure and be generous with fresh grated Parmesan cheese when you serve. You can add a little parmesan to the pesto if you want, but it works better to just be generous when serving.

A note on the garlic: this recipe is designed to have a rather strong garlic taste when it is finished. This is because when I freeze the pesto, it is less garlicky when thawed. I, for one, am sorta a nut for garlic, so this really doesn't bother me, but if you are not a raw garlic person, either add two fewer cloves of garlic or freeze and thaw before use.

Cilantro Pesto

2 bunches cilantro (about 2 cups)
1/2 cup plus two tablespoons sour cream
1/4 cup sun dried tomatoes
6 tablespoon toasted pine nuts
8 large cloves garlic
1/4 to 1/3 cup extra virgin olive oil
1 1/2 teaspoon freshly ground pepper
1/2 teaspoon sea salt
1/8 teaspoon cayenne


Instructions
  1. Place the pine nuts in a small dry skillet and set over medium heat. 
  2. Toast the nuts until golden brown, about 3 minutes, shaking the pan frequently to prevent burning. Allow to cool to avoid wilting the lettuce. 
  3. Add cilantro, sun dried tomatoes, sour cream, garlic, salt, and pepper to a blender or food processor. 
  4. Add the cooled pine nuts.
  5. Pulse to combine. 
  6. Slowly add olive oil to running blender.
  7. Process and blend until smooth and thick. If necessary, add more sour cream or olive oil to taste. You may need to check to make sure pine nuts have not stuck to the bottom of the blender.
  8. Season with cayenne to taste. 
  9. Pour over pasta to serve. Use prudence when using, pesto is strong stuff.
  10. If freezing, portion out immediately into an empty ice cube tray or two as necessary. Thaw individual ice cubes when ready to use later.

Sunday, August 21, 2011

Osso Buco

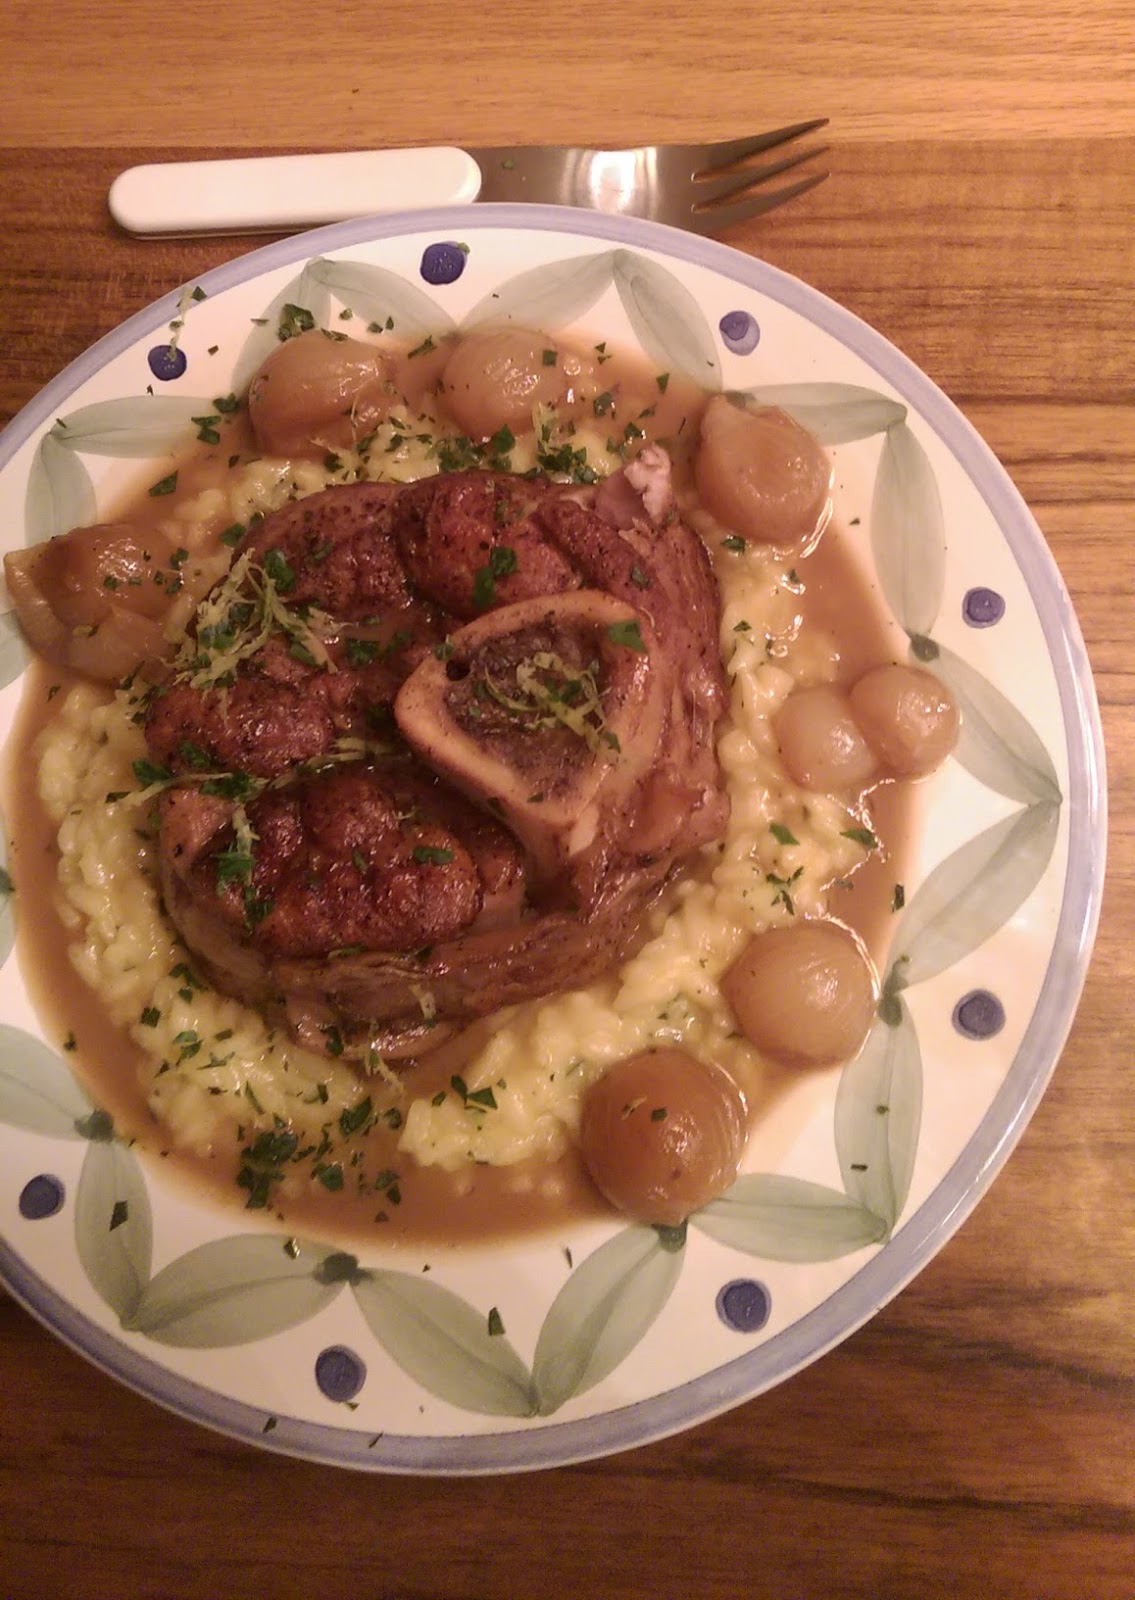
My relationship with this dish began when I was only a small child. My parents had taken me out to eat at an Italian restaurant. When the waiter came to the table he announced osso buco as one of the night’s specials. I remember thinking the name sounded silly, and asking my dad what it was. “Veal braised in wine,” he said. Like a fool, I wasn’t impressed. I suppose that’s what prompted him to order it. When it came to table he showed me how the hole in the middle of the bone was filled with marrow. He spread some onto a piece of bread for me to taste, and my life was never the same again.

Osso buco, which literally translates to ‘bone with a hole,’ is a thick slice of veal shank, traditionally braised for many hours in white wine and aromatics. Slow cooking transforms the tough shank meat into fall-off-the-bone deliciousness. Oh, and did I mention the bone marrow? Sometimes, it’s hard to decide which to eat first.

These days, I like to make osso buco for guests because I can throw it into the oven two hours ahead of time and forget about it. It also never fails to impress. When I’m lucky, E.S. will make risotto to accompany the osso buco, but simpler starches like egg noodles or mashed potatoes are equally delicious. I finish the dish with a sprinkling of gremolata, a mixture of parsley and lemon zest, which helps to brighten the dish and cut through the sweetness of the veal.

I recommend using slices of veal shank that are at least 1½ inches thick for this recipe. If you only see thinner piece in the case, ask your butcher if he can cut you some thicker pieces (2 inches is ideal). As with my braised lamb shank recipe, I finish the osso buco in the oven, which allows the meat to re-brown and helps the shank to hold their form on the plate. Serve with crusty bread for soaking up the extra braising liquid and, of course, for the bone marrow.

Osso Buco


Ingredients

4 slices veal shank, 1½ to 2 inches thick
Kosher salt
Black pepper
2 tablespoons olive oil
1 medium carrot, chopped
1 medium onion, chopped
½ celery rib, chopped
6 garlic cloves, chopped
5 sprigs parsley
1 sprig thyme
2 bay leaves
10-12 black peppercorns
3 whole cloves
1 cup dry white wine
2 cups veal or chicken stock
1 tablespoon chopped parsley
1 tablespoon grated lemon zest from one lemon


Instructions

1. Preheat oven to 325F. Cut four pieces of kitchen twine, each about a foot long. Place a length of twine on a cutting board and lie a piece of veal shank on its side on top of twine, making sure to center the shank on the twine. Lift the ends of the twine up around the shank and tie as tightly as possible. Pat the shanks dry with paper towels and season generously with salt and pepper.
2. Heat oil in a Dutch oven large enough to hold the shanks in one layer over medium-high heat. When the oil begins to shimmer add the shanks and brown well on all sides, about 6 minutes. Brown the shanks in batches if necessary. Remove to a plate.
3. If the pot looks dry, add a little more oil. Reduce the heat to medium and add the carrot, onion, celery and garlic. Cook the vegetables, stirring frequently, until softened.
4. Place the parsley sprigs, thyme, bay leaves, peppercorns and cloves in a small coffee filter to make a bouquet garni (see pictures). Fold the filter over itself and tie shut with a piece of kitchen twine.
5. When the vegetables are cooked add a little bit of the wine to the pot and, using wooden spoon, scrape up any browned bits from the bottom of the pot. Arrange the shanks over the vegetables in a single layer, along with the bouquet garni. Add the wine and stock to the pot. The liquid should reach about halfway up the shanks. Increase the heat to high and bring to a boil. Cover and place in the oven for 1 hour.
6. After one hour, flip the shanks over and add additional stock to the pot if needed to keep the level halfway up the shanks. Return to the oven and cook for 1 hour more.
7. Remove the pot from the oven and place on the stove top. Increase oven temperature to 400F. Remove shanks from liquid and place on a baking sheet. Once the oven has come up to temperature, place shanks in oven and allow to re-brown. Meanwhile, finish the sauce.
8. Strain the braising liquid into a medium saucepan and bring to a simmer over medium heat. Simmer the sauce until thick and velvety, about 10 minutes, skimming off any fat that rises to the surface. Once thickened, season to taste with Kosher salt and freshly ground black pepper.
9. Combine the chopped parsley and lemon zest in a small bowl.
10. To serve, remove the string from each shank and ladle some of the reduced sauce over the top. Finish with a sprinkling of the parley and lemon zest mixture.

Friday, May 13, 2011

Fideos with Clams and Saffron

This is the first recipe TK and I ever made from the Top Chef cookbook, and it still is a regular on our menu when we're looking for something romantic, charming and relatively easy (minus the general annoyance of having to clean clams). The basic premise of very slowly cooking garlic in oil then absorbing it into toasted pasta (almost risotto style) then adding cream and saffron is pretty unbeatable. And the presentation of the just-opened clams is elegant and fun. That being said, we had to make some adjustments to the recipe (more veggies, more clams, less pasta), and work a little bit on the technique of getting a bird's nest of toasted pasta into a dutch oven. As a result, I recommend using the largest dutch oven you have, even if you aren't serving that many. (This dish serves 4 to 6).

One whole teaspoon of saffron is a decadent amount of saffron, and that is the luxury ingredient of this dish. You can lighten that a bit. For instance, if you are using the pre-packaged individual servings of saffron, one capsule will do even though that usually isn't quite a teaspoon. Too much saffron can overwhelm a dish, so don't go wildly overboard, but this is also definitely not a three or four strands and that's it dish. It is the star of this show and deserves to be treated as such.


Fideos with Clams and Saffron


Ingredients

3/4 pound fideos or capellini pasta
2 cups heavy cream
1 teaspoon saffron threads, crumbled
Salt
1 1/4 cup small cauliflower florets
1 1/4 cup small broccoli florets
1/3 cup extra virgin olive oil
10 garlic cloves, peeled and left whole
1/2 cup white wine or seafood stock
1 1/2 pound fresh medium clams, cleaned
Freshly ground black pepper
Chopped fresh flat-leaf parsley for garnish


Instructions
  1. Preheat the oven to 375 degrees. Break the fideos into 3-inch pieces. Arrange the pieces in an even layer on a rimmed baking sheet. Place in the oven and bake until golden brown, 8 to 10 minutes. Remove from the oven and set aside to cool. This exercise will also provide you with an awesome test of "where is my oven the hottest".
  2. Meanwhile, clean the clams thoroughly of any grit.
  3. In a medium saucepan, combine the cream, saffron, and salt to taste and place over medium heat. Bring just to a boil, whisking and watching the pot so the cream doesn’t boil over. Remove from the heat, stir in the cauliflower and broccoli, and set aside.
  4. Preheat the broiler. 
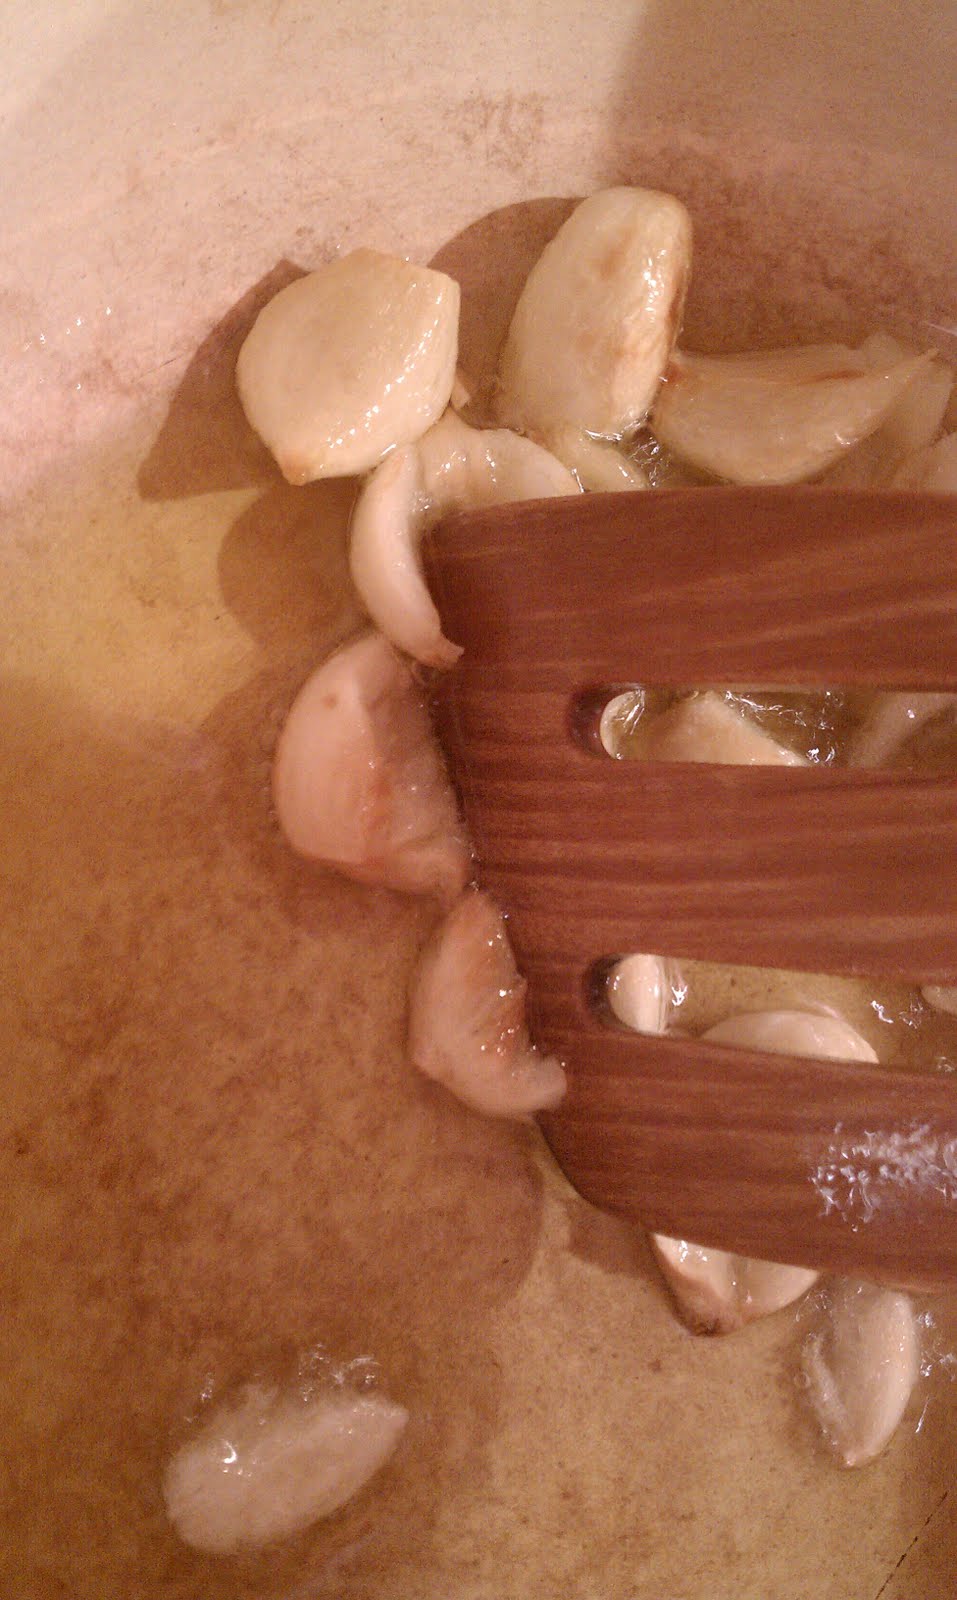
  5. In a large dutch oven, heat the oil and garlic over low heat, stirring, until the garlic begins to soften and turn golden, about 15 minutes. Don't rush it and burn the garlic. Break the garlic up with the back of a wooden spoon.
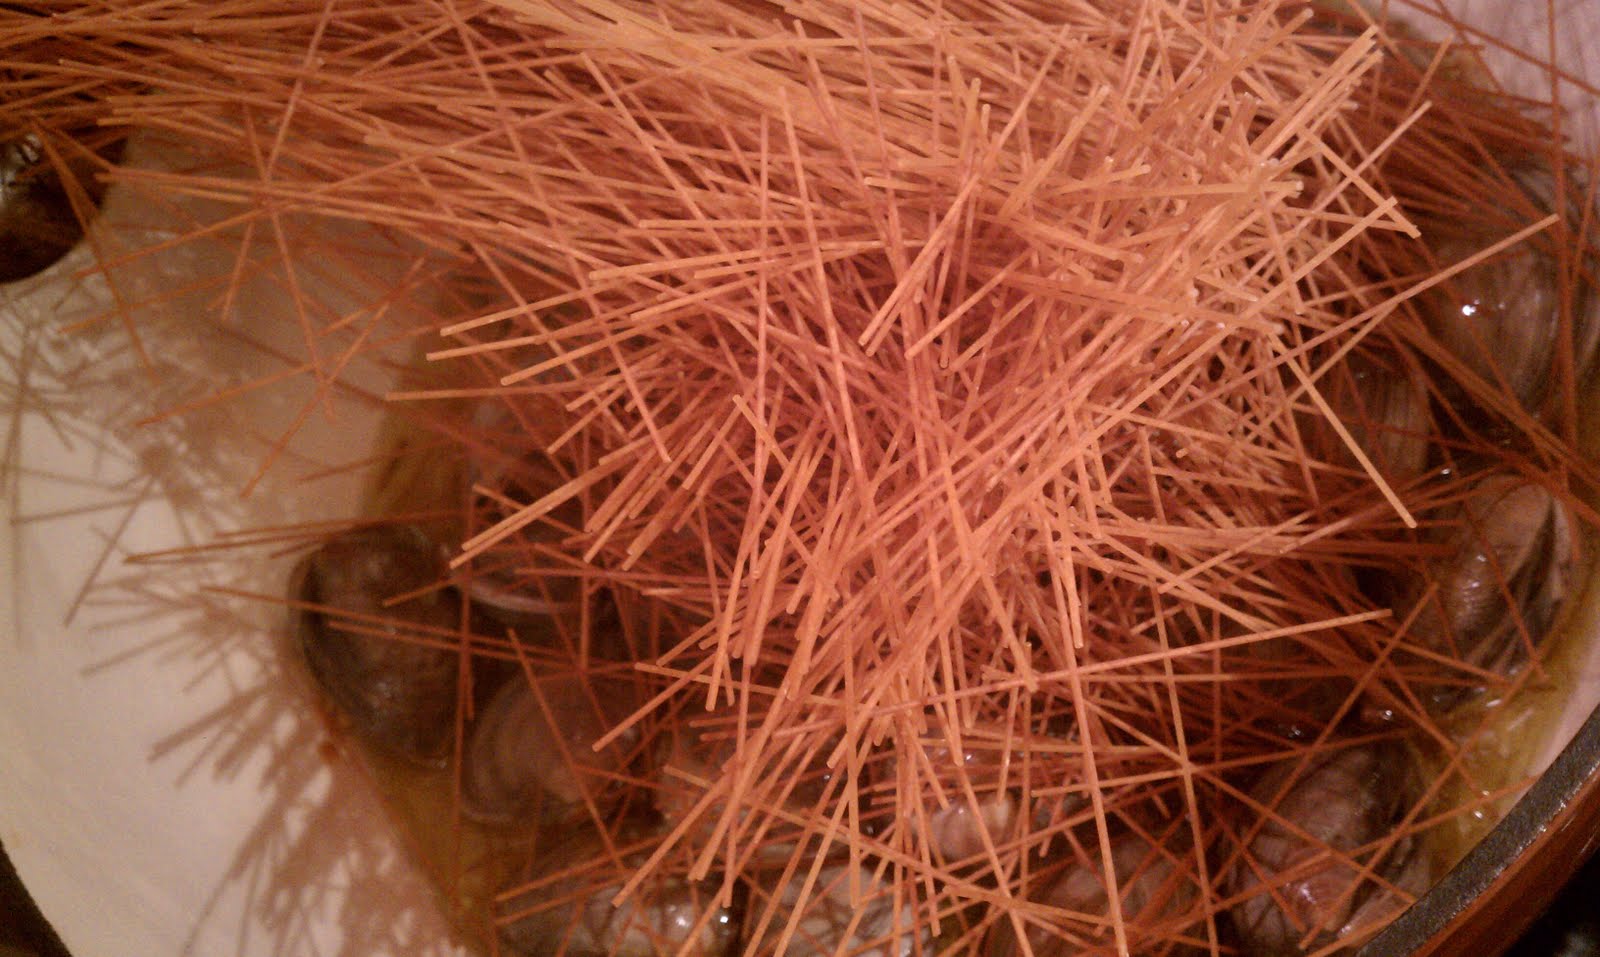
  6. Add the clams, fideos, and then wine. The fideos will make a bit of a mess and may not all fit immediately into the pot. Season with salt and pepper to taste. Close the lid and shake the pot to combine.
  7. Increase the heat to medium-high and cover the pan. Cook for about 4 minutes, shaking the pan, until the clams have JUST opened. Discard any unopened clams. Stir in the cauliflower and cream mixture and remove from the heat.
  8. Divide the clam and pasta mixture among 4 ovenproof dishes. Place the dishes in the oven and broil until golden brown, 2 to 4 minutes. Garnish with the chopped parsley and serve immediately.