Showing posts with label chives. Show all posts

Thursday, June 12, 2014

Heirloom Tomato Sorbet with Chive Oil

As a little kid, I used to love it when restaurants would serve sorbet as first course or as a palate cleanser between courses.  "Early dessert!" I'd think to myself when greeted with basil ice cream as an amuse or presented with pear sorbet before my main course.  Those are the memories that inspire me to work sorbets and ice creams into unexpected parts of my menus today.  I try to find recipes that surprise my guests – and get them excited for the meal to come.

This recipe for tomato sorbet, from Thomas Keller's The French Laundry Cookbook, is particularly good.  The sorbet has intense tomato flavor, but is still clean enough to be refreshing between courses, thank in part to the addition of orange zest.  Wait until late summer when the very best tomatoes are available to make this sorbet.  The wait will be worth it.

Keller's method for making chive oil is as simple as can be, and pairs beautifully with the sorbet.  Just hold the chives under hot running water for a couple of minutes and then blend with the oil.  The heat created by the friction of the blade spinning through the oil is enough to heat the mixture and infuse the flavor of the chives into the oil.  The oil is best if made at least one day ahead of time, and then strained just before use.

Ingredients

Simple Syrup

3/4 cup sugar
3/4 cup water

Tomato Sorbet
2 1/4 pounds heirloom tomatoes, peeled, seeded and cut into 1-inch pieces
1 tablespoon canola oil
1/3 cup finely chopped yellow onion
2 tablespoons red wine vinegar
Pinch of chopped tarragon
Pinch of cayenne
3/4 cup plus 2 tablespoons simple syrup
Julienned zest of 1/2 orange (removed with a zester; 1 teaspoon), brought to a boil in cold water, strained and repeated 2 additional times
Kosher salt
Freshly ground black pepper

Chive Oil

1 packed cup chives
1 cup canola oil

Fleur de sel
Extra chives for garnish

Instructions

For the simple syrup: 
  1. Combine the sugar and water in a saucepan and bring to a boil, stirring to dissolve the sugar.  
  2. Remove from heat, let cool to room temperature, and then refrigerate.
For the sorbet: 

  1. Place the tomatoes in a saucepan and bring to a simmer over medium heat. 
  2. Cook, stirring often, for about 45 minutes, or until the tomatoes have reduced by half.  There may still be a small amount of liquid remaining.
  3. Meanwhile, heat the oil in a skillet over low heat.  
  4. Add the onions to the skillet and cook gently for 7 to 8 minutes, or until tender.
  5. Place the reduced tomatoes and the onions in a blender and puree them until very smooth.  
  6. Press the mixture through a fine mesh strainer (there will be about 1 cup of puree) and return it to the clean blender.  
  7. Add the remaining sorbet ingredients and blend again.  
  8. Strain through a clean fine mesh strainer.  There should be about 1 1/2 cups sorbet base.  
  9. Cool the mixture over ice, stirring often.
  10. Freeze the sorbet in an ice-cream machine according to the manufacturer's directions.  
  11. Store the sorbet in a covered container in the freezer.  The sorbet is best eaten the day it is made.


For the chive oil: 
  1. Place the chives in a strainer and run hot water over them for about two minutes to soften and remove the chlorophyll taste.
  2. Place half of the chives in a blender with the oil.  
  3. Turn on the blender to medium speed and allow the chives to blend for a minute to begin the process. 
  4.  Turn the speed to high and continue to blend for another 2 minutes.  If your blender has a hole at the top, remove the stopper to allow some air in.
  5. Add half of the remaining chives to the machine and blend for another 2 minutes, then add the remaining chives and blend for 2 more minutes.
  6. Remove the puree to a covered container and refrigerate for at least 24 hours.
  7. When ready to use, strain the oil through a fine mesh strainer lined with cheesecloth.
To serve: 
  1. Spoon a little of the chive oil into the center of a six small bowls.  
  2. Top each with a quenelle of tomato sorbet.  
  3. Sprinkle each bowl with a few grains of fluer de sel and garnish with the extra chives.

Thursday, December 19, 2013

Wasabi Deviled Eggs with Sriracha

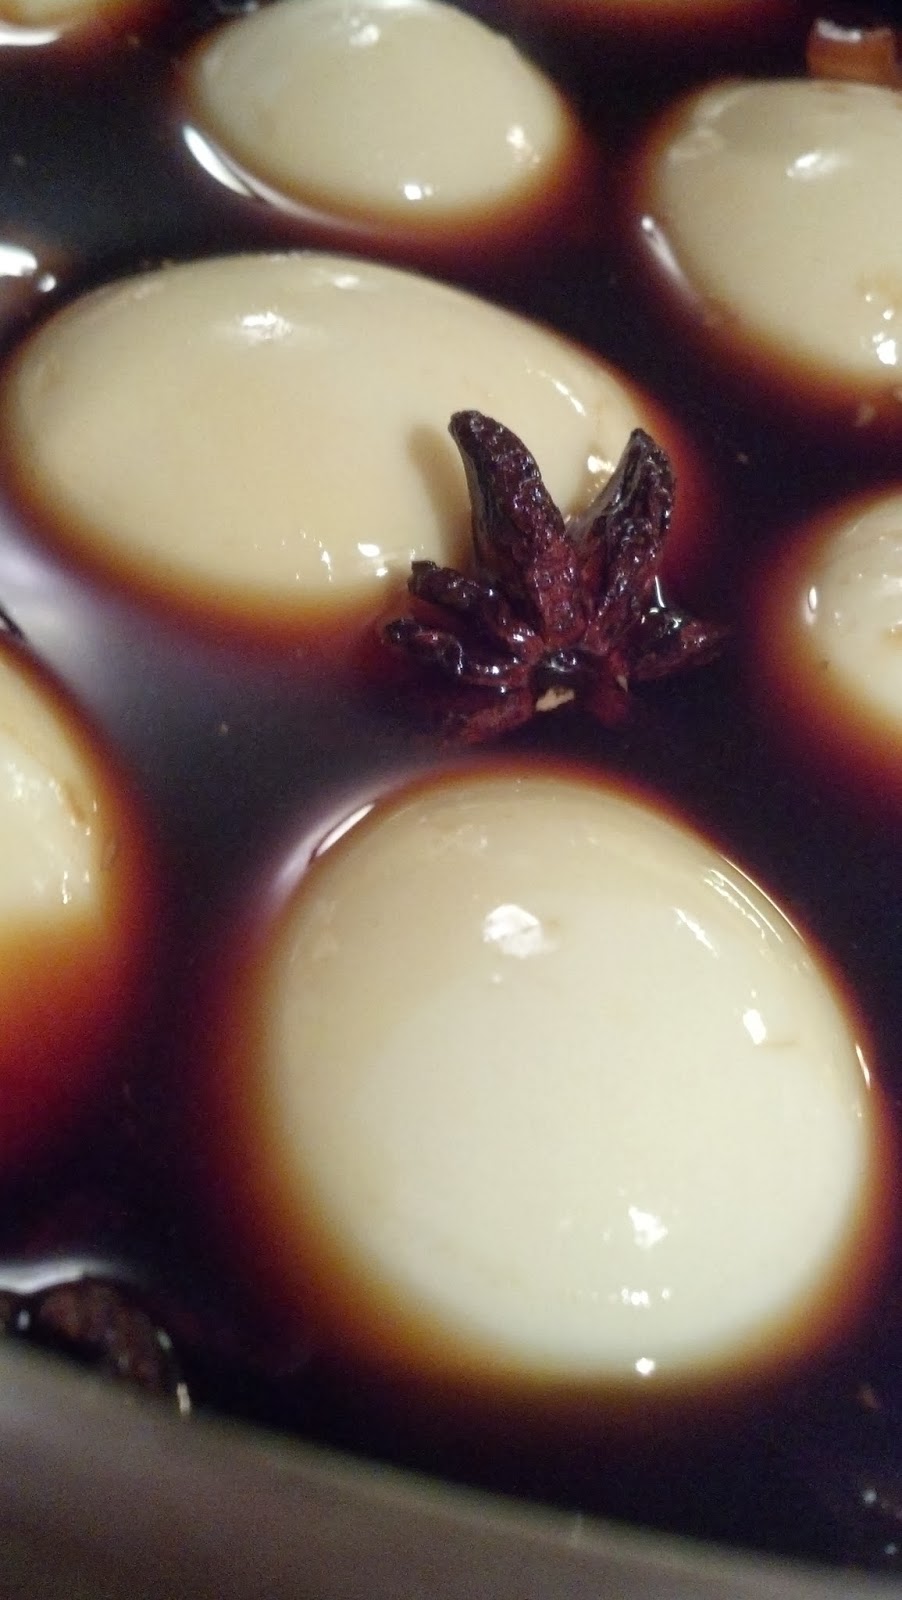
Deviled eggs are a timeless tradition of delectable snacking that lends itself well to pretty much any party or potluck in any season. These deviled eggs are no exception, and were added to our Holiday Party line up. They are salty, spicy, and have a subtle hint of star anise that makes for a more Eastern take of a Southern classic. I love deviled eggs in pretty much every available format, but the only thing better than one kind of deviled egg is SEVERAL kinds of deviled eggs.

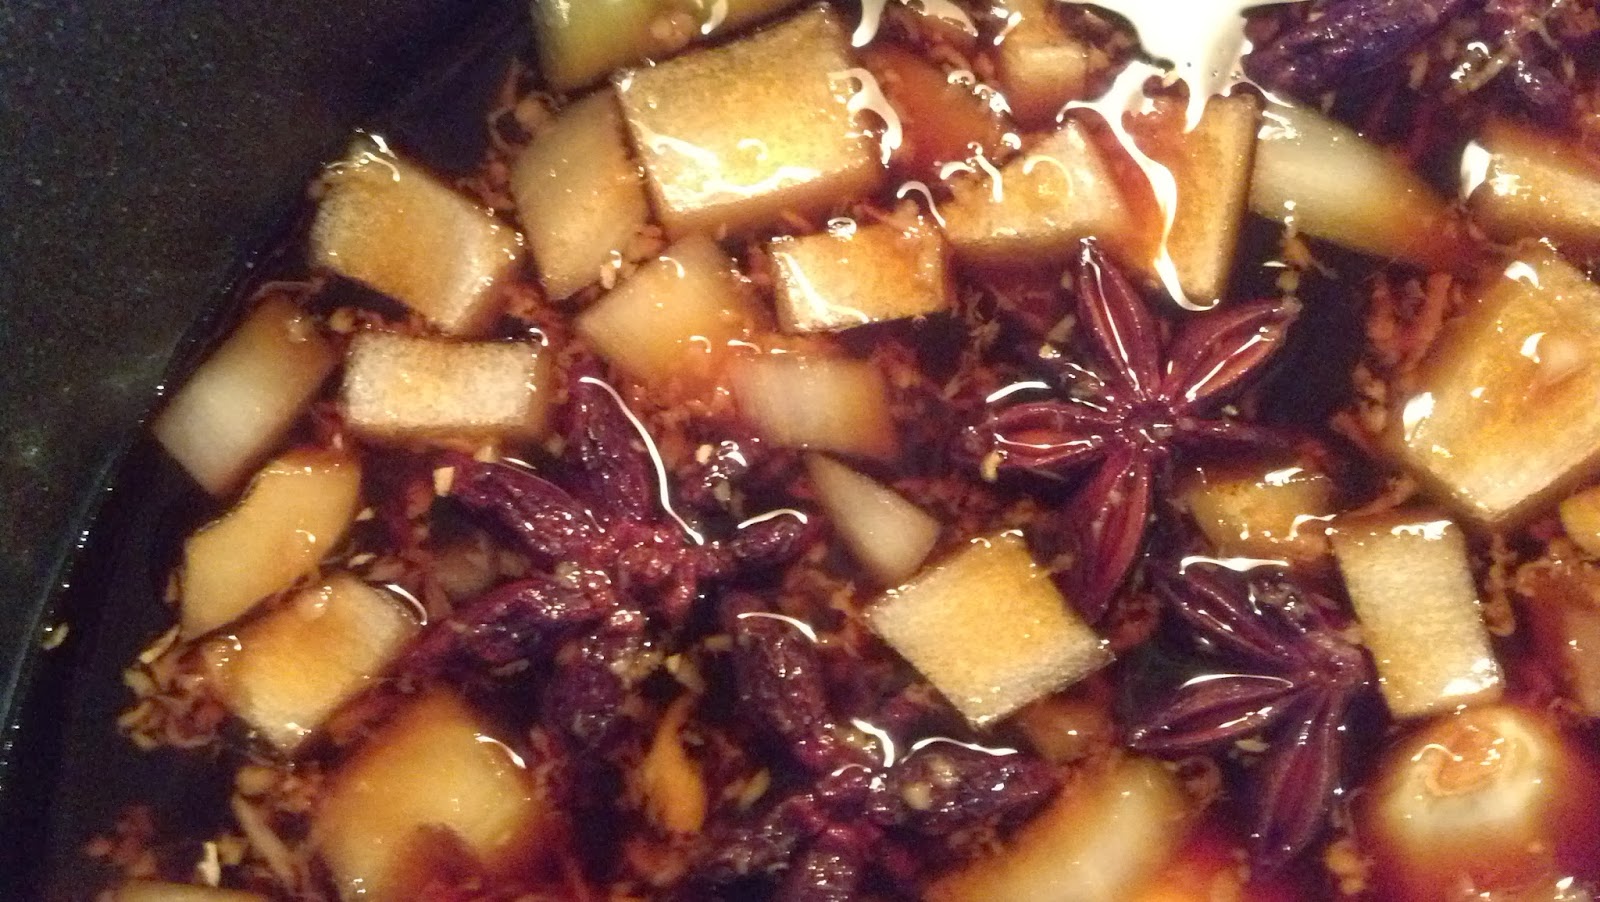
The original recipe (available at the Food and Wine website), uses scallions in the marinade, but we were fresh out of scallions when we first made these and substituted a combination of onions and garlic in its place, as this is essentially a marinade so presentation really isn't an issue. It worked wonderfully. The main flavors from the marinade are fresh ginger, soy, sake, and star anise and the onion is more of a background note. And given we are more likely to have an onion on hand than to have a bunch of scallions, it's been a useful substitute.

The star of this show is the wasabi and sriracha filling, which takes this from just being salty to packing a kick at the end of each bite that makes people eat them before I am able to take the "finished" photo of what they look like, which gives you a sense of their popularity. If you want a quick and dirty version that doesn't involve a bunch of star anise and hours of marinating, you can just make the filling and skip the marinade. Your eggs won't get a cool tint and will not have quite the complexity, but the filling is pretty delicious on its own. Even with the marinade, this still qualifies as a pretty easy recipe. If you want to throw some extra eggs in there, go ahead. We've squeezed in 15 eggs into the marinade without increasing the amounts of the marinade (this might require more stirring for even coating). Above that I would recommend making some extra marinade.
 

Wasabi Deviled Eggs with Sriracha

Makes 24 eggs

Ingredients

1/4 cup sugar
1/4 cup coarsely grated peeled fresh ginger
1/2 cup sake
1 cup water
2 cups soy sauce
10 star anise pods


1 medium yellow onion, chopped (or 1/2 cup of chopped scallions)
6 cloves garlic, peeled
1 dozen large eggs 
1 tablespoon Sriracha  
1/4 cup plus 1 tablespoon mayonnaise
1/4 cup snipped chives
2 1/2 teaspoons wasabi paste 
Chinese five-spice powder 


Instructions 

  1. In a medium saucepan, combine the water, soy sauce with the sake, star anise, onion (or scallions if using), garlic, sugar and grated ginger.
  2. Bring soy mixture to a boil. Transfer the mixture to a heatproof medium bowl and let cool completely. 
  3. Meanwhile, in a large saucepan, cover the eggs with cold water and bring to a boil. Boil for one minute, then cover the saucepan, remove from heat, and let stand 10 minutes until hard boiled.
  4. Drain the water from the large saucepan. Cool the eggs slightly under cold running water to stop the cooking process, then peel them under cold running water. 
  5. Add the eggs to the completely cooled soy mixture. Cover with plastic wrap and refrigerate the eggs for at least 4 hours, stirring once in awhile to ensure that all the eggs are fully immersed in the soy mixture and will color evenly.
  6. Drain the eggs and rinse lightly to remove any bits of scallion or ginger; pat dry. The outside of the eggs will become a tannish brown color.
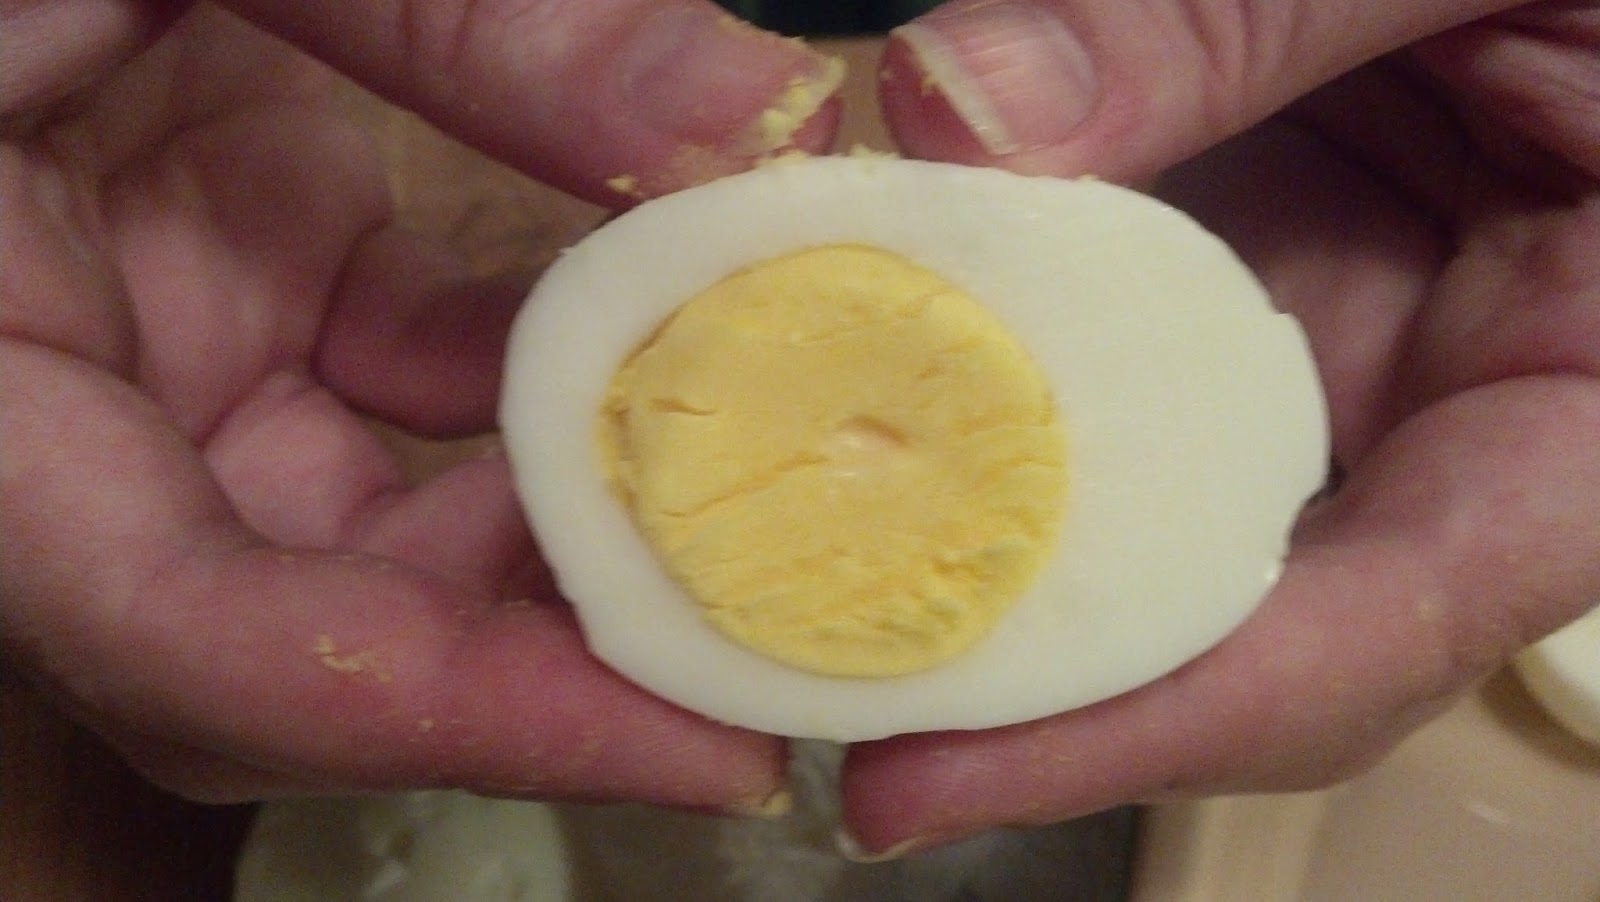
  7. Using a slightly moistened thin, sharp knife (non-serrated), cut the eggs in half lengthwise. Yolks should be bright yellow, cooked all the way through, and the knife should cut cleanly through the yolk.
  8. Gently pry the egg yolks into a medium bowl without breaking the cooked white. Leave the whites aside and mash yolks with a fork or potato masher until the mixture is as free of lumps as possible. If some remain, they will be taken care of during the piping process.
  9. Stir the mayonnaise, Sriracha, wasabi and 3 tablespoons of the snipped chives into the mashed yolks until fully combined.
  10. Transfer the mixture to a pastry bag fitted with a star or plain tip. Set the egg whites on a serving platter and pipe in the filling. If you don't have a pastry bag, cut off the corner of a plastic Ziploc bag, or just use a spoon for a slightly more rustic but equally delicious look. At this point, if you are making these ahead of time, you can stop here and store the eggs in a fridge overnight until ready to serve.
  11. Right before serving, sprinkle a pinch of Chinese five-spice powder on each of the deviled eggs then top with the remaining chive snips or thinly sliced scallions if wanted. 

Sunday, July 31, 2011

Polenta Cakes

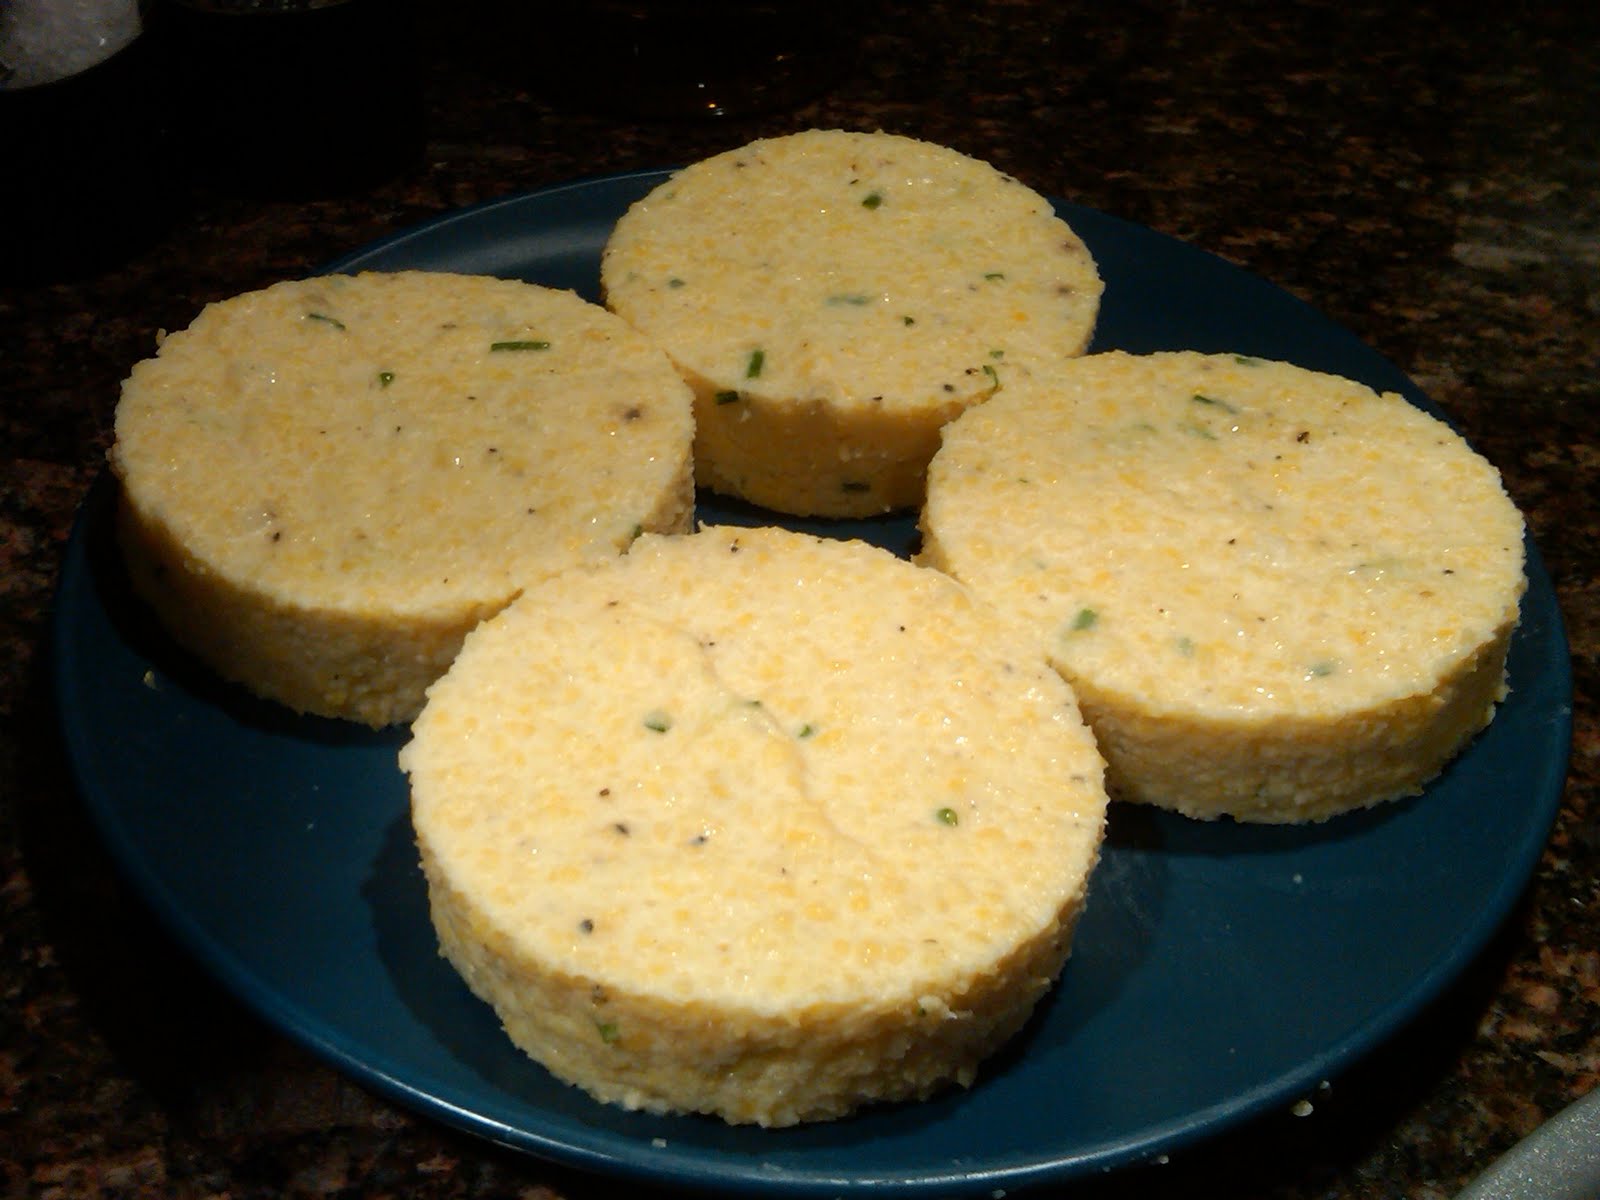
There are two kinds of polenta in life. Creamy polenta, like grits, should collapse when ladled directly on a plate. Firm polenta is usually served shaped and is often fried to crisp the top and bottom. These would be the latter kind. From Thomas Keller's French Laundry cookbook, these polenta cakes are the kind of thing I usually think of as a restaurant dish, but it turns out are perfectly accessible and manageable to make in the home, especially for company.

This polenta cake recipe we paired with TK's fantastic short ribs, and the very rich sauce and very rich polenta really gave a wonderful restaurant quality feel. Although not a weekday item, they make a decent company side, because you have to chill them down and wait, and preparing things ahead is the key to successful dinner parties. You can even pre-cut the circles using a biscuit cutter, cookie cutter, or baking round, put them on a plate, and then just fire them up on the stove a few minutes before serving. And since the nature of the recipe kinda forces you to make a lot (you have to harden the polenta in a baking dish prior to cutting the cakes, and baking dishes can only be so small), it makes sense for guests, or to make some for now, and save the rest for a second meal later.

If you're not like me and don't have things like mascarpone cheese on hand (shocking, I know), you can try substituting equal parts cream cheese and sour cream. All this being said, just like sour cream is just not the same as creme fraiche (though easily substitutable for), nothing is truly like mascarpone. Just make sure to adjust any necessary firming times. Make sure to use regular polenta, not instant polenta. Extra fine polenta that is low in starch and has not been processed is also useable and will speed up your cooking time.

Polenta Cakes

Ingredients

2 1/2 cups chicken stock
3 cups water
1/2 teaspoon minced garlic
1 1/2 cups polenta
8 tablespoons unsalted butter, at room temperature
2 tablespoons marscapone
2 tablespoons minced chives
Kosher salt and freshly ground pepper
Flour


Instructions
  1. Bring the chicken stock, water, and garlic to a boil in a saucepan.
  2. Whisking constantly, pour in the polenta.
  3. Return the liquid to a simmer and cook the polenta over very low heat, stirring occasionally, for 25 to 35 minutes, or until the polenta is thick and smooth.
  4. When the polenta is cooked, stir in the marscapone, butter, chives, and salt and pepper to taste.
  5. Spread the polenta in a 9 x 13 inch baking pan. Let it cool to room temperature.
  6. Once cooled, cover the surface of the polenta directly with plastic wrap to seal off air and refrigerate. Allow plenty of time for the polenta to fully firm up (at least three hours).
  7. With a 2-inch round cutter or biscuit cutter (or similar size), cut 8 rounds into the firm polenta.
  8. Heat about 1/8" of canola or vegetable oil in any ovenproof skillet to medium heat.
  9. Add some flour to a round cake pan and gently coat the pieces of polenta with flour. Shake off any excess.
  10. Add floured polenta round to the skillet and cook for 2-3 minutes on each side (until evenly browned on both sides and hot. If they brown too quickly (before the center is hot), the pan can be placed in a 350 degree oven to finish cooking.
  11. Serve warm. Any leftover polenta can be saved for three days.

    Tuesday, July 12, 2011

    Gazpacho Andaluz

    This soup is a good example of why Cooks Illustrated is a special magazine. I have very mixed feelings on gazpacho. A good gazpacho can just taste so freaking good. A perfect fresh cold soup for a hot day that really lets ripe tomatoes shine and do their thing. The problem is that 80-90% of the gazpacho served in this country is basically watery salsa, which is not so great as a soup, and not concentrated enough for a tortilla chip. It has the consistency of baby food, no real distinct flavor, and is not really filling at all as a soup. That stuff I can't even finish. This is in a completely different category. Most importantly, it is strained, so it is a silky smooth soup that referred to as 'creamy' though it lacks any cream-like ingredients. It will knock your puree of salsa version of gazpacho on its feet with a slight vinegar bite and a little subtle heat from the serrano chile.

    Juices extracted by salt
    And absorbed by bread
    This is also the kind of recipe where following the process leads to a good result, and the steps matter. Salting the vegetables and allowing the vegetable juice to be strained out then absorbed into the bread and re-added to the puree adds to the volume of intense fresh vegetable taste and ensures the garnish chunks of veggie don't add excess moisture at the end. Seasoning at the end won't break down the cells in the same way. Slowly adding the olive oil into the running blender ensures a fully creamy and blended consistency. Adding too much at once will cause oil to bubble up in the soup. Adding it correctly in a drizzle leads to the effect that the initial pink color of the blended veggies will turn to orange as the oil is slowly added. Letting it all sit for awhile allows the flavors to marry and enhance. 

    Ideally, it should sit overnight, but we have definitely made it early in the morning for an evening dinner and it's been stunning. Just give it a couple hours, and remember to taste right before you serve to adjust seasoning, though it probably won't need much more than the small drops of oil and vinegar served on top, and with pepper and diced veggies to be passed around for diners to garnish as desired. You can substitute red wine vinegar for sherry vinegar and HALF the amount of table salt for the kosher salt, but I prefer kosher salt. We have fairly consistently chosen chives as our herb of choice for this recipe. I imagine basil would add quite different notes, but you really just can't go wrong with chives.

    Creamy Gazpacho Andaluz


    Ingredients

    * 3 pounds (about 6 medium) ripe tomatoes , cored
    * 1 small cucumber , peeled, halved, and seeded
    * 1 medium green bell pepper , halved, cored and seeded
    * 1 small red onion , peeled and halved
    * 2 medium garlic cloves , peeled and quartered
    * 1-2 small serrano chiles , stemmed and halved lengthwise
    * Kosher salt (or half the amount of table salt)
    * 1 slice high-quality white sandwich bread , crust removed, torn into 1-inch pieces
    * 1/2 cup extra virgin olive oil , plus extra for serving
    * 2 tablespoons sherry vinegar, plus extra for serving (or red wine vinegar if you need a substitute)
    * 3 tablespoons finely minced chives (you can substitute parsley, or in a pinch basil leaves)
    * Ground black pepper


     Instructions
    1. Roughly chop 2 pounds of tomatoes, half of cucumber, half of bell pepper, and half of onion and place in large bowl. Add garlic, chile, and 1½ teaspoons salt; toss until well combined. Set aside.
    2. Cut remaining tomatoes, cucumber, and pepper into ¼-inch dice; place vegetables in medium bowl. Mince remaining onion and add to diced vegetables. Toss with ½ teaspoon salt and transfer to fine-mesh strainer set over medium bowl. Set aside 1 hour.
    3. Transfer drained diced vegetables to medium bowl and set aside. Add bread pieces to exuded liquid (there should be about ¼ cup) and soak 1 minute. Add soaked bread and any remaining liquid to roughly chopped vegetables and toss thoroughly to combine.
    4. Transfer half of vegetable-bread mixture to blender and process 30 seconds. With blender running, slowly drizzle in ¼ cup oil and continue to blend until completely smooth, about 2 minutes. Strain soup through fine-mesh strainer into large bowl, using back of ladle or rubber spatula to press soup through strainer. Repeat with remaining vegetable-bread mixture and 1/4 cup olive oil.
    5. Stir vinegar, minced herb, and half of diced vegetables into soup and season to taste with salt and black pepper. Cover and refrigerate overnight or for at least 2 hours to chill completely and develop flavors. Serve, passing remaining diced vegetables, olive oil, sherry vinegar, and black pepper separately.


    See how adding the oil in a drizzle takes the pink puree and makes it orange?

    Wednesday, April 6, 2011

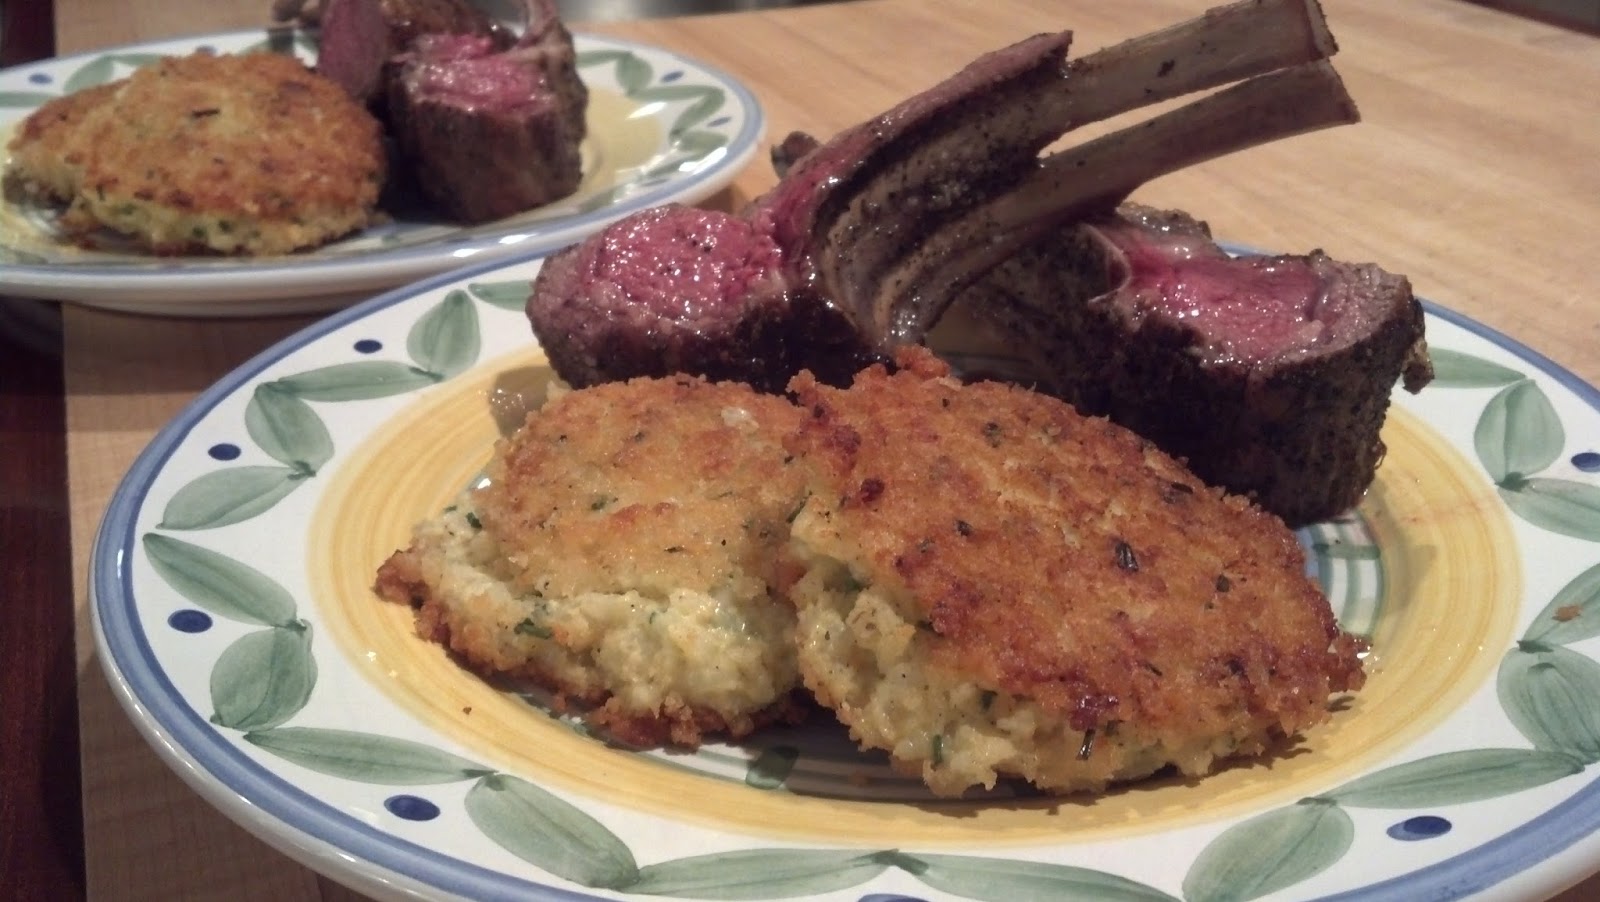
    Chive Risotto Cakes

    I'm a big fan of chives. I'm a fan of the entire onion family of course, but to me the chive is just the right combo between fresh herb and onion tang to cross that bridge. Its one of my favorite additions to add life to sides such as polenta and risotto. To me, nothing tastes quite like Spring than adding a little chives and some lemon. Add in a little cheese and yogurt and you have these risotto cakes. They take awhile to chill, but include all the things a successful side should contain- flavor (but complementary to the main course), creaminess, and texture in the form of the crisp panko coating.

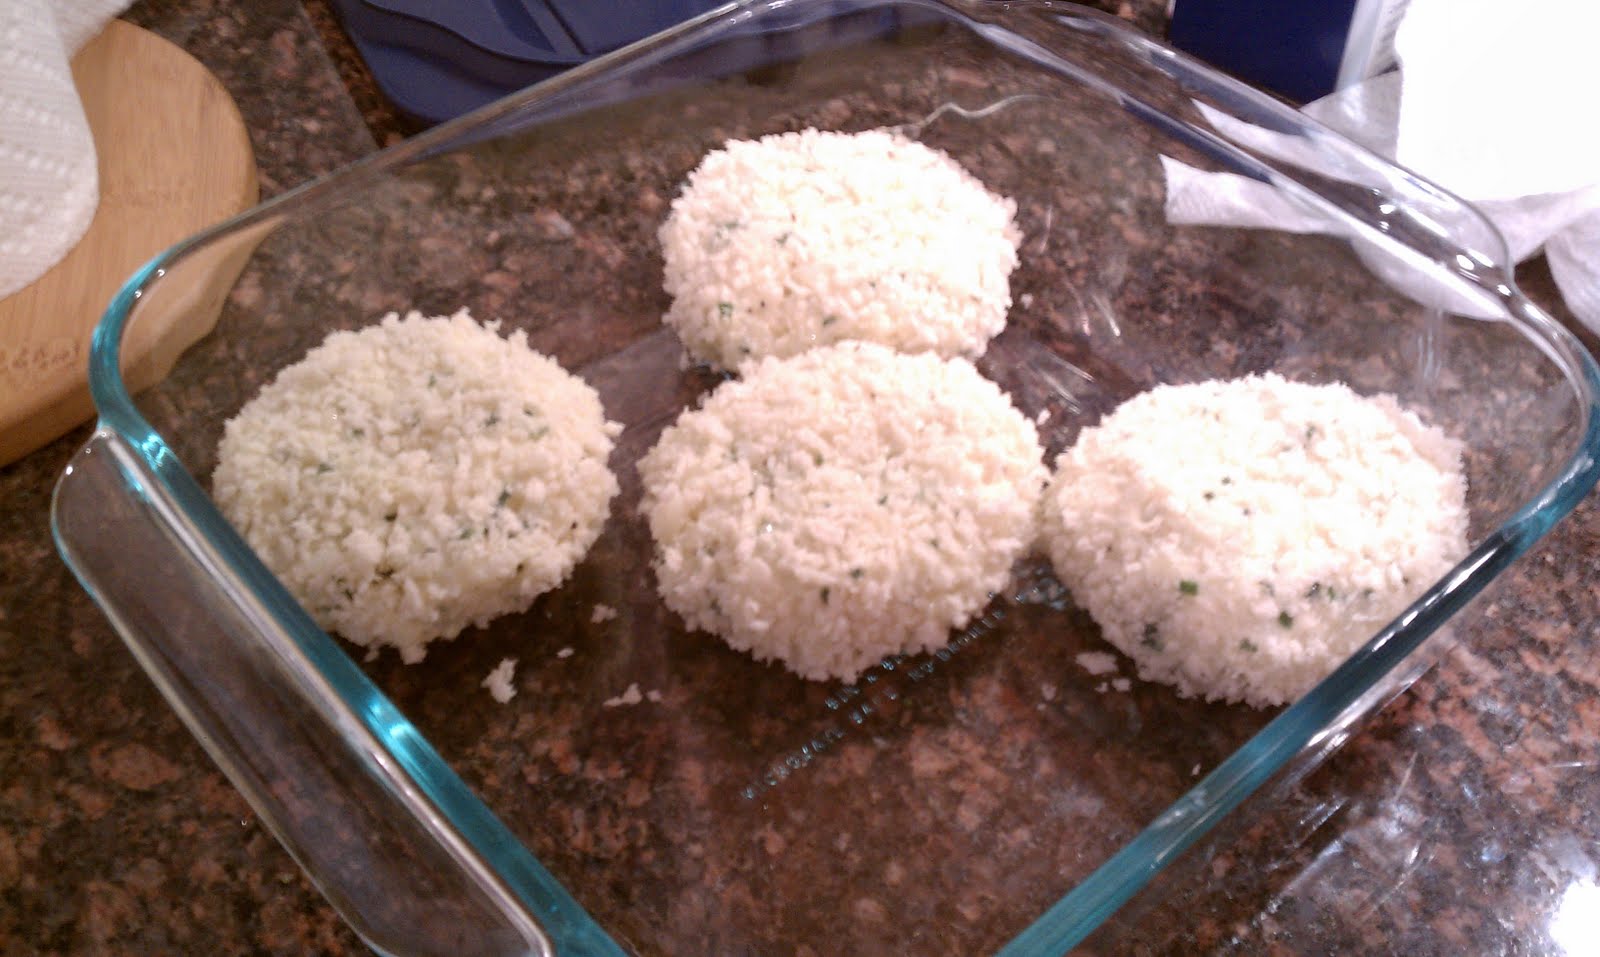
    This is an adjusted creation of Barefoot Contessa, and are a classy and easy side for a dinner party. The mixture should chill at least three hours and preferably overnight before forming the cakes. After the first chill, you'll want to prepare them ahead up to the point of covering in panko, and then refrigerate them for at least three hours.  (Keeping them chilled is the key to them not falling apart in the pan during flipping). If you do not have three hours, you can speed it up by storing them in the freezer for 30 minutes. This also has the added benefit of allowing you to prepare this mostly ahead of your guests coming, then just finish in the pan with some olive oil and serve around the time the meat comes out of the oven.

    You can prepare your own Greek Yogurt for this recipe, or just buy it ready-made. We have also substituted fontal cheese (a slightly cheaper version of Italian Fontina Cheese) when available. A word on Fontina: this is a recipe where some really excellent Fontina will go a long way. We've certainly made it with cheaper domestic Fontina that can be found at the local Harris Teeter, but getting the pricier stuff does pay off in this recipe. The other side of that is that depending on what brand of Fontina you purchase, you might have different salt-content in the cheese, so be sure and try your cheese before dumping a bunch of salt into the rice. This dish can get too salty, so a gentle hand is in order.

    Ingredients

    Kosher salt
    1 cup uncooked Arborio rice 
    1/2 cup Greek yogurt 
    2 extra-large eggs 
    6 tablespoons minced fresh chives
    1 pressed garlic clove (optional) 
    1 1/2 cups grated Italian fontina cheese (5-6 ounces) 
    1 teaspoon freshly ground black pepper 
    3/4 cup panko (Japanese dried bread flakes) 
    olive oil

    Directions


    1. Bring a large (4-quart) pot of water to a boil over medium-low heat and add 1 1/2 teaspoon salt and the Arborio rice. Cook, stirring occasionally, for 20 minutes. The grains of rice will be quite soft. Drain the rice in a sieve and run under cold water until completely cool to touch. Drain well.
    2.  Meanwhile, whisk together the yogurt, eggs, chives, fontina, salt to taste, and the pepper in a medium bowl. Add the cooled rice and mix well. Cover with plastic wrap and refrigerate overnight or at least 3 hours, until firm.
    4.  After chilling, spread the panko in a shallow dish. Form balls of the rice mixture using a standard (2 1/4-inch) ice-cream scoop or a large spoon. Pat the balls into patties 3 inches in diameter and 3/4-inch thick. Place 4 to 6 patties in the panko, turning once to coat both sides.
    5. Place on a plate and chill in refrigerator for three hours. If you need to speed the process, sometime can be spent in the freezer but do not freeze all the way through. The cakes should be chilled and firm. If you are chilling for an extended period of time (you can leave the patties for up to 24 hours), you may want to hold off on adding the panko until you are ready to cook.
    6.  When ready to serve, heat 3 tablespoons of olive oil in a large skillet over medium to medium-low heat. Place the patties in the hot oil and cook, turning once, for about 4-5 minutes on each side until the risotto cakes are crisp and nicely browned. Place on a sheet pan lined with parchment paper and keep warm in the oven for up to 30 minutes. Continue cooking in batches, adding oil as necessary, until all the cakes are fried. Makes 8 cakes or 4 generous side portions.


    Total Cook Time: 6-24 hours, 1 hour cooking time, 6 hours plus inactive time