Showing posts with label savory. Show all posts

Tuesday, November 25, 2014

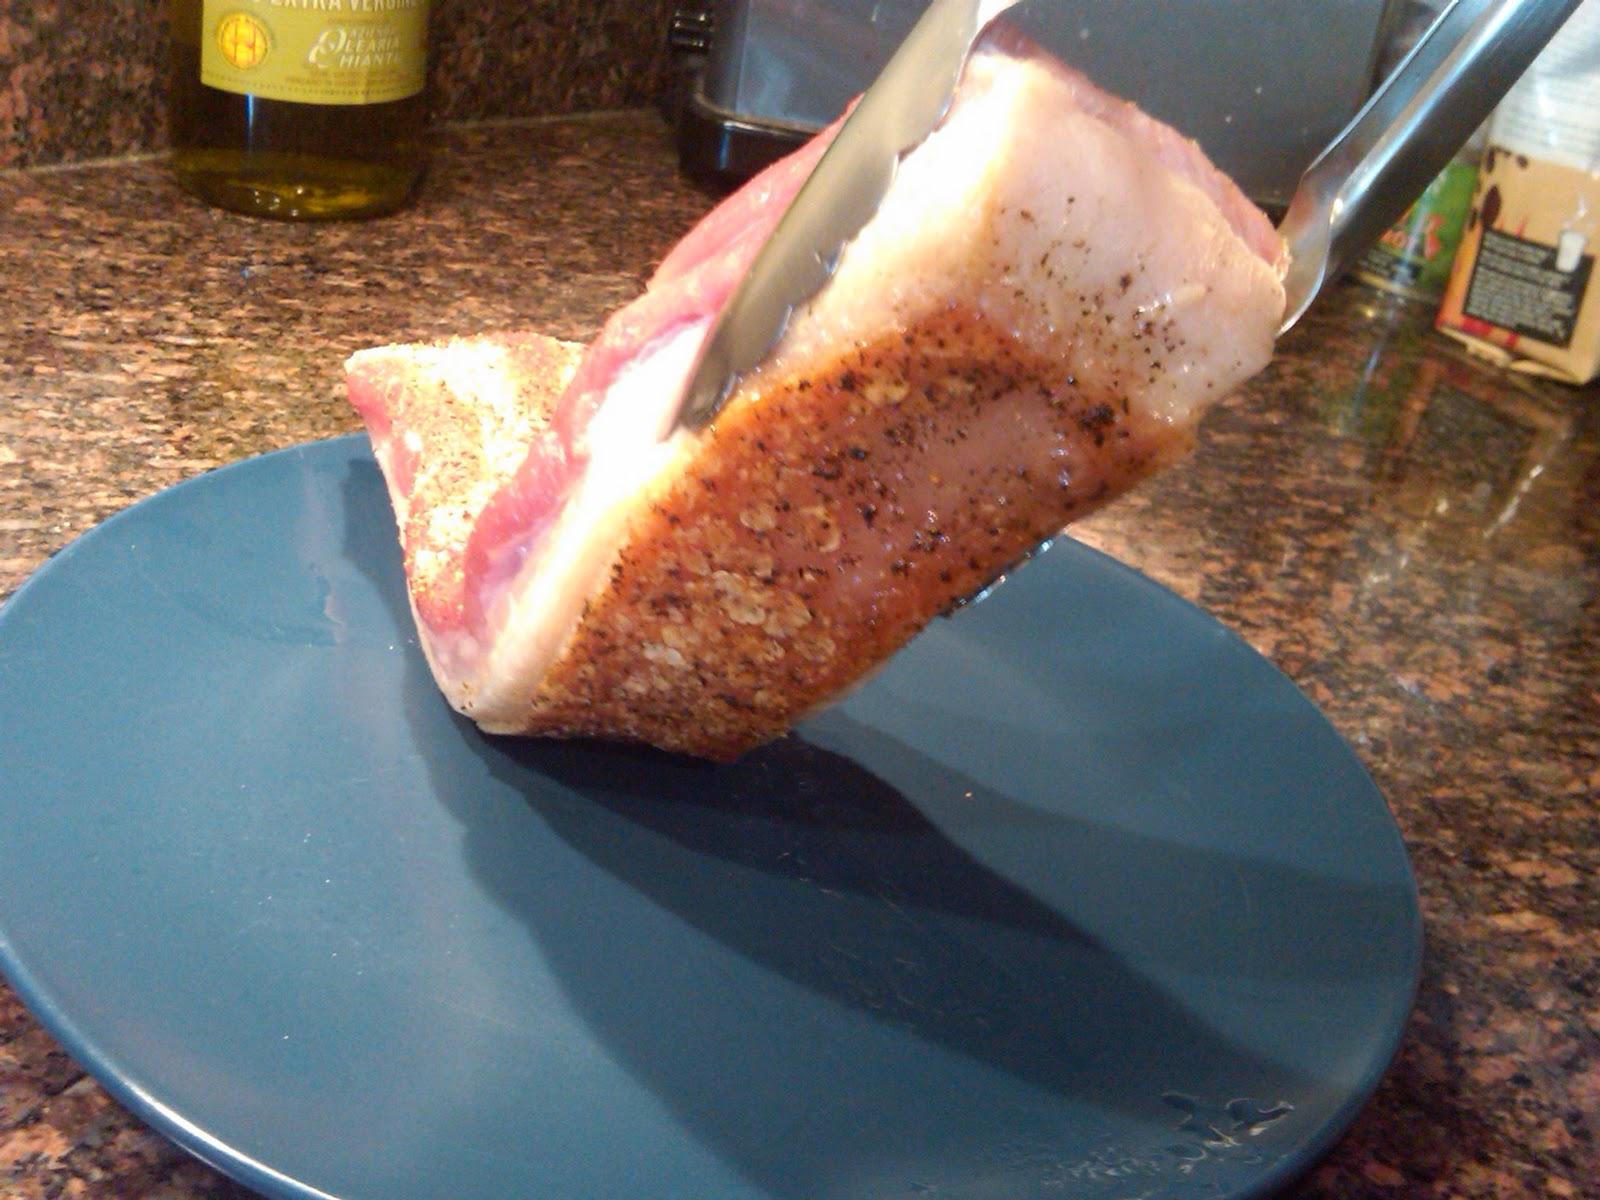
Chermoula Marinated Pork Loin

Pork loin is all or nothing for me.  It’s either juicy, succulent, and full of delicious porky flavor, or it’s as dry and chewy as a hockey puck.  When done correctly, the loin is one of my favorite cuts of pork.  Tied and pan roasted, it makes for a roast as beautiful as it is tasty, perfect for a small dinner party.  But pork loin can be finicky.  Because it is relatively lean, it does have a tendency to dry out. And being pork, the loin needs lots of seasoning to be flavorful.

Before the pork loin goes anywhere near a pan, there are steps you can take to ensure that the final product will come out juicy.  First, get a high quality piece of pork.  Look for one in your butcher’s case that has good marbling, has most of its fat cap intact, and that still looks pink and fresh.  If the only pork loin you can find is vacuum sealed in plastic and labeled as “enhanced” pork (i.e., pork that has been injected with salt water), consider using this marinade on a nice pork chop instead.

Brining is an additional step you can take towards keeping your pork loin juicy.  I use a very basic brine for this recipe, because the pork loin is marinated after brining.  As an alternative recipe, try using the brine I call for in my Roast Chicken recipe.  Pan roast the loin as I do below and make a simple pan sauce with all of the delicious brown bits sticking the bottom of the skillet.  The end result would make a Frenchman proud.

Pork loin benefits from heavy seasoning and pairs great with big, intense flavors.  The chermoula marinade I use here – a potent North African marinade traditionally used to season vegetables – penetrates the pork with deep and complex flavors and imparts the loin with an attractive golden brown exterior when seared.
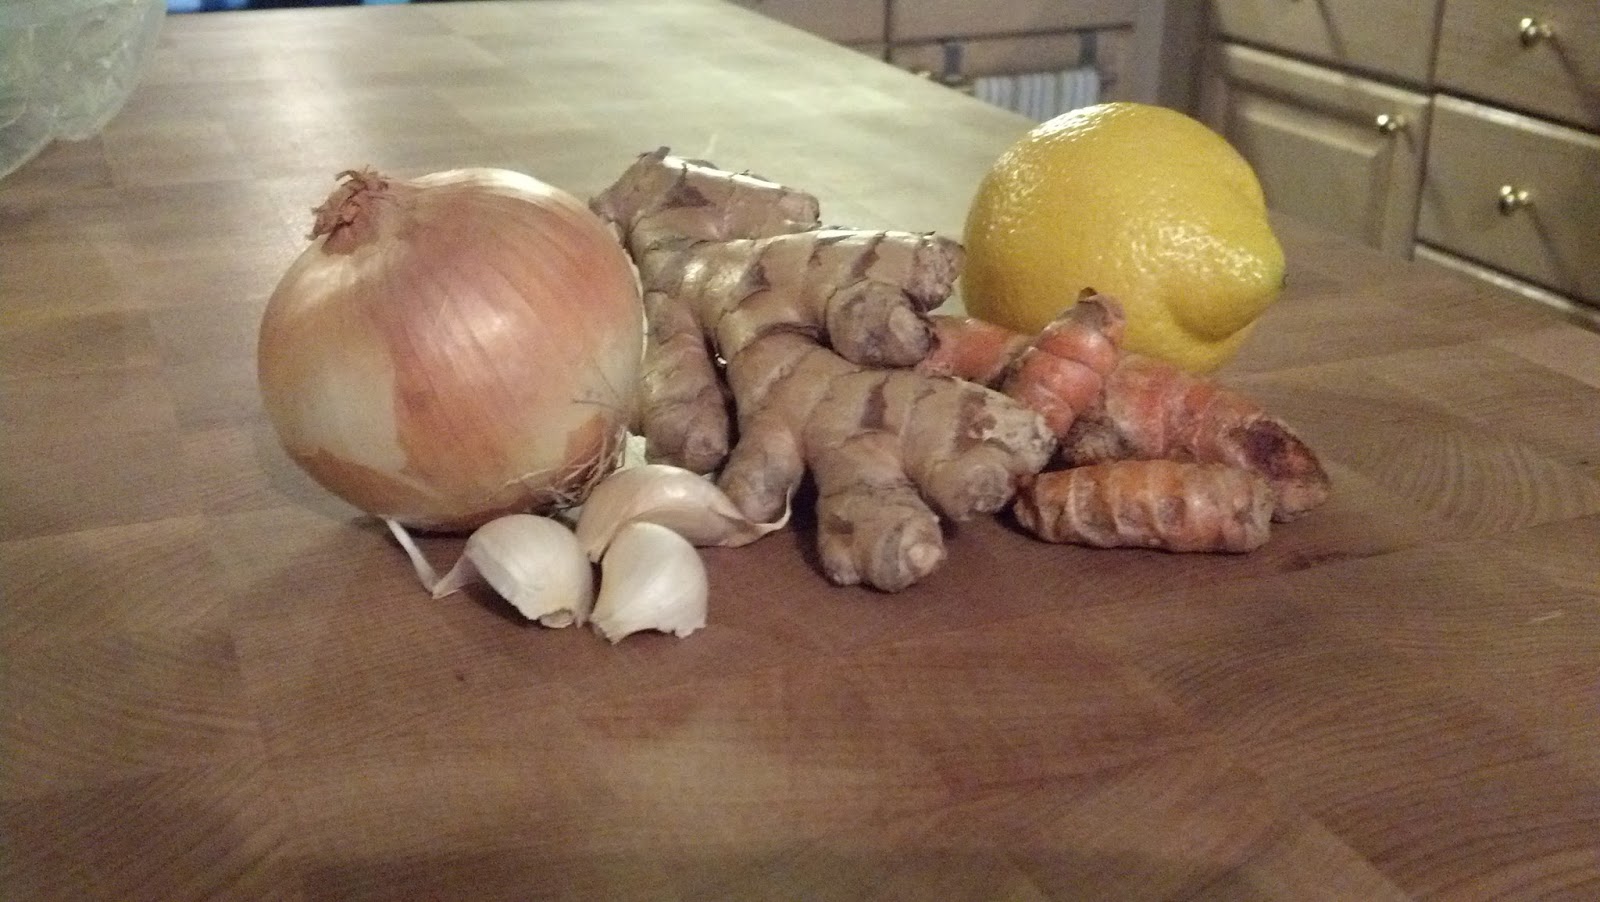
The chermoula calls for both fresh ginger and fresh turmeric.  You can substitute dried ground turmeric if you cannot find fresh, but the fresh ginger is essential. If you have never seen tumeric, it looks like small, orange fresh ginger that is as bright as a carrot when peeled and gets on everything it touches (see photos).  Grating the ginger, turmeric, onion and garlic on a Microplane grater or through the small holes of a box grater intensifies their flavors and will help to tenderize the meat.


Chermoula Marinated Pork Loin


Ingredients


1 boneless pork loin roast, 2-3 pounds

8 cups water
½ cup Kosher salt

1½ teaspoons cumin seeds
½ teaspoon coriander seeds
½ teaspoon black peppercorns
½ teaspoon red chile flakes
2 cloves garlic, grated
¼ cup grated yellow onion
½ teaspoon peeled and grated fresh ginger
1 teaspoon peeled and grated fresh turmeric, or ½ teaspoon ground turmeric
2 teaspoons unsmoked Spanish paprika
Grated zest of ½ lemon
2 tablespoons
2 tablespoons finely chopped flat-leaf parsley
finely chopped cilantro
3 tablespoons olive oil

Instructions


  1. Trim the pork loin of any excess fat, but be sure to leave most of the fat cap intact. Tie the loin at one inch intervals with butcher’s twine, making sure to tie it very tightly so that the roast will maintain its shape during cooking.
  2. Combine the water and salt in a large bowl and stir until the salt is completely dissolved. Add the trimmed and tied pork loin, cover, and refrigerate for 8-10 hours, or overnight.
  3. Toast the cumin and coriander seeds in a small skillet over medium heat, stirring frequently, until fragrant. Remove to the bowl of a spice grinder and add the peppercorns and chile flakes. Grind finely.
  4. Transfer the ground spices to a small bowl and add the garlic, onion, ginger, turmeric, paprika, lemon zest, parsley, cilantro and two tablespoons of the olive oil.  Stir to combine.
  5. Remove the pork loin from the brine and rinse under cold, running water. Dry thoroughly with paper towels.
  6. Rub the chermoula all over the pork loin, then wrap tightly with plastic wrap and refrigerate overnight.
  7. The next day, pre-heat your oven to 325° F. Unwrap the pork loin and wipe most of the chermoula off with your hands. Allow to sit at room temperature for one hour to temper.
  8. Heat the remaining tablespoon of olive oil in a large non-stick or cast iron skillet over medium high heat until shimmering but not smoking. Add the pork loin and sear on all sides until well browned, about 10 minutes.
  9. Turn the pork loin so that the fat cap is on top, and then place the skillet in the oven. Roast until center of roast registers about 135 degrees on an instant-read thermometer, 35 to 45 minutes.
  10. Remove the roast to a plate. Cover with tin foil and allow to rest for 20 minutes.
  11. After the roast has rested, transfer to a carving board. Cut the twine with scissors and discard. Slice the roast into ½ inch to ¾ inch slices. Poor any accumulated juices from the resting plate over the slices and serve.

Thursday, June 12, 2014

Heirloom Tomato Sorbet with Chive Oil

As a little kid, I used to love it when restaurants would serve sorbet as first course or as a palate cleanser between courses.  "Early dessert!" I'd think to myself when greeted with basil ice cream as an amuse or presented with pear sorbet before my main course.  Those are the memories that inspire me to work sorbets and ice creams into unexpected parts of my menus today.  I try to find recipes that surprise my guests – and get them excited for the meal to come.

This recipe for tomato sorbet, from Thomas Keller's The French Laundry Cookbook, is particularly good.  The sorbet has intense tomato flavor, but is still clean enough to be refreshing between courses, thank in part to the addition of orange zest.  Wait until late summer when the very best tomatoes are available to make this sorbet.  The wait will be worth it.

Keller's method for making chive oil is as simple as can be, and pairs beautifully with the sorbet.  Just hold the chives under hot running water for a couple of minutes and then blend with the oil.  The heat created by the friction of the blade spinning through the oil is enough to heat the mixture and infuse the flavor of the chives into the oil.  The oil is best if made at least one day ahead of time, and then strained just before use.

Ingredients

Simple Syrup

3/4 cup sugar
3/4 cup water

Tomato Sorbet
2 1/4 pounds heirloom tomatoes, peeled, seeded and cut into 1-inch pieces
1 tablespoon canola oil
1/3 cup finely chopped yellow onion
2 tablespoons red wine vinegar
Pinch of chopped tarragon
Pinch of cayenne
3/4 cup plus 2 tablespoons simple syrup
Julienned zest of 1/2 orange (removed with a zester; 1 teaspoon), brought to a boil in cold water, strained and repeated 2 additional times
Kosher salt
Freshly ground black pepper

Chive Oil

1 packed cup chives
1 cup canola oil

Fleur de sel
Extra chives for garnish

Instructions

For the simple syrup
  1. Combine the sugar and water in a saucepan and bring to a boil, stirring to dissolve the sugar.  
  2. Remove from heat, let cool to room temperature, and then refrigerate.
For the sorbet: 

  1. Place the tomatoes in a saucepan and bring to a simmer over medium heat. 
  2. Cook, stirring often, for about 45 minutes, or until the tomatoes have reduced by half.  There may still be a small amount of liquid remaining.
  3. Meanwhile, heat the oil in a skillet over low heat.  
  4. Add the onions to the skillet and cook gently for 7 to 8 minutes, or until tender.
  5. Place the reduced tomatoes and the onions in a blender and puree them until very smooth.  
  6. Press the mixture through a fine mesh strainer (there will be about 1 cup of puree) and return it to the clean blender.  
  7. Add the remaining sorbet ingredients and blend again.  
  8. Strain through a clean fine mesh strainer.  There should be about 1 1/2 cups sorbet base.  
  9. Cool the mixture over ice, stirring often.
  10. Freeze the sorbet in an ice-cream machine according to the manufacturer's directions.  
  11. Store the sorbet in a covered container in the freezer.  The sorbet is best eaten the day it is made.


For the chive oil: 
  1. Place the chives in a strainer and run hot water over them for about two minutes to soften and remove the chlorophyll taste.
  2. Place half of the chives in a blender with the oil.  
  3. Turn on the blender to medium speed and allow the chives to blend for a minute to begin the process. 
  4.  Turn the speed to high and continue to blend for another 2 minutes.  If your blender has a hole at the top, remove the stopper to allow some air in.
  5. Add half of the remaining chives to the machine and blend for another 2 minutes, then add the remaining chives and blend for 2 more minutes.
  6. Remove the puree to a covered container and refrigerate for at least 24 hours.
  7. When ready to use, strain the oil through a fine mesh strainer lined with cheesecloth.
To serve
  1. Spoon a little of the chive oil into the center of a six small bowls.  
  2. Top each with a quenelle of tomato sorbet.  
  3. Sprinkle each bowl with a few grains of fluer de sel and garnish with the extra chives.

Thursday, December 19, 2013

Wasabi Deviled Eggs with Sriracha

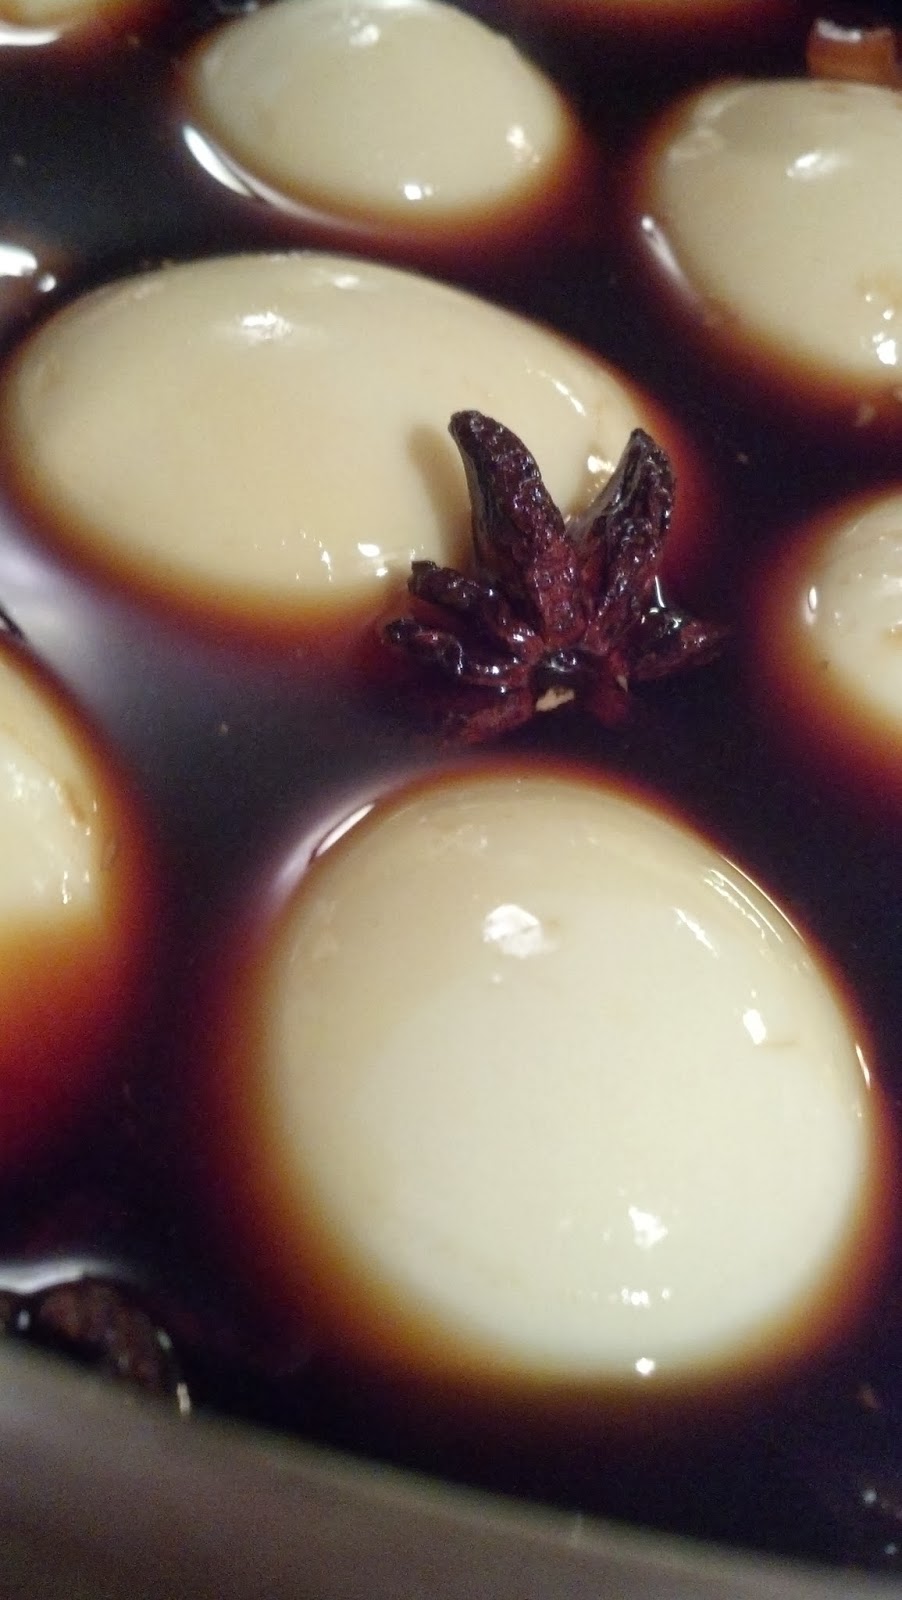
Deviled eggs are a timeless tradition of delectable snacking that lends itself well to pretty much any party or potluck in any season. These deviled eggs are no exception, and were added to our Holiday Party line up. They are salty, spicy, and have a subtle hint of star anise that makes for a more Eastern take of a Southern classic. I love deviled eggs in pretty much every available format, but the only thing better than one kind of deviled egg is SEVERAL kinds of deviled eggs.

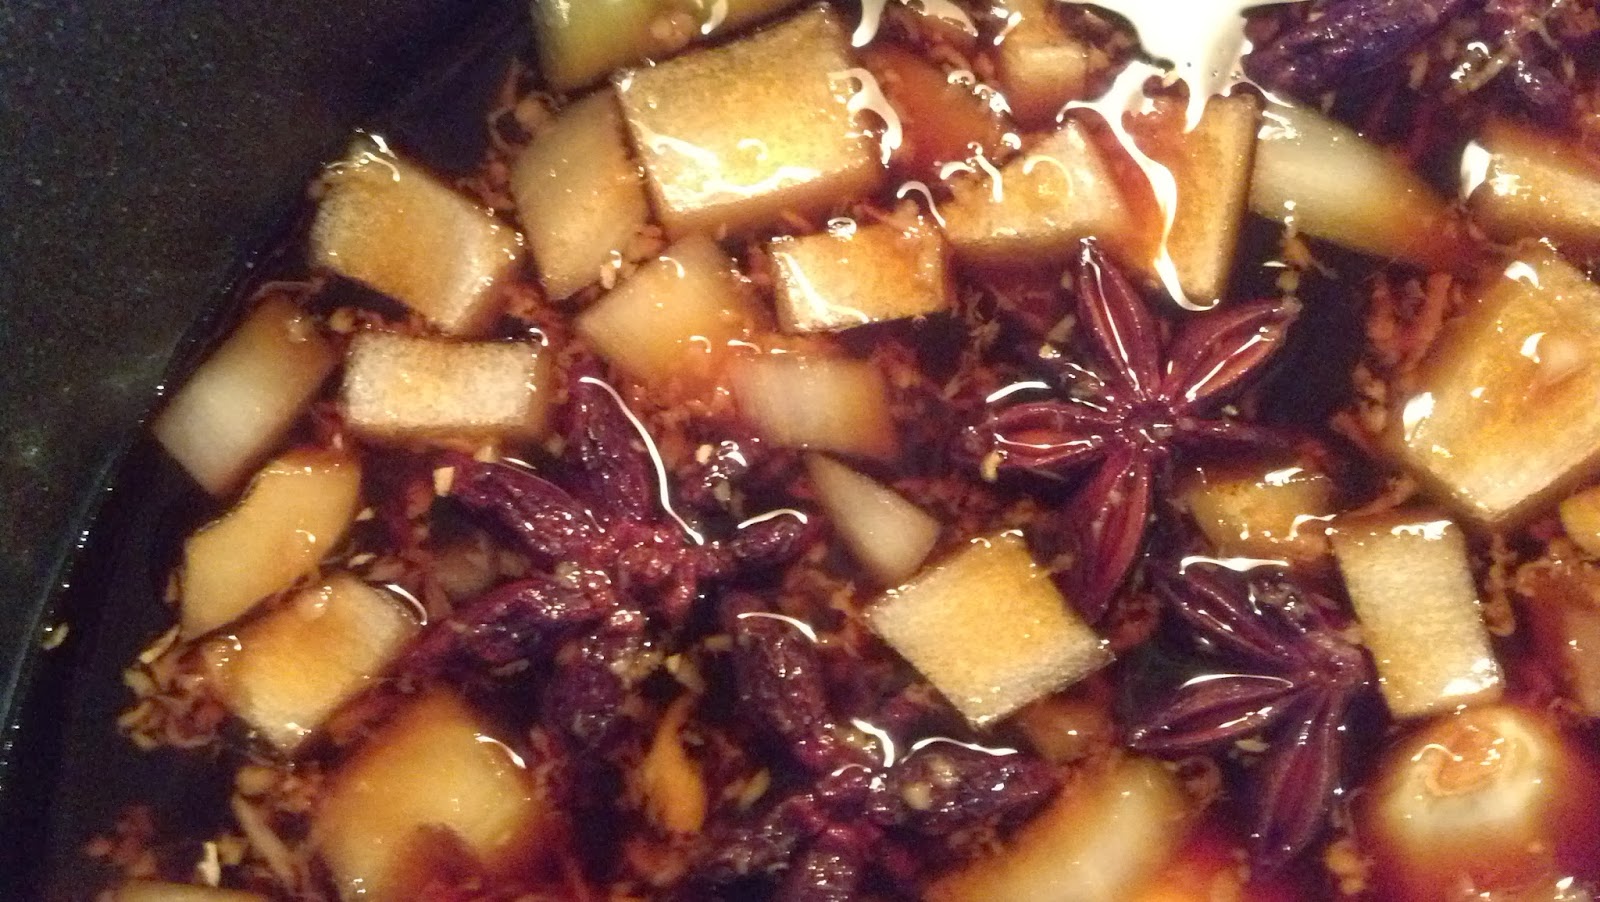
The original recipe (available at the Food and Wine website), uses scallions in the marinade, but we were fresh out of scallions when we first made these and substituted a combination of onions and garlic in its place, as this is essentially a marinade so presentation really isn't an issue. It worked wonderfully. The main flavors from the marinade are fresh ginger, soy, sake, and star anise and the onion is more of a background note. And given we are more likely to have an onion on hand than to have a bunch of scallions, it's been a useful substitute.

The star of this show is the wasabi and sriracha filling, which takes this from just being salty to packing a kick at the end of each bite that makes people eat them before I am able to take the "finished" photo of what they look like, which gives you a sense of their popularity. If you want a quick and dirty version that doesn't involve a bunch of star anise and hours of marinating, you can just make the filling and skip the marinade. Your eggs won't get a cool tint and will not have quite the complexity, but the filling is pretty delicious on its own. Even with the marinade, this still qualifies as a pretty easy recipe. If you want to throw some extra eggs in there, go ahead. We've squeezed in 15 eggs into the marinade without increasing the amounts of the marinade (this might require more stirring for even coating). Above that I would recommend making some extra marinade.
 

Wasabi Deviled Eggs with Sriracha

Makes 24 eggs

Ingredients

1/4 cup sugar
1/4 cup coarsely grated peeled fresh ginger
1/2 cup sake
1 cup water
2 cups soy sauce
10 star anise pods


1 medium yellow onion, chopped (or 1/2 cup of chopped scallions)
6 cloves garlic, peeled
1 dozen large eggs 
1 tablespoon Sriracha  
1/4 cup plus 1 tablespoon mayonnaise
1/4 cup snipped chives
2 1/2 teaspoons wasabi paste 
Chinese five-spice powder 


Instructions 

  1. In a medium saucepan, combine the water, soy sauce with the sake, star anise, onion (or scallions if using), garlic, sugar and grated ginger.
  2. Bring soy mixture to a boil. Transfer the mixture to a heatproof medium bowl and let cool completely. 
  3. Meanwhile, in a large saucepan, cover the eggs with cold water and bring to a boil. Boil for one minute, then cover the saucepan, remove from heat, and let stand 10 minutes until hard boiled.
  4. Drain the water from the large saucepan. Cool the eggs slightly under cold running water to stop the cooking process, then peel them under cold running water. 
  5. Add the eggs to the completely cooled soy mixture. Cover with plastic wrap and refrigerate the eggs for at least 4 hours, stirring once in awhile to ensure that all the eggs are fully immersed in the soy mixture and will color evenly.
  6. Drain the eggs and rinse lightly to remove any bits of scallion or ginger; pat dry. The outside of the eggs will become a tannish brown color.
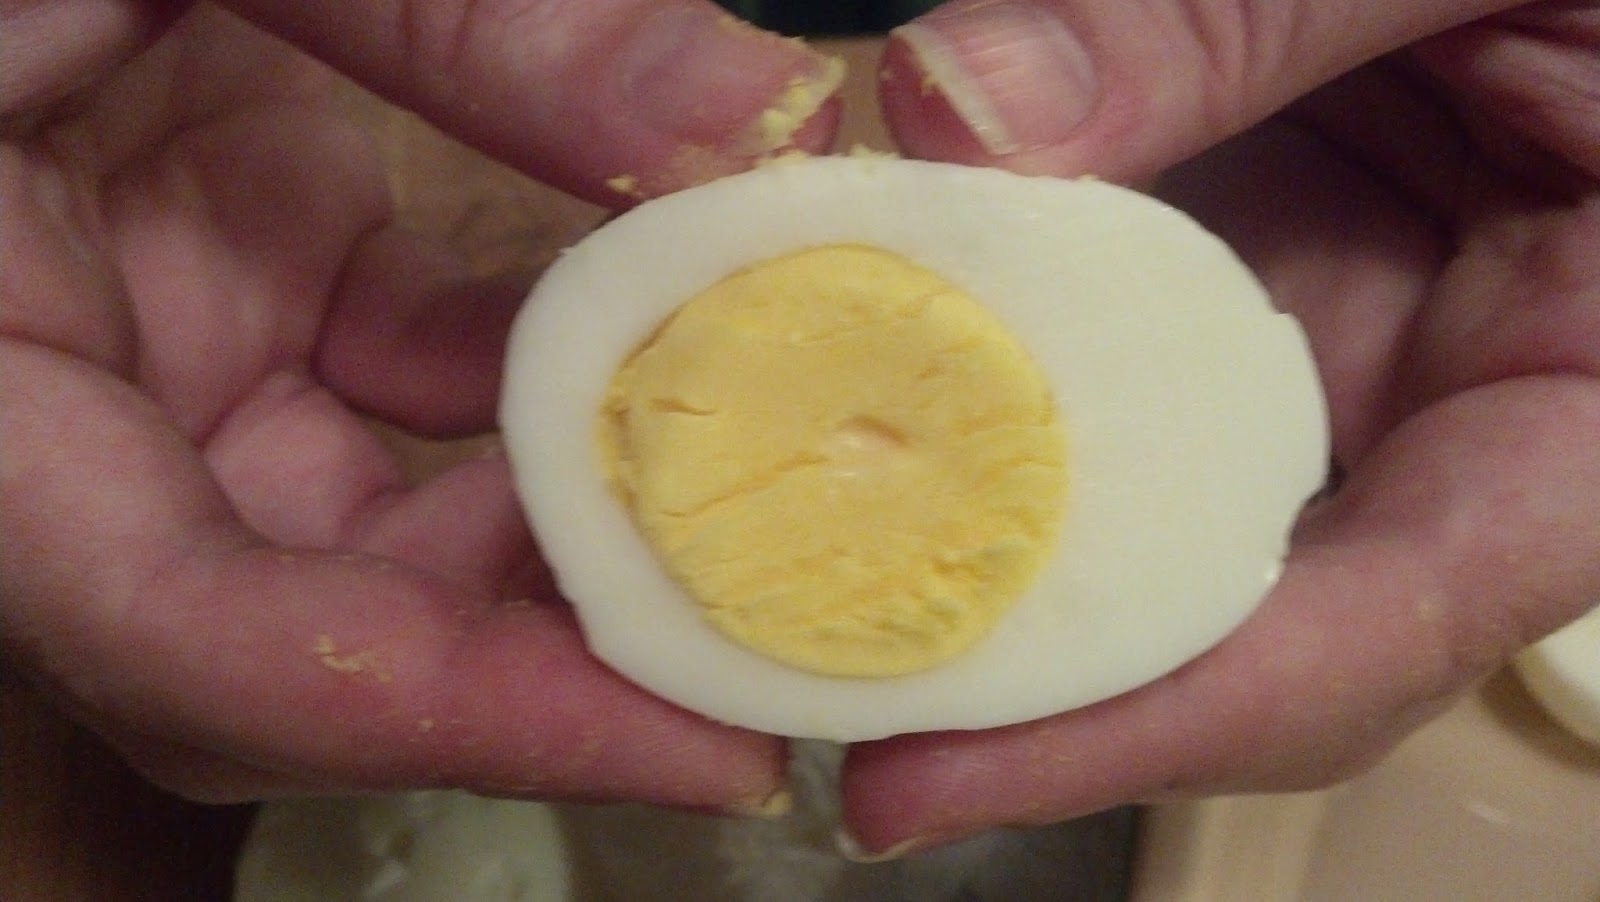
  7. Using a slightly moistened thin, sharp knife (non-serrated), cut the eggs in half lengthwise. Yolks should be bright yellow, cooked all the way through, and the knife should cut cleanly through the yolk.
  8. Gently pry the egg yolks into a medium bowl without breaking the cooked white. Leave the whites aside and mash yolks with a fork or potato masher until the mixture is as free of lumps as possible. If some remain, they will be taken care of during the piping process.
  9. Stir the mayonnaise, Sriracha, wasabi and 3 tablespoons of the snipped chives into the mashed yolks until fully combined.
  10. Transfer the mixture to a pastry bag fitted with a star or plain tip. Set the egg whites on a serving platter and pipe in the filling. If you don't have a pastry bag, cut off the corner of a plastic Ziploc bag, or just use a spoon for a slightly more rustic but equally delicious look. At this point, if you are making these ahead of time, you can stop here and store the eggs in a fridge overnight until ready to serve.
  11. Right before serving, sprinkle a pinch of Chinese five-spice powder on each of the deviled eggs then top with the remaining chive snips or thinly sliced scallions if wanted. 

Wednesday, December 18, 2013

Cranberry Cheddar Gougeres

A gougere is a French pastry that is light, airy, and deliciously cheesy. Essentially, it is a cheese puff the way a cheese puff should be. If you have never experienced the delight of biting into a piping hot gougere and have the steam from the oven explode in your mouth or had an entire room consumed by the smell of cheesy goodness cooking in the oven, I insist you stop whatever you are doing and find yourself a gougere to eat, unless what you are doing is making gougeres, in which case, you are on the right track.  

There are many variations on a gougere (which is classically made with gruyere cheese or sometimes other French cheeses), but all of them are based on the idea of a light, airy cheese pastry made with a pot au choux dough, which is a cooked dough that uses moisture instead of a rising agent (like yeast) to rise. All of which makes it sound very fancy and much more difficult than it is.

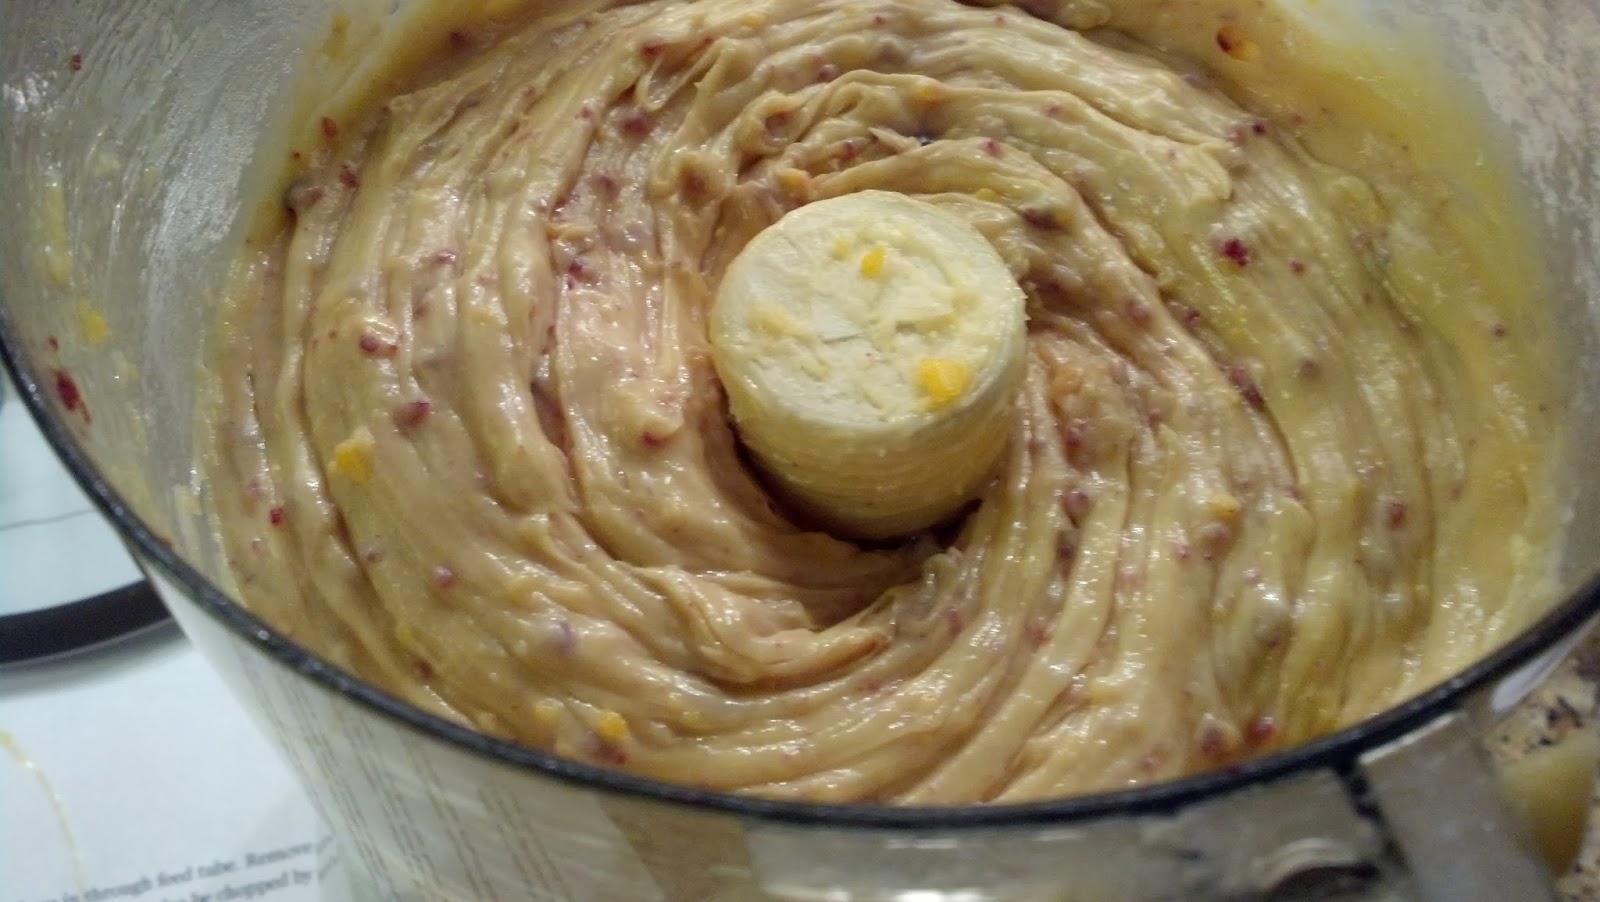
Usually, you see gougeres in small bite size balls (each 1-2 bites), but when we were in Burgundy recently, TK and I were frequently served much larger almost biscuit sized gougeres that were equally light and delicious.We will get to those later, but for now, here are some of the regular bite sized gougeres in a fun recipe from the New York Times website that adds a little holiday cheer to this classic (and thus made it a perfect addition to our Holiday Party line-up), while speeding it up along the edges for a quick and easy treat. Obviously, cheddar is not particularly French, nor are cranberries, but delicious is delicious. The dough looks marvelously festive before baking with little red cranberry flecks, the cheese kinda takes over the show during baking and the cranberry taste is a relatively subtle sweet note in the dough. Because these are tiny, they don't necessarily require the piping that larger gougeres may need to get that distinctly spiral. Obviously, piping doesn't HURT the recipe, but it can be a mess when all you need is a teaspoon scoop.

This is a food processor recipe, which is both awesome, convenient, and makes it difficult to make more than one batch at a time, unless you are willing to rock multiple food processors which frankly I am not. For the record, you can make this recipe by hand. You have to finely chop the cranberries by hand in the beginning and then stir until your arm can't stir anymore and then stir some more to incorporate the eggs, cranberry, and cheese later, but it can be done. But why would you take a recipe that has given you the gift of a food processor and then not use it? In addition, this is a freezer-friendly recipe. You can make these a week before your party and just heat them up right before you are ready to serve. You won't get the same intense cheese smell filling your house at reheating (only a moderate cheese smell filling your house), but they will still taste delicious and you'll still be able to serve them piping hot with a simple ten minutes in a 350 degree oven.


Cranberry Cheddar Gougeres

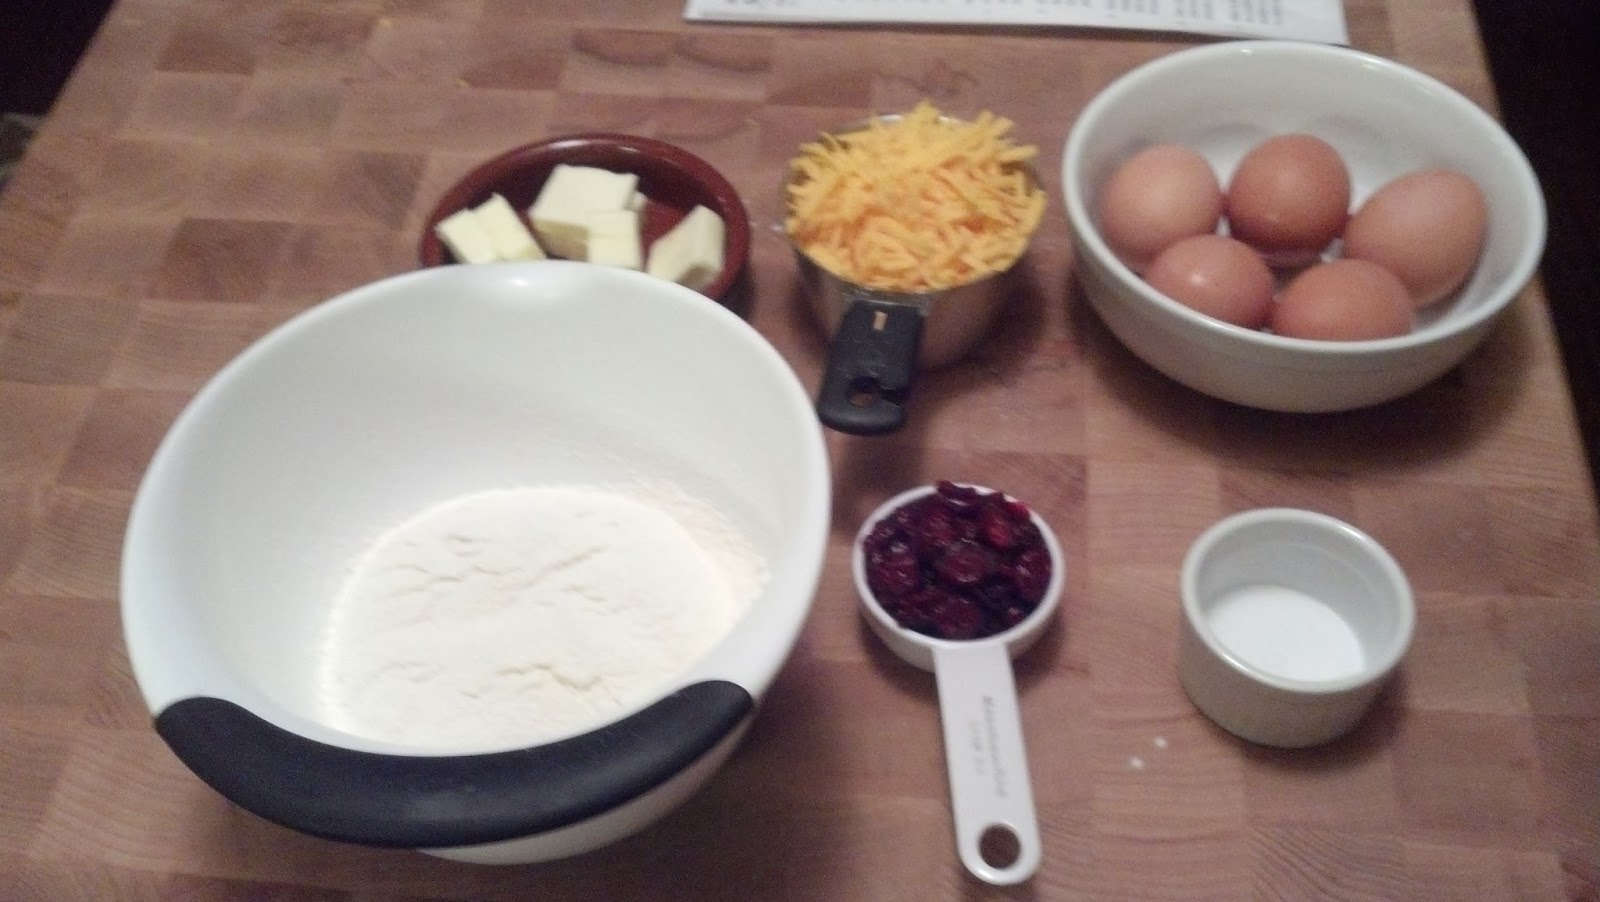
Ingredients


  • 1/4 cup dried cranberries
  • 3 ounces unsalted butter (6 tablespoons)
  • 1 teaspoon salt
  • 1 cup sifted flour
  • 5 large eggs
  • 1 cup grated sharp Cheddar


Preparation


  1. Turn on food processor and finely chop cranberries by dropping them in through feed tube. Remove cranberries, but don’t bother cleaning bits clinging to the bowl, as they'll end up back in bowl eventually. 
  2. Place 1 cup water in a 2-quart saucepan. Add butter and salt, bring to a simmer and cook just until butter melts. 
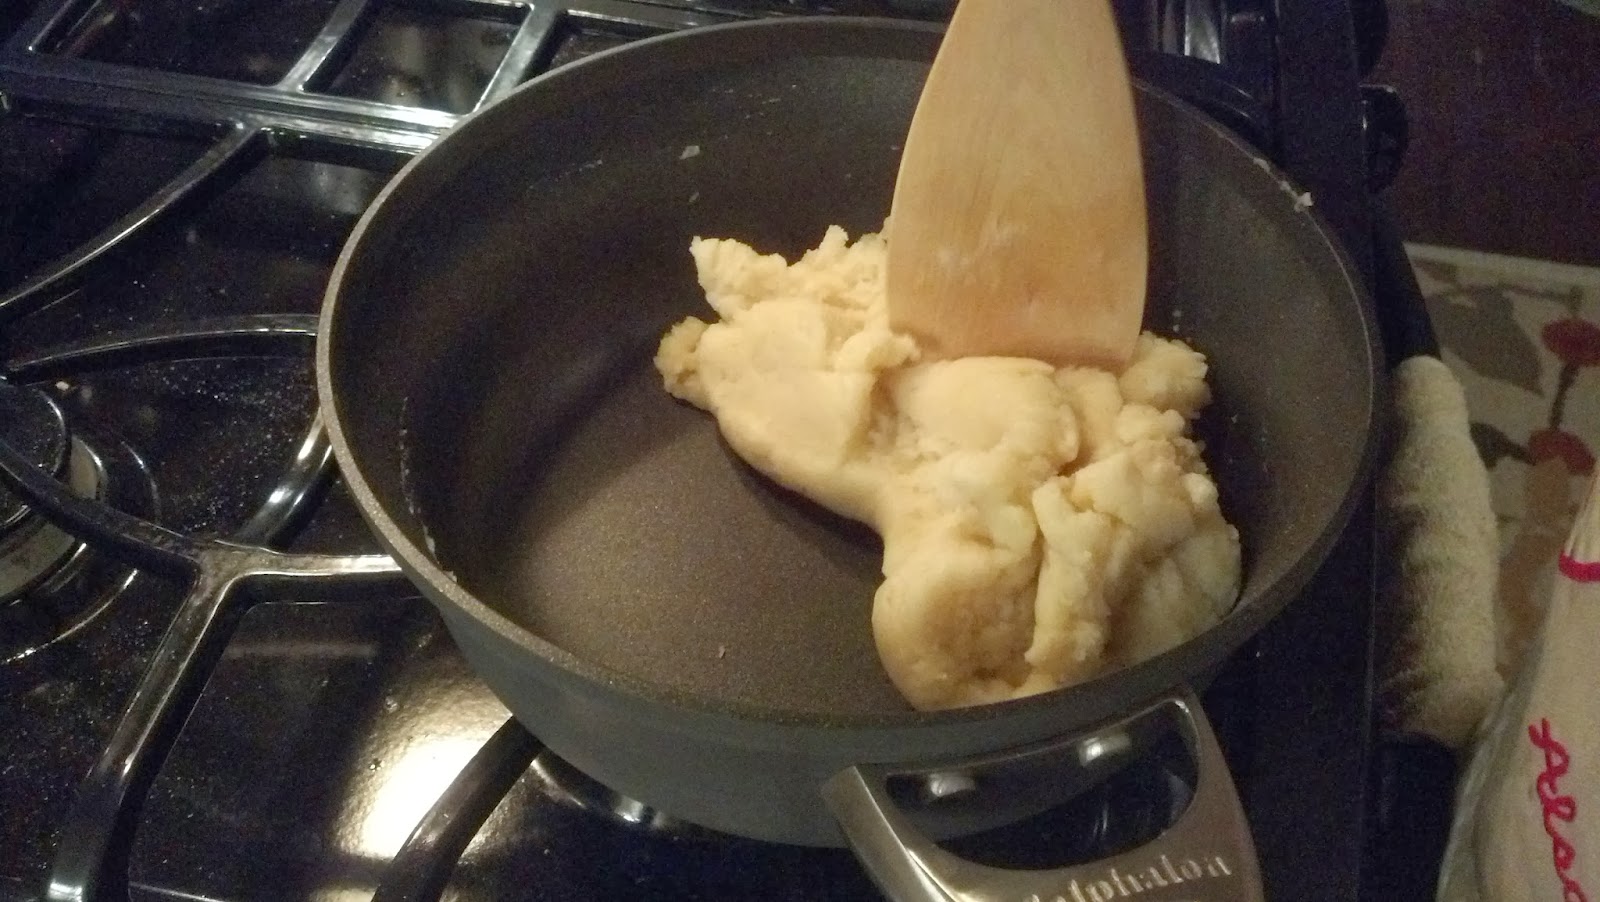
  3. Remove from heat and add flour all at once, stirring vigorously with a wooden spoon.
  4. Return saucepan to medium to medium high heat and cook dough, stirring constantly, about a minute or two until the dough forms a ball and does not stick to the sides of the saucepan.
  5. Transfer dough to food processor.
  6. Heat oven to 425 degrees.
  7. Turn on food processor and add 1 egg to the dough. As soon as it’s completely incorporated, add another, and continue adding eggs 1 at a time until you have used 4.
  8. Add chopped cranberries and Cheddar and pulse to blend.
  9. Line 2 baking sheets with parchment or silpat if available. Drop heaping teaspoons of batter, in mounds about 1 inch across, on baking sheets, leaving 2 inches between them.
  10. Dipping your fingertips in cold water, gently press down any peaks or tips to the mounds of dough so that the dough is flat and will form a clean circular puff.
  11. Beat remaining egg. Brush tops of mounds with egg, taking care not to let any drip down the sides.If after your first batch you find the coloring to be overly dark or slightly burned, you can wait to brush the egg until 7 minutes in to the first fifteen minutes of cooking (or whenever the first time you rotate baking sheets is).
  12. Bake 15 minutes, until puffed and lightly browned, rotating baking sheets halfway between cooking.
  13. Reduce heat to 350 degrees and bake another 10 to 15 minutes, until well browned and again rotating baking sheets halfway.
  14. Shut off oven, open oven door a few inches and leave gougères another 15 minutes before removing them. If you are serving them immediately, serve right away, they do not need any time to cool and are best hot.
  15. Before making your next round, wait ten minutes for baking sheets to cool, replace parchment paper, and repeat process.If you are making these ahead of time, move gougeres to cooling racks. When completely cooled, the gougères can be transferred to a heavy plastic bag and frozen. Reheat them for 10 minutes at 350 degrees.


Sunday, May 27, 2012

Chilled English Pea Soup with Crispy Prosciutto

I based this recipe on the Chilled Garden Pea Soup recipe in the Eleven Madison Park Cookbook by Daniel Humm and Will Guidara.  Like almost all of the recipes in Eleven Madison Park, I had to simplify this one considerably before I could attempt to make it.  By omitting the "buttermilk snow" and by substituting a piece of crispy prosciutto for the more-involved "prosciutto crisp," I was able to bring this recipe down to earth while staying true to the vibrant flavors in the dish.  The sweet-fresh flavor of spring peas is complemented by the tartness of buttermilk and the sting of green onion.  Crispy prosciutto, served on the side, adds salt and a little whimsy to the dish.

The most involved part of this recipe is shelling the peas.  Two cups doesn't sound like a lot, but after you've been shelling peas for 30 minutes and your measuring cup still looks empty, you'll realize that it's actually a lot.  That being said, the fresh peas are what make this dish special, so don't even think about cheating and using frozen peas.  If you're lucky enough to find freshly-shelled peas, available at some farmers markets, they're a great alternative.

This recipe makes enough to serve 6 as a small first course or amuse bouche.  If you want to serve it as a middle course, simply double the amounts in the recipe.  The soup is best if made the day before serving, allowing the flavors to intensify overnight.  The crispy prosciutto can be prepared several hours ahead of time, but are best if eaten the day they are prepared.

Chilled English Pea Soup with Crispy Proscuitto

Ingredients

Kosher salt
1/3 cup chopped green onions, green parts only
2 cups shelled English peas
1/2 cup buttermilk
2 tablespoons good olive oil
6 mint leaves
6 thin slices prosciutto
Freshly ground black pepper
Tabasco sauce

Instructions

1. Bring a large pot of salted water to a boil.  Fill a large bowl with ice and water.  Add the green onions to the boiling water and cook for about 30 seconds. 
2. Using a slotted spoon, transfer them to the ice water.  Once cool, drain them on paper towels. 
3. Add the peas to the boiling water and cook for 3 to 4 minutes. 
4. Using a slotted spoon, transfer them to the ice water and drain with the green onions once cool.
5. Place the green onions and peas in a blender along with the buttermilk, olive oil, mint leaves, 1 tablespoon salt and 6 cups of water. 
6. Blend on high speed until completely smooth, 4 or 5 minutes. 
7. Pass soup through a fine mesh strainer, pressing against the sides gently with the back of a wooden spoon to strain.  Clean the strainer, and then strain again into a clean bowl.  If the soup isn't completely smooth and free of all solid particles, strain again for a third time.
8. Chill the soup over ice, stirring occasionally. 
9. Cover and refrigerate overnight.
Crispy Proscuitto
10. The next day, preheat the oven to 375 degrees.  Line a rimmed baking sheet with Silpat.  Carefully lay the slices of prosciutto on top and bake for 10 to 15 minutes, or until crisp and slightly dark. 
11. Remove using tongs and drain on paper towels.  Store the prosciutto in an airtight container until ready to serve.
12. Remove the soup from the refrigerator and season to taste with additional Kosher salt, black pepper and Tabasco.
13. To serve, fill 6 chilled demitasse or other small cups (such as a tall shot glass or espresso cup) with equal portions of the soup.  Place a piece of prosciutto to the side of each cup and serve immediately.

Sunday, January 1, 2012

Brown Sugar and Citrus Cured Salmon

This salmon has become a staple at our holiday party and is always one of the first things to get eaten. It makes an elegant and impressive hors d'oeuvre, but it's simple to make and can be prepared days ahead of time and sliced just before the party.

The salmon can cure for anywhere from 24 to 48 hours. I prefer lightly-cured salmon, which is melt-in-your-mouth tender and still has prominent salmon flavor, so I only cure my salmon for 24 hours. If you prefer your cured salmon to have firmer flesh and saltier flavor, leave your fish in the cure for the full 48 hours. If you're squeamish about serving raw-ish fish to your guests, I would recommend curing your fish for longer than 24 hours.

This recipe will work well with any variety of salmon, but it has to be very fresh. Ask your fishmonger which salmon is the freshest, and choose that one. Try to begin curing the salmon on the same day you purchase your fish. This recipe will make enough fish to serve 6 as an appetizer. For larger parties, simply use a larger filet and increase the amount of curing mixture to maintain the correct ratio of fish to cure.

Ingredients 
1 pound very fresh salmon filet, skin on
1 cup Kosher salt
1 cup dark brown sugar
1 tablespoon black peppercorns
1/4 cup citrus zest from any combination of lemons, limes, oranges and grapefruits
several sprigs dill
creme fraiche


Instructions
  1. Combine the salt, sugar, peppercorns and zest in a medium bowl.
  2. Line the bottom of a glass baking dish with the dill. Pour a third of the curing mixture over the dill and smooth.
  3. Place the salmon, skin down, into the dish and pour the rest of the curing mixture over the fish. Smooth the curing mixture to form an even layer. The salmon should be completely encased in the curing mixture.
  4. Place a layer of plastic wrap directly onto the curing mixture, and place another glass baking dish on top of that. Weight with cans and place in the refrigerator for 24 to 48 hours.
  5. Remove the salmon from the curing mixture and rinse thoroughly under running water. Dry the salmon with paper towels and remove the skin using a filet knife. Slice as thinly as possible and serve with creme fraiche.

Tuesday, December 27, 2011

Braised Pork Belly (Fresh Bacon)

Anyone who knows me, knows that I love bacon. Pork belly, also known as "fresh bacon," is simply uncured slab bacon. It's where bacon comes from, so it follows that I would love it just as much as I love its smokey, crispy, mouth-watering relative. To no one's surprise, it turns out that I do.

Braised for hours in stock and aromatics, pork belly can be as tender as fillet of beef, but with so much more flavor. Just like a strip of bacon, the belly is composed of layers of fat and meat. Slow cooking helps to soften the tough layers of meat, while also infusing the tender layers of fat with the flavors of the braising liquid. When I buy belly, I try to look for pieces that have a good balance of fat and meat. Too much fat can be overwhelming in the mouth, and too much meat can result in a dry final product.

This recipe is based on Tom Colicchio's recipe for fresh bacon in "Think Like A Chef." The first few times I attempted Colicchio's recipe, I was always happy with the belly itself but couldn't quite nail the sauce. The original recipe finished the belly by browning it in a hot oven with the braising liquid still in the skillet. Something about putting that beautiful sauce in a hot oven ruined it every time. As a solution, I strain my braising liquid into a small sauce pan and gently reduce on the stove top until I get it just right. Meanwhile, I brown the belly with a little bit of extra stock, instead of my precious sauce.

The belly can be prepared through step 3 and held for several hours before completing. When buying pork belly, be sure to ask your butcher to leave the skin on. Also, try to pick a piece of belly that is relatively uniform in thickness. Pork belly is so cheap, don't be afraid to buy more than you need and trim it down to the choicest pieces at home. Serve with mashed potatoes, soft polenta, or our polenta cakes.
 

Ingredients

1 tablespoon canola oil
Kosher salt
Freshly ground black pepper
2 pounds pork belly, skin on
1 onion, roughly chopped
2 carrots, roughly chopped
2 celery stalks, roughly chopped
1 leek, white and light green part only, roughly chopped
6 garlic cloves, peeled
 
4 cups chicken stock


Instructions
  1. Heat oven to 350°F. Heat the oil in a large ovenproof skillet over medium heat until shimmering. Generously season the pork with salt and pepper. Add it to the pan, skin side down, and cook until the skin is well browned, about 15 minutes. Transfer the pork to a plate.
  2. Pour off all but about 2 tablespoons of the fat and add the onion, carrots, celery, leek, and garlic to the skillet. Cook the vegetables, stirring occasionally, until they are tender and beginning to brown, about 20 minutes. 
  3. Return the pork belly to the skillet, skin side down and fat side up, and add about 2 cups of stock (it should surround but not cover the meat). Bring the stock to a simmer, then transfer the skillet to the oven. 
  4. Gently simmer the pork, uncovered, for 1 hour, then add another cup of stock. Continue cooking until the pork is tender enough to cut with a fork, about 1 hour longer.
  5. Remove the skillet from the oven and allow the pork to cool in the braising liquid. This will take at least one hour.
  6. When ready to complete, increase the oven temperature to 400°F. 
  7. Remove the pork from the liquid, then gently lift off and discard the skin (use a small knife to separate any pieces that don’t come away from the fat easily). Score the fat, making crosshatch incisions, then cut the pork into 4 portions. This is rich stuff, so I recommend serving no more than one, 2-inch square piece to each guest.
  8. Strain the braising liquid through a fine mesh strainer into a small saucepan and discard the solids. Bring to a simmer over medium-low heat and reduce to a sauce-like consistency, skimming off any fat that rises to the surface. 
  9. Meanwhile, return pork, scored side up, to the skillet. Pour the remaining 1 cup of stock around the pork and transfer to the oven. Allow to cook, without basting, until the pork is heated through and the fat nicely browned, about 20 minutes.
  10. Serve the pork in shallow bowls with some of the sauce ladled over the top and around the meat.