Showing posts with label lemon. Show all posts

Wednesday, January 28, 2015

Whole Maine Lobster

Every year, TK and I go up to the Berkshires for New Years. Over the years, we have tried going out on New Year's Eve with mixed results. In the end, we've settled that the best plan is to not leave the Lakehouse at all if possible. Instead, we do lobster. When in New England, we figure, we are pretty much obligated to procure fantastic local lobsters, which we serve with haricot verts and potato gratin. This differs from our Summer lobster meal, when we serve our lobster with corn on the cobb and jalepeno cheddar biscuits. It is something I look forward to all year, and a great way to kick off the New Year. You just can't go wrong with a perfect whole lobster, boiled in salt water and served with butter and lemon. When your base ingredients are that good, the best thing to do is to let them speak for themselves, serve them simply, and enjoy.

Our preferred size lobster is between 1.5 lbs and 2 lbs (or to be entirely accurate, however much over 1.5 lbs the seafood salesman will give us before charging us the 2 lbs. lobster rate). Larger lobsters do not automatically mean better meat. The real 20 lbs. giants that they raffle off  in stores actually tend to have tougher meat. Lobsters shed their shells, and at certain parts of the years their shells are softer and thinner than others. These soft-shelled lobsters are significantly easier to crack, barely needing the cracker at times. Still, the softer the shell is, the newer it is, and the more room to grow the lobster has. This means the lobster will have more water weight and less meat inside, so you might want to consider a slightly larger lobster. These particular lobsters were the more common hard-shells.

The generally most anticipated part of having lobster is the killing of the lobster. Now, I think of lobsters as mutant sea bugs, so I have very little pity for them. But no one wants to make anyone suffer. We like to sedate the lobsters a little bit. We store them with wet paper towels on top in the fridge before we're ready, and then remove them one at a time and drop them in the pot. Sometimes, the fridge will be enough to make them mellow, but for particularly feisty lobsters, we put them in the freezer for about half an hour or less to sedate them. We try to minimize the time between when they are out of the fridge and when they are in the water. We submerge them completely, and feel that that is more humane than dragging it out by knifing them in the skull beforehand, though some do choose to do so.

Boiled Whole Maine Lobsters

lobsters
sea salt
butter (1/4 cup per lobster)
lemon juice (1/2 lemon per lobster)


Boiling Time For Lobsters:
1 lbs lobsters: 8-10 minutes
1.5 lbs lobsters: 12-15 minutes
2 lbs lobsters: 15-18 minutes
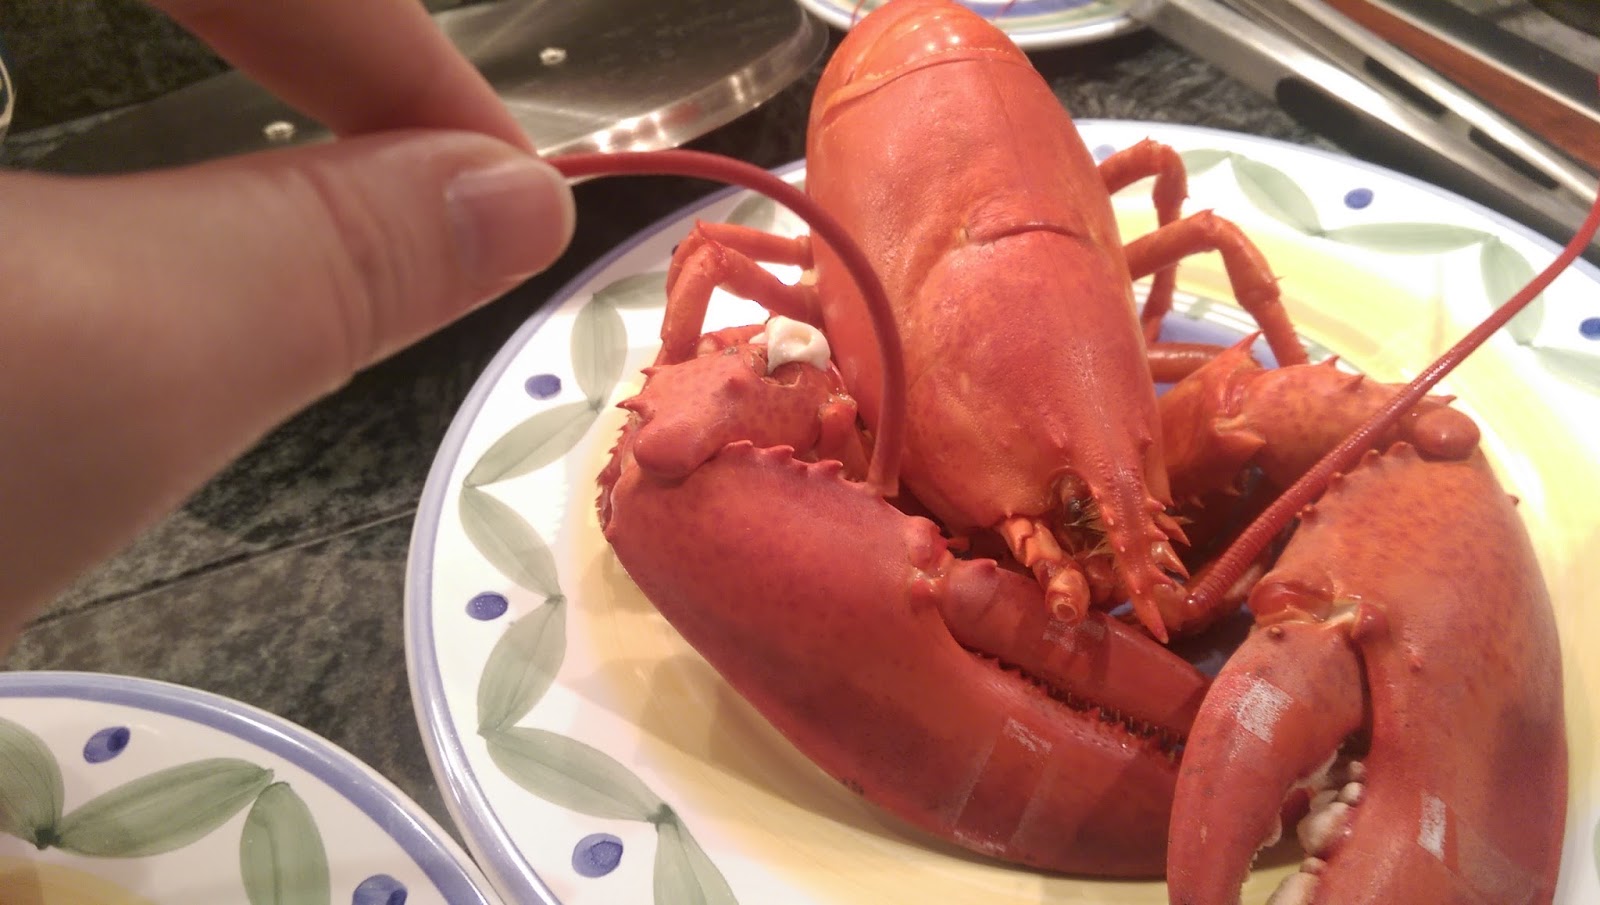


When you can pop the antennae off, your lobster is done.
  1. In the largest pot you can find with a tight-fitting lid, add 3 quarts of water for each lobster you want to boil, filling the pot about 2/3rd to 3/4 of the way full.
  2. Add generous amounts of sea salt (approx. 3 tablespoons per quart) to water and bring to a healthy boil. You are trying to mimic seawater.
  3. Remove your lobsters from the fridge one at a time and quickly dunk them head first into the boiling water. Make sure to remove the rubber bands before dropping them in the water as the rubber in the bands can actually change the taste of the boiling liquid. Don't worry, and don't drag it out. The lobster won't get you.
  4. Boil your lobsters for the necessary time depending on what size lobsters you have. (See above)
  5. The easiest way to tell if your lobster is done is to pull at one of its antennae. When it is fully cooked, it should pop-off in your hand with little to no resistance.
  6. Remove lobsters from pot and allow to rest and cool for at least five minutes.
  7. Melt butter in individual ramekins.
  8. Add lemon juice to the butter.
  9. Serve with lobsters, shell crackers, and a bowl for discarded shells.Remember this is not a race to see who can finish their lobster first.

Tuesday, January 7, 2014

Swedish Visiting Cake (Swedish Almond Cake)

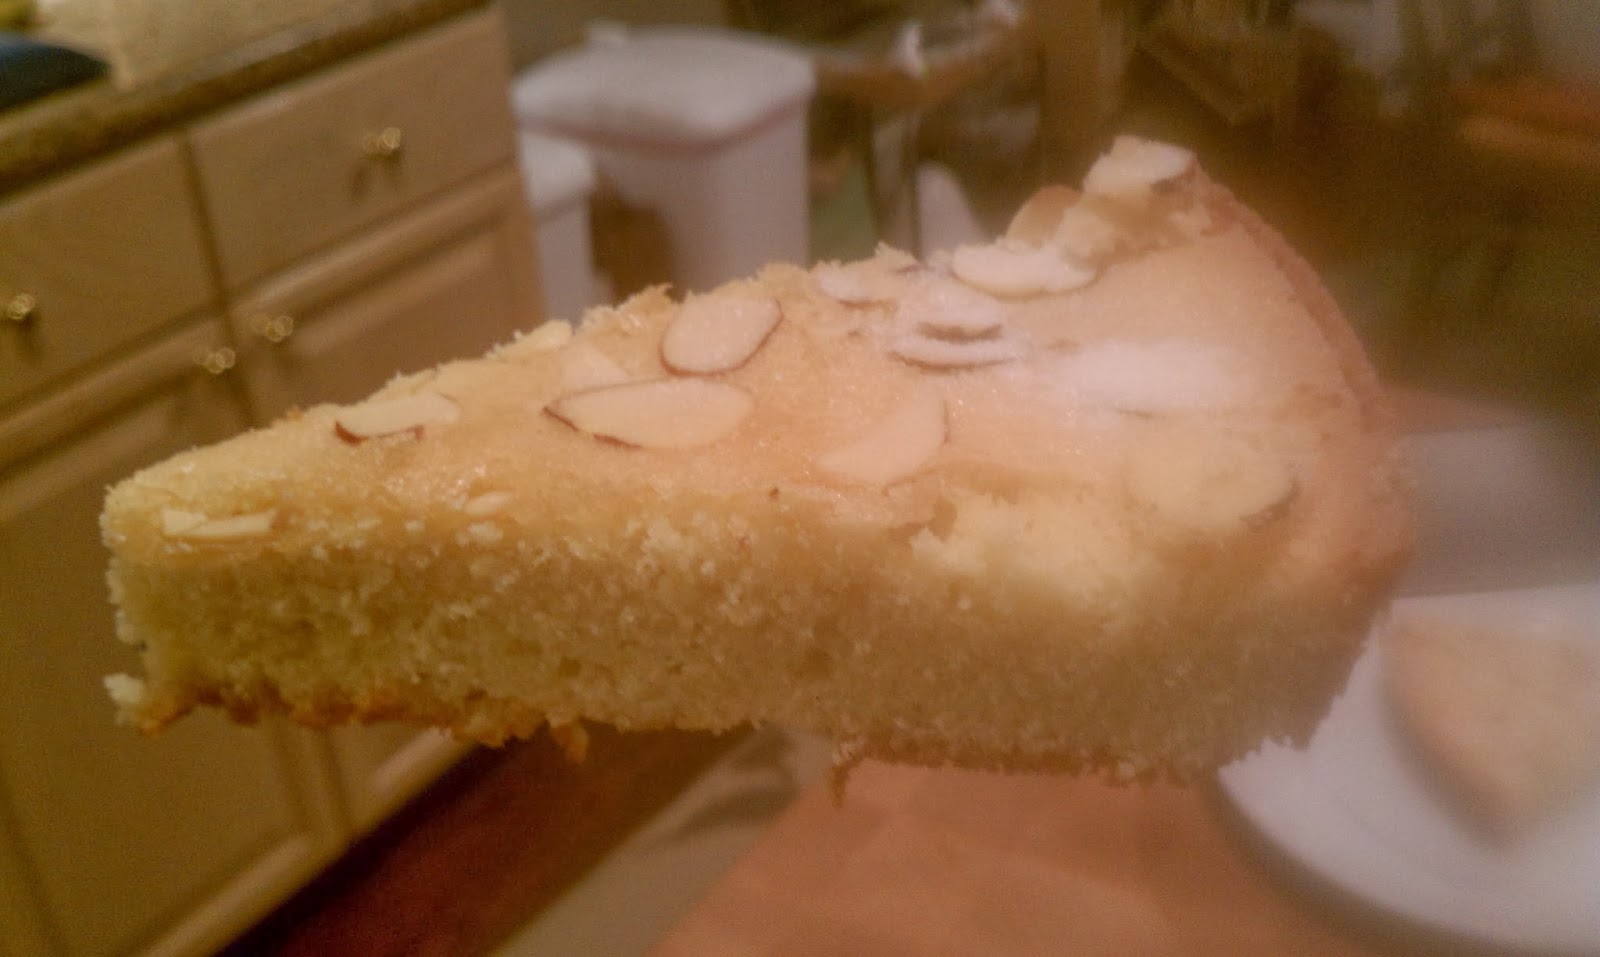
Almost every Northern European culture features some version of a traditional almond cake. This cake is so good, simple, and elegant that it needs no frosting other than a light dusting of sugar, and when served fresh is one of the best things you've ever tasted. It goes with everything and is just the right balance between a light and heavy dessert. This version is Swedish, and I particularly like it because it doesn't require almond flour or almond paste, two ingredients that I love but that can get pricey and more difficult to find.  The story behind Swedish visiting cake is that it is supposed to be simple enough to be started when you see someone coming at the end of the lane and out of the oven and ready to be served by the time tea is ready. This is only slightly far from true. You might want to zest the lemon before you see your guest. But otherwise, yeah, you could do this from start to finish, including all prep, in forty five minutes with ingredients you most likely have on hand.

Now, it needs to be stated that my family is Swedish, and it would be very tempting to pass this off as a long running family recipe that my Swedish grandparents made. But actually, it is from Dorie Greenspan's Baking cookbook, with slight alterations. When I first made it for my Swedish mother, she said, "we never made cake when people visited for tea. You'd bake cookies, and then have cookies stored in the freezer to bring out at a moment's notice for guests." And sometimes you would bring those cookies when you went to visit others. Well, this cake is also brought around when you visit others (carries nicely in a cast iron skillet). It  stores well for up to a week, and is just as delicious two days later as it is served warm. Basically, I think my Mormor in particular was more into cookies than cake and that is that. But the idea is the same, as is the importance of constantly having little desserts available for guests who come for tea, a problem the Swedes have put a good deal of time into solving.

One cake is best cut into 8 slices. It serves well with tea (obviously), but also light ice creams like vanilla and with red berries such as strawberries or raspberries. 

Swedish Visiting Cake


Ingredients

1 cup sugar, plus extra for sprinkling
Grated zest of 1 lemon
2 large eggs at room temperature
1/4 teaspoon salt
1 teaspoon pure vanilla extract
1 teaspoon pure almond extract
1 cup all-purpose flour
1 stick (8 tablespoons) unsalted butter, melted and cooled
About 1/4 cup sliced almonds


Instructions

  1. Center a rack in the oven and preheat to 350 degrees.
  2. Heavily butter a seasoned 9-inch cast-iron skillet or other heavy ovenproof skillet, a 9-inch cake pan or even a pie pan.
  3. Pour the sugar into a medium bowl.  Add the lemon zest and blend and toss the zest and sugar together with your fingertips until the sugar is moist and aromatic and lemony. Congrats, you've just made lemon sugar.
  4. Whisk in the eggs one at a time until well blended.  This is your only levener for the cake, so don't rush it.
  5. Whisk in the salt and the extracts.  
  6. Switch to a rubber spatula and stir in the flour.  
  7. Finally, fold in the melted butter. 
  8. Scrape the batter into the pan and smooth the top with a rubber spatula, evenly spreading the batter to the sides.  
  9. Scatter the sliced almonds over the top and sprinkle with a little sugar (it should take between 2-3 small spoonfuls).  If you're using a cake or pie pan, place the pan on a baking sheet.
  10. Bake the cake for 25 to 30 minutes, or until it is golden and the sugar crisps on the outside; the inside will remain moist, almost damp. If you are cooking multiple cakes, rotate once during baking, and remember to check both cakes for done-ness, as a cast iron skillet and a cake pan cook a little differently.  
  11. Remove the pan from the oven and let the cake cool for 5 minutes, then run a thin knife around the sides of the cake to loosen it.  You can serve the cake warm or cooled, directly from the skillet or turned out onto a serving plate. 


Monday, February 13, 2012

Poached Pears in White Wine

The poached pear is a controversial dessert. It's easy to make, but can be easy to screw up as well. It can be romantic and easy to serve, or it could just be an easy way out. The trick to good poached pears is, first and foremost, picking the right pears that are already in season, ripe, and oozing delicious pear, before being bruised and abused and thus not so pretty to serve. I've found that Bartlet work well, as do Bosc. Purchase them a bit firm, before you plan on using them, and let them ripen for a couple of days. If they start to go too fast, you can either slow them down via the fridge, or you can poach them, and they'll hold in their syrup for about three days. This brings us to another advantage of the poached pear, the fact that you can prep it all and save it in its syrup for a mighty three days before dessert/salad/etc. is served. That gives you two days to screw up your tart crust enough times to give up and just serve poached pears, or two days to masterfully perfect the rest of your meal in a more leisurely manner.

Lastly, choose a wine that you like to drink as your wine for poaching. Sometimes wine that maybe was a well-intentioned gift but wasn't really what you like to drink gets sidelined for cooking purposes, and that's fine if we're just de-glazing a pan, but when you poach a pear, you are essentially giving the pear the complexion of whatever wine you are using, so lay off the yellow tail for a bit. Use a sauvignon blanc or chardonnay that you drink on a regular basis, and you'll get lovely bright colors in your pear. A chardonnay will lend oakier tones, because it is chardonnay and that's an oakier wine. TK and I are not so big on the chardonnay, so we always use sauvignon blanc, but either of those wines will work and will avoid being overly sweet. You want the sweet to come from the vanilla bean, not the wine. The wine is there for brightness.

How do you serve your poached pears? Well, you can add some nuts and frisee and some goat cheese and you have your self a pretty nice upscale salad, or you can slice and add to a decedent pear tart with frangipane, or you can serve simply and beautifully with some vanilla or ice cream and tea cookies. It can serve as the sweet counter to a savory cheese plate or first course, or stand alone as a dessert. It's really a versatile little course that's good to have in your pocket.


Poached Pears with White Wine

1 bottle white wine (750 ml)
2/3 cup granulated sugar (about 4 1/2 ounces)
2 tablespoons lemon juice from 1 lemon plus 4 or 5 large strips zest removed with vegetable peeler
1 cinnamon stick
15 - 20 whole black peppercorns
3 whole cloves
1/8 teaspoon table salt
1 vanilla bean, slit in half lengthwise (optional, but encouraged)
4 ripe but firm pears (about 8 ounces each), preferably Bosc or Bartlett

Instructions
  1. Combine wine, sugar, lemon juice and zest, cinnamon, peppercorns, cloves, and salt in large, nonstick saucepan or dutch oven. 
  2. Scrape seeds from vanilla bean pod using a paring knife and add seeds (they look like fine caviar) to the saucepan as well as the scraped out pod.
  3. Bring mixture to simmer over medium heat, stirring occasionally to dissolve sugar.
  4. Peel pears with vegetable peel making long verticle stripes from stem to blossom end of pear.
  5. Working quickly to avoid discoloration, cut pears in half.
  6. Remove seed core of pear.
  7. Cut out the blossom end of pear, then cut a long narrow "V" from cored center of pear up to and around the stem of the pear, removing the stem and the fibrous center core of pear (see photo below of pear halves for what pears should look like).
  8. Gently slide pears into simmering wine using a spatula or slotted spoon.
  9. Increase heat to high and return to simmer then reduce heat to low. Simmer while covered until pears are tender enough that a toothpick or skewer inserted into pear should slide in and out with very little resistance and the outer edges of pears have turned translucent. Turn pears in liquid halfway through poaching time using wooden spoon or spatula. Pears should simmer for about 10 minutes total.
  10. Off heat, cool pears in liquid, partially covered, until pears have turned translucent and are cool enough to handle, about 1 hour. (Pears and liquid may be transferred to nonreactive bowl or container, cooled to room temperature, covered, and refrigerated for up to 3 days.)
  11. Remove from liquid and serve pears as desired, additionally slicing if necessary. If preparing a tart, dry pears on paper towels to prevent tart from becoming soggy.

Friday, January 20, 2012

Pasta With Kalamata Olives, Garlic and Basil

This is a pretty easy way to take a simple pasta dish and make it complex and deeply layered. The acid of the tomato paste, brightness of the lemon, salt of the anchovy paste (or olive paste if preparing as vegetarian/no anchovy version), and fresh herb of the basil create flavors all around. It's a warm, flavorful meal that isn't half bad for lunch the next day, either.

To make the recipe vegetarian, just substitute kalamata olive paste for the anchovies/anchovy paste. You can also do this if you are simply scared of the anchovy, as many people are. I encourage you, however, not to fear these salty, oily fish, but embrace it. The easiest way to think of anchovy is as the X factor in a lot of things, such as this dish, or Ceasar salad. You can't fully taste it, but it adds a brine-y note that is distinct and often what people love about these dishes. Admittedly, it can be a mess to work with straight from the jar (always get the white filets). It's oily. That's why we often substitute in a little bit of anchovy paste in place of the filets to save time and clean-up. The filets are better, but so is not cleaning an extra knife and cutting board and figuring out what to do with the rest of the jar of anchovies. Like with tomato paste, we buy the tubes of anchovy paste, and keep the leftovers in the fridge for later. This way we don't feel wasteful buying a whole can of tomato paste and then only using a tablespoon. How many recipes really call for a whole can of tomato paste, anyway?

If you find the salt of kalamata olives is too strong, you can use Manzilla olives in their place. The original recipe for this had bread crumbs to thicken, but we've never really had a problem with the sauce being runny, so we've removed them, though we have continued to use the full amount of garlic. Basil can be expensive, and you can reduce it as low as half a cup if necessary.


Cooking Time: 40 minutes, Serves 4


Ingredients

1/4       cup extra-virgin olive oil
6          medium garlic cloves, minced or pressed through garlic press (about 2 tablespoons)
1          tablespoon minced white anchovy fillets (4 to 6 fillets)  
           OR 1 teaspoon of anchovy paste 
           OR 1 teaspoon kalamata olive paste (if vegetarian)
1          tablespoon tomato paste
1/4-1/2 teaspoon hot red pepper flakes
1/4        cup oil-packed sun-dried tomatoes , drained, rinsed, patted dry, and cut into thin strips
1           cup pitted kalmata olives , well rinsed and coarsely chopped (1 8 oz bottle)
1 3/4     teaspoons table salt
1           pound rigatoni (mezze) or farfalle (any short pasta will work)
2           ounces finely grated Parmesan cheese (about 1 cup)
3           tablespoons chopped fresh parsley leaves
1 1/2     cups lightly packed fresh basil leaves , roughly torn
            Ground black pepper
1           lemon , cut into wedges


Instructions

  1. Combine 2 tablespoons quality olive oil, garlic, anchovies (or paste of choice if substituting), tomato paste, red pepper flakes, sun-dried tomatoes, and olives in medium bowl. Make sure olives are well-rinsed of brine prior to chopping and adding. Set aside.
  2. Meanwhile, bring 4 quarts water to boil in Dutch oven over high heat. Add rigatoni and salt.
  3. While pasta is cooking, heat 12" nonstick skillet to medium heat and add olive mixture and remaining olive oil. Cook until olive mixture is aromatic and oil has turned rusty red, 4 to 6 minutes. 
  4. Remove 1 cup pasta cooking water from pot and add to skillet. Bring to simmer and cook for 2 minutes. Remove pan from heat while pasta finishes cooking.
  5. When pasta is just shy of al dente, drain pasta, reserving 1/2 cup of pasta cooking water, and transfer back to Dutch oven. 
  6. Add olive mixture to pasta and toss over medium heat until pasta absorbs most of liquid, about 2 minutes. Stir in 1/2 cup Parmesan. Adjust consistency of sauce with reserved pasta water. (Sauce should cling to pasta but not be too loose or runny.) 
  7. Remove pot from heat and stir in parsley and basil; adjust seasoning with pepper. 
  8. Sprinkle with parmesan and serve with lemon wedges to be added prior to eating.

Sunday, January 1, 2012

Brown Sugar and Citrus Cured Salmon

This salmon has become a staple at our holiday party and is always one of the first things to get eaten. It makes an elegant and impressive hors d'oeuvre, but it's simple to make and can be prepared days ahead of time and sliced just before the party.

The salmon can cure for anywhere from 24 to 48 hours. I prefer lightly-cured salmon, which is melt-in-your-mouth tender and still has prominent salmon flavor, so I only cure my salmon for 24 hours. If you prefer your cured salmon to have firmer flesh and saltier flavor, leave your fish in the cure for the full 48 hours. If you're squeamish about serving raw-ish fish to your guests, I would recommend curing your fish for longer than 24 hours.

This recipe will work well with any variety of salmon, but it has to be very fresh. Ask your fishmonger which salmon is the freshest, and choose that one. Try to begin curing the salmon on the same day you purchase your fish. This recipe will make enough fish to serve 6 as an appetizer. For larger parties, simply use a larger filet and increase the amount of curing mixture to maintain the correct ratio of fish to cure.

Ingredients 
1 pound very fresh salmon filet, skin on
1 cup Kosher salt
1 cup dark brown sugar
1 tablespoon black peppercorns
1/4 cup citrus zest from any combination of lemons, limes, oranges and grapefruits
several sprigs dill
creme fraiche


Instructions
  1. Combine the salt, sugar, peppercorns and zest in a medium bowl.
  2. Line the bottom of a glass baking dish with the dill. Pour a third of the curing mixture over the dill and smooth.
  3. Place the salmon, skin down, into the dish and pour the rest of the curing mixture over the fish. Smooth the curing mixture to form an even layer. The salmon should be completely encased in the curing mixture.
  4. Place a layer of plastic wrap directly onto the curing mixture, and place another glass baking dish on top of that. Weight with cans and place in the refrigerator for 24 to 48 hours.
  5. Remove the salmon from the curing mixture and rinse thoroughly under running water. Dry the salmon with paper towels and remove the skin using a filet knife. Slice as thinly as possible and serve with creme fraiche.

Monday, August 22, 2011

Chilled Cucumber-Avocado Soup with Crab Salad

I love cold soups, especially cold cucumber soup.  It reminds me of hot midday meals in the Caribbean and Mexico.  Of course, eating it at home is pretty good, too.

When I make this dish for guests I want it to transport them the same way it transports me, so I add lots of flavor.  The addition of avocado and coconut milk to pureed cucumber makes the soup creamy-smooth, and adds a pleasant sweetness.  I cut through that sweetness with just enough Thai green curry paste and serrano chile to linger on your palette.  The crab salad, which can be omitted for a vegetarian friendly plate, adds a luxurious element to the dish and compliments the flavors in the soup perfectly.

The soup is best eaten the day after it’s made to give the flavors time to develop.  If your blender is too small to accommodate all of the ingredients (remember to factor the water into your calculation), blend the soup in batches.  It’s worth splurging for jumbo lump crabmeat for this recipe.  The crab is dressed simply, so the relative quality of your product will really show though.

Chilled Cucumber-Avocado Soup with Crab Salad

Ingredients

Cucumber Avocado Soup
2 cucumbers, about 12 ounces each, peeled, seeded and coarsely chopped
2 Hass avocados, coarsely chopped
3 teaspoons Thai green curry paste
2 teaspoons sugar
3 teaspoons finely grated lime zest from 3 limes
2 serrano chiles, seeded and chopped
1 13-ounce can unsweetened coconut milk
3 tablespoons lime juice from 3 limes
Fine sea salt
Cayenne pepper
Ground white pepper
Siracha (optional)

Crab Salad (Optional)
1 pound jumbo lump crab meat, picked over
2-3 tablespoons lemon juice from 1 lemon
1 tablespoon minced chives
Black pepper


How to Pit An Avocado

Instructions

  1. In a blender, puree the cucumbers until smooth.  Add the avocados, curry paste, sugar, lime zest and chile.  Process until blended.  Add 3 1/2 cups of water, the coconut milk and lime juice and process until smooth.  Transfer the soup to a large bowl and season with salt, cayenne and white pepper to taste.  Cover and refrigerate until chilled, or overnight.
  2. When ready to serve the soup, place the crabmeat in a medium bowl and add the lemon juice and chives.  Toss gently to combine.  Season with salt, black pepper and cayenne to taste. 
  3. Taste and season the now developed flavors of the soup with salt, white pepper, and drops of siracha for added heat (optional--be gentle).
  4. To serve, mound a small pile of the crab salad in the center of a wide soup bowl.  Carefully ladle some of the soup around the crab.  The crab should still be visible above the soup.  Don’t’ submerge it.  Repeat with remaining bowls.  Finish the soup with a drizzle of olive oil and a pinch of freshly ground black pepper.

Sunday, June 5, 2011

Tomato and Avocado Ceviche


You can use almost any whitefish in this recipe, though we've had very good success with halibut. Other fish suggestd include tuna, salmon, sea bass, sole, sea scallop and shrimp. The recipe suggests thin fish such as sole, flounder or tilapia as easy because they do not need to be cut width-wise (which should be no thicker than 1/3 inch for even cooking). The important part is to keep the pieces of fish approximately the same size cubes so that they cook in the citrus at the same rate. Because we are essentially cooking the fish with the acid from the citrus and not applying any heat, it's important to use fresh (from the store that day, not frozen, etc) fish and fresh lemons and limes. The brightness of the lemons and limes are the key to the flavor of the dish. Don't worry, it cooks, and will turn opaque to prove it. You actually can overcook things with citrus, so don't leave it in the marinade too long.

Be sure to pat all seafood dry with paper towels so that any moisture does not water down the marinade. To prep in advance, you can mix all the citrus marinade ingredients together (jalepeno, red pepper, garlic, lemon, lime, etc.) in one bowl, the cut seafood in another, and the added veggies minus avocado (scallions, cilantro, cherry tomatoes, oil, and sugar) in another. When it is time to start marinating, add the fish to the citrus. Add the avocado just before serving to prevent it from breaking down, turning brown, or making everything green. This will serve a generous 4 portions for a first course or a smaller 6 portions.


Tomato and Avocado Ceviche


Ingredients


1 pound extra-large shrimp (21 to 25 per pound), large sea scallops, skinless fish fillets, or a combination
1teaspoon grated lime zest from 1 lime
1/2cup juice from 4 limes
1/2cup juice from 4 lemons
1small red bell pepper , stemmed, seeded, and chopped fine
1-2 jalapeno chile (small), stemmed, seeded, and minced
1 medium garlic clove , minced or pressed through a garlic press
Salt
1/4cup extra-virgin olive oil
4-6 scallions , sliced thin (about 1 small bunch)
1cup cherry tomatoes , quartered
3tablespoons minced fresh cilantro leaves
1/2teaspoon sugar
1 ripe avocado , pitted and diced fine
Ground black pepper

Instructions

1. If using shrimp, peel them completely, devein, and slice each shrimp in half lengthwise using a paring knife (through the deveined groove in the back). If using scallops, remove the side tendon and slice into 1/3-inch-thick rounds. If using fish, remove any bones and slice into 1-inch squares about 1/3 inch thick.

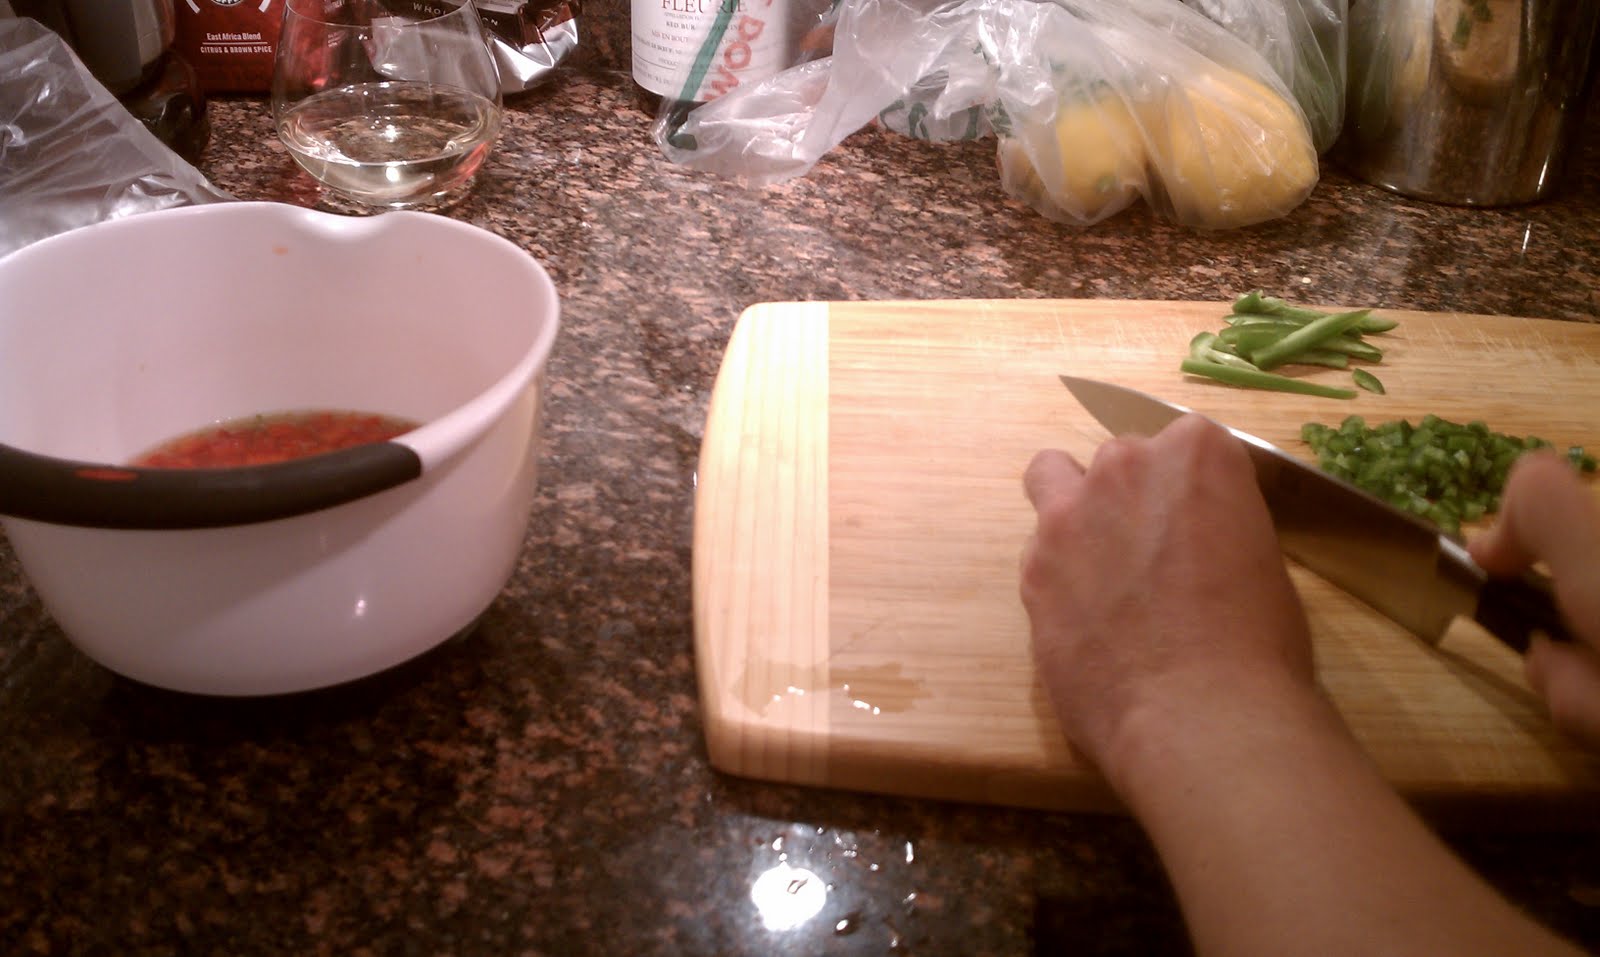
2. Stir the lime zest, lime juice, lemon juice, bell pepper, jalapeno, garlic, and 1/2 teaspoon salt together in a medium bowl. Gently stir in the seafood, cover with plastic wrap, and refrigerate until the seafood is firm, opaque, and appears cooked, 45 to 60 minutes, stirring halfway through the marinating time.

3. Place the mixture in a fine-mesh strainer, leaving it a little wet, then return to the bowl. Gently stir in the oil, scallions, tomatoes, cilantro, and sugar followed by the avocado. Season with salt and pepper to taste before serving.

Monday, March 21, 2011

Spring Vegetable Risotto

This risotto is a giant bowl of Spring and freshness. It's beautiful to serve and to look at, with the bright green asparagus and green peas poking out of the cheesy, smooth risotto. And the done-up broth and lemon add a level of freshness that just really brings the whole dish together. It's also a recipe of not-wasting, as you use the leftover stems, rough leek greens, asparagus ends, and other leftover bits from prep to infuse the broth with even more freshness. It's not in the recipe because its not a mushroom risotto, but if you have any mushrooms stems to add from another project, you should do so, as it adds a nice umami flavor to the veggie broth (if you are doing this vegetarian). This recipe is pretty much a testament to the wonders of making your own broth, so be sure not to skip this step!

I tend to not put as much mint as the original Cooks Illustrated recipe calls for. I like the stems in the broth, but I'm just not a fan of the raw texture of mint in much anything. I am however, a fan of garlic in EVERYTHING, so I've upped the amount of garlic in the recipe. (So if you are like me and add two extra cloves of garlic to most recipes, fear not, I have added them already!) It can be a little difficult to judge when the rice has become "transparent on the sides" so I try to stick to the time estimate there. As far as when the liquid is gone, I judge that by if you drag a rubber spatula across the bottom of the dutch oven, does the cleared line remain clear or does the risotto fall back and cover it with liquid immediately? When it stays dry, it's time to add more liquid or move on in the recipe. The exception is this is the last time, where you want to keep it a LITTLE wetter than you have prior just to ensure that once its off-heat and butter, lemon juice, and cheese have been added, it does not get too stiff. If it does, you can loosen it with a little more stock at the end, but be careful not to overdo it. You don't want the initial taste of the dish to be stock rather than lemon.

Cooks Illustrated includes a note on substituting onion for leek (1 for the broth, 2 for the risotto). I've never tried it, and think it would be a shame not to include the leeks because leeks marry so well and add even more green to the recipe. On the other hand, if you have no leeks, this could be an option. Be sure to remember the lemon at the end. The citrus really brings out the freshness of the veggies.

Spring Vegetable Risotto

Ingredients

2 tablespoons minced fresh parsley leaves, stems reserved
1-2 tablespoons minced fresh mint leaves, stems reserved
1/2 teaspoon finely grated zest from 1 lemon
1 pound asparagus , tough ends snapped off and reserved, spears cut diagonally into 1/2-inch thick pieces
3 medium leeks , white and light green parts halved lengthwise, washed, and sliced thin (about 4 cups), roughly chopped tough greens reserved
4 cups low-sodium chicken broth or vegetable broth
3 cups water
5 tablespoons unsalted butter
1/2 cup frozen peas
4 medium garlic cloves, pressed through garlic press
11/2 cups Arborio rice
1 cup dry white wine
1 cup grated Parmesan cheese (3/4 cup for recipe, 1/4 cup for serving)
1-2 tablespoons juice from 1 lemon

Instructions

  1. For the Gremolata: Combine minced parsley, mint, and lemon zest in small bowl, reserving the rest of the lemon for juice and the parsley and mint stems for broth. Set aside.
  2. For the Broth: Chop tough asparagus ends and leek greens into rough 1/2-inch pieces. Bring chopped vegetables, reserved parsley and mint stems, broth, and water to boil in large pot over high heat. 
  3. Reduce heat to medium-low, partially cover, and simmer 20 minutes. 
  4. Strain broth through fine-mesh strainer into medium saucepan, pressing and squishing the solids against the strainer to extract as much liquid as possible. Trash the solids. 
  5. Cover and set over low heat to keep broth warm. This can be done in advance and brought back to low heat prior to starting the risotto.
  6. For the Risotto: Heat 1 tablespoon butter in large Dutch oven over medium heat. When foaming subsides, add asparagus spears, pinch of salt, and pepper to taste. Cook, stirring occasionally, until asparagus is crisp-tender, 4 to 6 minutes. 
  7. Add peas and continue to cook 1 minute. Transfer vegetables to plate and set aside.
  8. Melt 3 tablespoons butter in now-empty Dutch oven over medium heat. When foaming subsides, add leeks, garlic, 1/2 teaspoon salt, and 1/2 teaspoon pepper. 
  9. Cook, stirring occasionally, until leeks are softened, 4 to 5 minutes. 
  10. Add rice and cook, stirring frequently, until grains are translucent around edges, about 3 to 4 minutes. 
  11. Add wine and cook, stirring frequently, until fully absorbed, 2 to 3 minutes.
  12. When wine is fully absorbed, add 3 cups hot broth to rice. Simmer, stirring every 3 to 4 minutes, until liquid is absorbed and bottom of pan is almost dry, about 12 minutes.
  13. Stir in about 1/2 cup hot broth and cook, stirring constantly, until absorbed, about 3 minutes; repeat with additional broth 3 or 4 times until rice is al dente. 
  14. Off heat, stir in remaining tablespoon butter, Parmesan, and lemon juice. 
  15. Fold in asparagus and peas. If necessary, add up to 1/4 cup additional hot broth to loosen texture of risotto. 
  16. Sprinkle each serving with gremolata and Parmesan and serve immediately