Showing posts with label make ahead. Show all posts

Saturday, September 6, 2014

Fresh Plum Ice Cream

Plums are my favorite of the fruits. I could eat an entire bag of plums in one sitting. The problem is that for every delicious, sweet, dripping and perfect plum, I eat probably five or so tart, hard, and not-yet-ready plums in anticipation. Plum season is woefully short. It occupies only a few weeks in August/September (although plums are available much longer). So the trick is to have some ways to use those close-but-no-cigar, not-quite-ready plums to capitalize on their increased availability. 

While making this recipe with in-their-prime plums is ideal (the better your fruit, the better your ice cream), you can extract an incredible amount of sweetness out of the plums through boiling, even if starting with a tart plum. Just the smell and the beautiful color of the plums in the pot will tell you how wonderful your ice cream is going to be. The end result is not overly sugary or cloying (the downfall of many fruit or berry ice creams) or rich. This is a light summer fruit ice cream that we've served with our Meyer Lemon Yogurt Cake in the photos.


Adding plum ice cream to ice cream maker This ice cream is also notable because you do not make a custard and you do not use eggs. Simply create your fruit and syrup, add cream, and blend. If you're worried about accidentally cooking the eggs when making custard, but want something with cream and more body and smoothness than a sorbet, this is a great option. The lovely color is all natural from the skin of the plums (which, no, you do not have to peel the plums, and don't worry about slight bruising). Any type of plum will do. Pick the ones most in season. We used red plums, but black or any can work. The recipe was written in David Lebovitz's Perfect Scoop for wild plums. We substituted frambois for the kirsch due to what we had on hand.

Serve by itself, with fresh fruit, with cake, or however you want. It makes one quart of ice cream.


Plum Ice Cream


Ingredients

1 pound plums (whatever available, around 5-8 depending on varietal)
1/3 cup water
3/4 cup plus 2 tablespoons sugar
1 cup heavy cream
1/2 teaspoon kirsch or frambois


Instructions

  1. The night before, make sure bowl for ice cream maker is chilling in the freezer.
  2. Cut plums in half and remove pits.
  3. Cut each half in quarters (approximately 8 slices per plum).
  4. Place in medium (3 qt) non-reactive saucepan.
  5. Add water. The juices from the plums will create the rest of the necessary moisture.
  6. Cover and cook over medium heat for about 8-10 minutes or until tender and easily split without resistance by pressing with the back of a wooden spoon.
  7. Remove from heat and stir in sugar until dissolved.
  8. Cool to room temperature (about an hour)
  9. Once cool, puree in a blender with the heavy cream and framboise until smooth and peels have been broken down as much as humanely possible.
  10. Chill mixture, pref. overnight but at least six hours.
  11. After thoroughly chilling, start ice cream maker and slowly add plum mixture in a drizzle. Note, this is written for our fairly standard $50 Cuisinart ice cream maker. If your ice cream maker's instructions are different, follow the directions for your ice cream maker.
  12. Run ice cream maker until mixture is no longer visibly moving around the scraper, and then wait a couple minutes longer, up to but not over twenty minutes total. This particular ice cream has taken pretty much the whole twenty minutes when we've made it before. If it is still moving at twenty minutes, you should still take it out (unless your ice cream maker says differently). Move to quart sized container and freeze until ready to serve.

Sunday, July 13, 2014

Mexican Style Shrimp Cocktail

Just as our Brown Sugar and Citrus Cured Salmon has become a tradition at our winter celebrations, this sweet-and-spicy shrimp cocktail based on an octopus recipe from the Rick Bayless cookbook has proved to be an immensely popular item at our parties during the warmer months. The first time we served this dish, our guests finished the entire bowl before E.S. even got to try one shrimp! Also like the cured salmon, this recipe is very simple.

Unlike your traditional shrimp cocktail arrangement – in which cooked shrimp are hung on the edge of a container of cocktail sauce – this recipe calls for the shrimp to be tossed in the sauce ahead of time, which allows the flavors of the sauce to penetrate the shrimp. Don’t add the shrimp to the sauce more than three hours before serving the cocktail, or the shrimp will start to get soft.

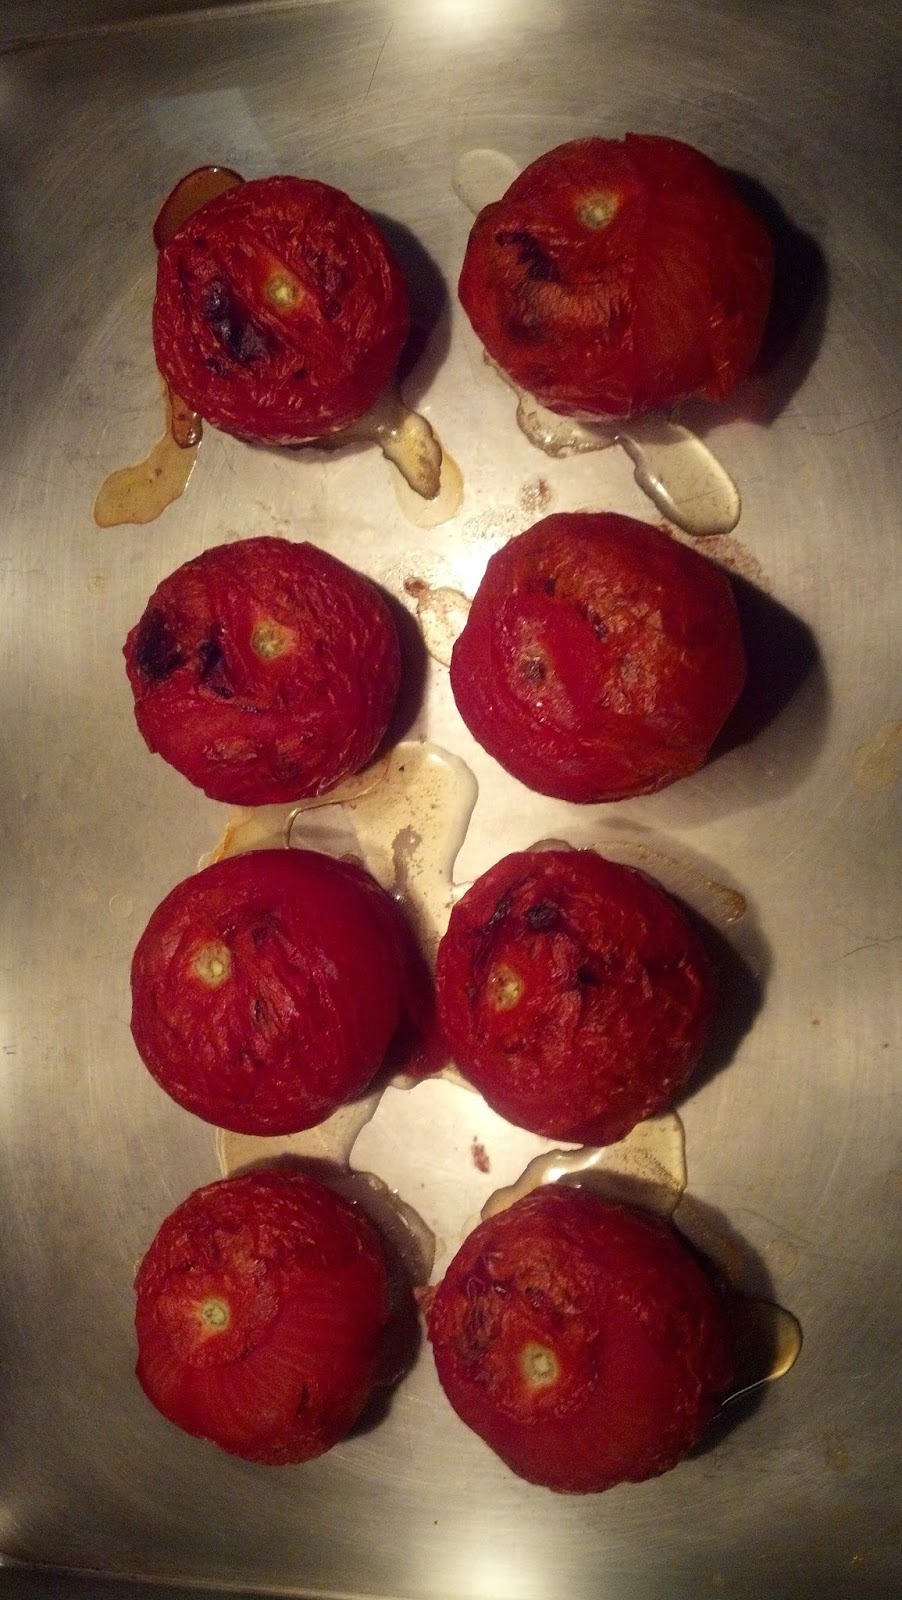
Tomatoes charred under a hot broiler, and a large quantity of hot sauce form the base of the cocktail sauce. I prefer Valencia or Cholula brand hot sauce for this recipe, as both have a subtle horseradish kick that compliments the shrimp nicely. Brown sugar and sherry vinegar provide a sweet contrast that balances the spice in the hot sauce.

Using precooked shrimp purchased from your local fishmonger makes this recipe a breeze. Just whip up the sauce in your food processor, chill in the refrigerator, and then toss in the shrimp. It’s that easy. Of course, if you want to cook your own shrimp, that will work too. Either way, be sure to remove all bits of shell and tail from your shrimp.

Serve this shrimp cocktail as part of a buffet in a large bowl, or as a plated first course in small glass bowls, topped with freshly sliced avocado and chopped cilantro.


Mexican Style Shrimp Cocktail

Ingredients

1 red onion, sliced thin
1 pound ripe tomatoes (2 large or 6 plum)
3 garlic cloves, peeled
1 tablespoon olive oil
2 tablespoons sherry vinegar
2 tablespoons brown sugar
¼ cup Mexican hot sauce (such as Valencia or Cholula brand)
2 ½ pounds cooked shrimp, shells and tails removed
1 ripe avocado, cut into small chunks
3 tablespoons chopped cilantro


Instructions

1. Roast the whole tomatoes on a rimmed baking sheet about four inches below a very hot broiler until splotchy black and thoroughly soft, at least 5 minutes per side. Remove and cool.

2.While the tomatoes are cooling, set the oven temperature to 425 degrees. Spread the onion and whole garlic cloves on a baking sheet and drizzle with the olive oil. Toss to combine. Place in the oven and roast until richly browned, about 15 minutes, stirring a few times to ensure even browning.

3. Pull the blackened skins off of the tomatoes, and scoop them into a food processor. Pulse several times to chop them into small pieces. Scrape into a medium bowl.

4. Scoop the onion and garlic into the food processor (don’t bother to clean the bowl of the food processor between uses). Pulse until finely chopped and add to the bowl with the tomatoes.

5. Add the sherry vinegar, brown sugar and hot sauce to the bowl and combine with the chopped vegetables. Season to taste with salt (I usually add about 2 teaspoons). Chill the cocktail sauce in the refrigerator.

6. An hour or two before you want to serve the shrimp cocktail, add the cleaned shrimp to the bowl and toss to combine. Try a shrimp to see if the cocktail needs additional salt or hot sauce. Once you are satisfied with the seasoning, return the bowl to the refrigerator.

7. When ready to serve, transfer the shrimp and sauce to an attractive bowl and top with the avocado and cilantro. Alternatively, divide the shrimp and sauce among small glass bowls and top each bowl with a few chunks of avocado and some chopped cilantro. Serve with high quality tortilla chips.

Related: Look at our Chilled Cucumber and Avocado Soup recipe to see how to pit an avocado.

Tuesday, January 7, 2014

Swedish Visiting Cake (Swedish Almond Cake)

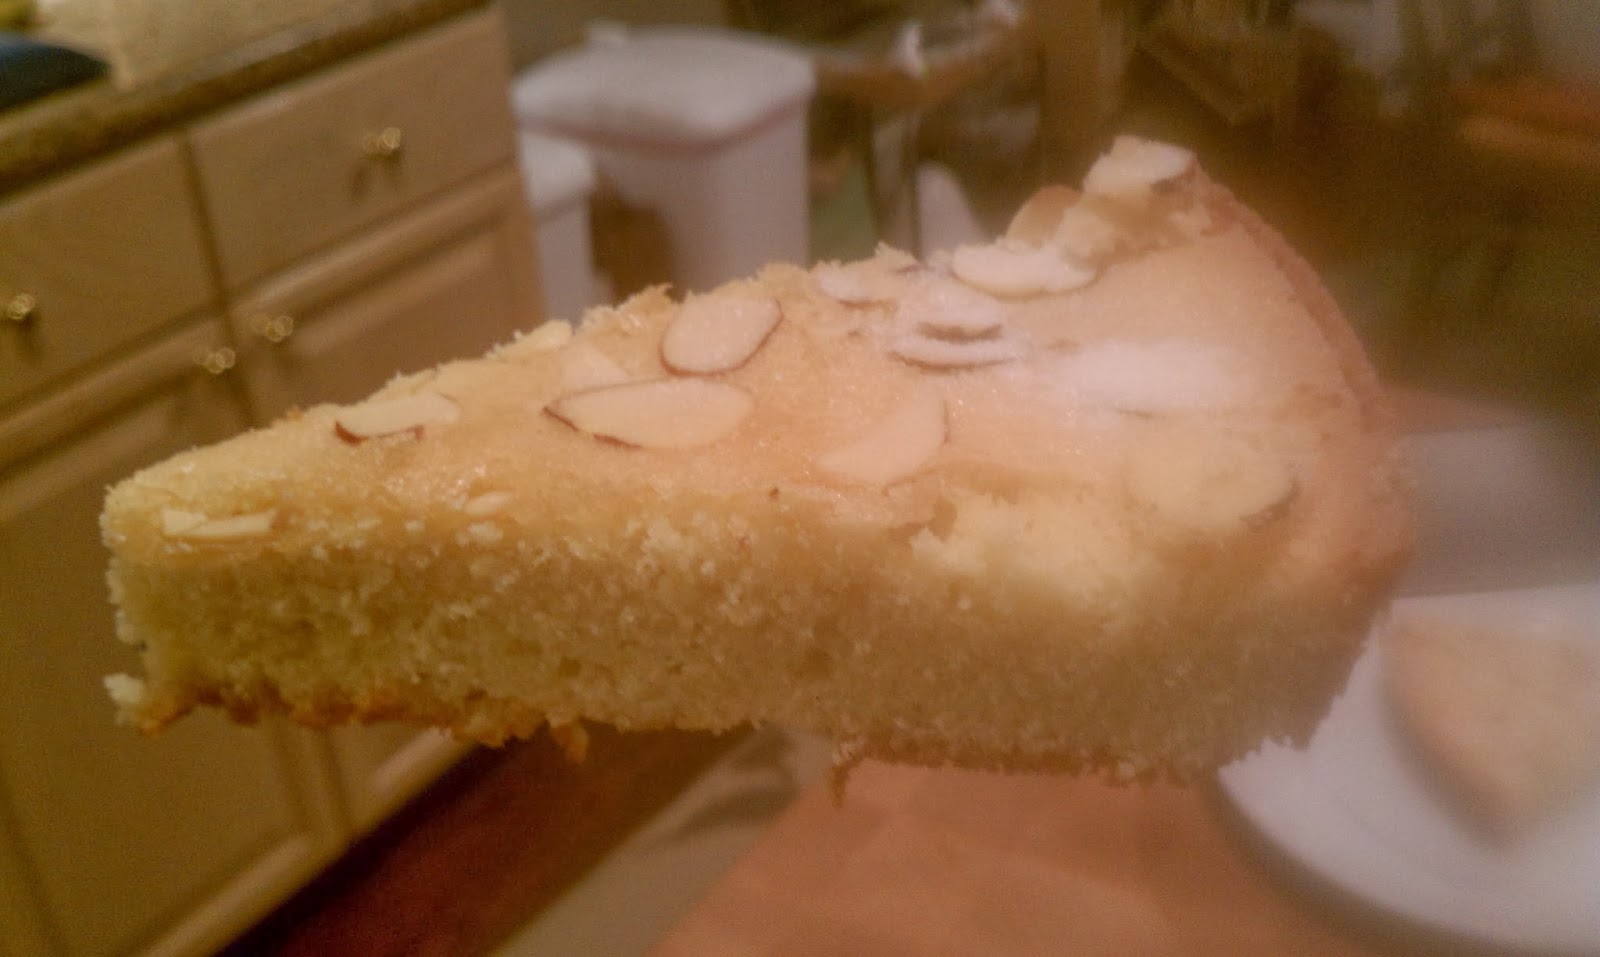
Almost every Northern European culture features some version of a traditional almond cake. This cake is so good, simple, and elegant that it needs no frosting other than a light dusting of sugar, and when served fresh is one of the best things you've ever tasted. It goes with everything and is just the right balance between a light and heavy dessert. This version is Swedish, and I particularly like it because it doesn't require almond flour or almond paste, two ingredients that I love but that can get pricey and more difficult to find.  The story behind Swedish visiting cake is that it is supposed to be simple enough to be started when you see someone coming at the end of the lane and out of the oven and ready to be served by the time tea is ready. This is only slightly far from true. You might want to zest the lemon before you see your guest. But otherwise, yeah, you could do this from start to finish, including all prep, in forty five minutes with ingredients you most likely have on hand.

Now, it needs to be stated that my family is Swedish, and it would be very tempting to pass this off as a long running family recipe that my Swedish grandparents made. But actually, it is from Dorie Greenspan's Baking cookbook, with slight alterations. When I first made it for my Swedish mother, she said, "we never made cake when people visited for tea. You'd bake cookies, and then have cookies stored in the freezer to bring out at a moment's notice for guests." And sometimes you would bring those cookies when you went to visit others. Well, this cake is also brought around when you visit others (carries nicely in a cast iron skillet). It  stores well for up to a week, and is just as delicious two days later as it is served warm. Basically, I think my Mormor in particular was more into cookies than cake and that is that. But the idea is the same, as is the importance of constantly having little desserts available for guests who come for tea, a problem the Swedes have put a good deal of time into solving.

One cake is best cut into 8 slices. It serves well with tea (obviously), but also light ice creams like vanilla and with red berries such as strawberries or raspberries. 

Swedish Visiting Cake


Ingredients

1 cup sugar, plus extra for sprinkling
Grated zest of 1 lemon
2 large eggs at room temperature
1/4 teaspoon salt
1 teaspoon pure vanilla extract
1 teaspoon pure almond extract
1 cup all-purpose flour
1 stick (8 tablespoons) unsalted butter, melted and cooled
About 1/4 cup sliced almonds


Instructions

  1. Center a rack in the oven and preheat to 350 degrees.
  2. Heavily butter a seasoned 9-inch cast-iron skillet or other heavy ovenproof skillet, a 9-inch cake pan or even a pie pan.
  3. Pour the sugar into a medium bowl.  Add the lemon zest and blend and toss the zest and sugar together with your fingertips until the sugar is moist and aromatic and lemony. Congrats, you've just made lemon sugar.
  4. Whisk in the eggs one at a time until well blended.  This is your only levener for the cake, so don't rush it.
  5. Whisk in the salt and the extracts.  
  6. Switch to a rubber spatula and stir in the flour.  
  7. Finally, fold in the melted butter. 
  8. Scrape the batter into the pan and smooth the top with a rubber spatula, evenly spreading the batter to the sides.  
  9. Scatter the sliced almonds over the top and sprinkle with a little sugar (it should take between 2-3 small spoonfuls).  If you're using a cake or pie pan, place the pan on a baking sheet.
  10. Bake the cake for 25 to 30 minutes, or until it is golden and the sugar crisps on the outside; the inside will remain moist, almost damp. If you are cooking multiple cakes, rotate once during baking, and remember to check both cakes for done-ness, as a cast iron skillet and a cake pan cook a little differently.  
  11. Remove the pan from the oven and let the cake cool for 5 minutes, then run a thin knife around the sides of the cake to loosen it.  You can serve the cake warm or cooled, directly from the skillet or turned out onto a serving plate.