Showing posts with label wine. Show all posts

Monday, February 13, 2012

Poached Pears in White Wine

The poached pear is a controversial dessert. It's easy to make, but can be easy to screw up as well. It can be romantic and easy to serve, or it could just be an easy way out. The trick to good poached pears is, first and foremost, picking the right pears that are already in season, ripe, and oozing delicious pear, before being bruised and abused and thus not so pretty to serve. I've found that Bartlet work well, as do Bosc. Purchase them a bit firm, before you plan on using them, and let them ripen for a couple of days. If they start to go too fast, you can either slow them down via the fridge, or you can poach them, and they'll hold in their syrup for about three days. This brings us to another advantage of the poached pear, the fact that you can prep it all and save it in its syrup for a mighty three days before dessert/salad/etc. is served. That gives you two days to screw up your tart crust enough times to give up and just serve poached pears, or two days to masterfully perfect the rest of your meal in a more leisurely manner.

Lastly, choose a wine that you like to drink as your wine for poaching. Sometimes wine that maybe was a well-intentioned gift but wasn't really what you like to drink gets sidelined for cooking purposes, and that's fine if we're just de-glazing a pan, but when you poach a pear, you are essentially giving the pear the complexion of whatever wine you are using, so lay off the yellow tail for a bit. Use a sauvignon blanc or chardonnay that you drink on a regular basis, and you'll get lovely bright colors in your pear. A chardonnay will lend oakier tones, because it is chardonnay and that's an oakier wine. TK and I are not so big on the chardonnay, so we always use sauvignon blanc, but either of those wines will work and will avoid being overly sweet. You want the sweet to come from the vanilla bean, not the wine. The wine is there for brightness.

How do you serve your poached pears? Well, you can add some nuts and frisee and some goat cheese and you have your self a pretty nice upscale salad, or you can slice and add to a decedent pear tart with frangipane, or you can serve simply and beautifully with some vanilla or ice cream and tea cookies. It can serve as the sweet counter to a savory cheese plate or first course, or stand alone as a dessert. It's really a versatile little course that's good to have in your pocket.


Poached Pears with White Wine

1 bottle white wine (750 ml)
2/3 cup granulated sugar (about 4 1/2 ounces)
2 tablespoons lemon juice from 1 lemon plus 4 or 5 large strips zest removed with vegetable peeler
1 cinnamon stick
15 - 20 whole black peppercorns
3 whole cloves
1/8 teaspoon table salt
1 vanilla bean, slit in half lengthwise (optional, but encouraged)
4 ripe but firm pears (about 8 ounces each), preferably Bosc or Bartlett

Instructions
  1. Combine wine, sugar, lemon juice and zest, cinnamon, peppercorns, cloves, and salt in large, nonstick saucepan or dutch oven. 
  2. Scrape seeds from vanilla bean pod using a paring knife and add seeds (they look like fine caviar) to the saucepan as well as the scraped out pod.
  3. Bring mixture to simmer over medium heat, stirring occasionally to dissolve sugar.
  4. Peel pears with vegetable peel making long verticle stripes from stem to blossom end of pear.
  5. Working quickly to avoid discoloration, cut pears in half.
  6. Remove seed core of pear.
  7. Cut out the blossom end of pear, then cut a long narrow "V" from cored center of pear up to and around the stem of the pear, removing the stem and the fibrous center core of pear (see photo below of pear halves for what pears should look like).
  8. Gently slide pears into simmering wine using a spatula or slotted spoon.
  9. Increase heat to high and return to simmer then reduce heat to low. Simmer while covered until pears are tender enough that a toothpick or skewer inserted into pear should slide in and out with very little resistance and the outer edges of pears have turned translucent. Turn pears in liquid halfway through poaching time using wooden spoon or spatula. Pears should simmer for about 10 minutes total.
  10. Off heat, cool pears in liquid, partially covered, until pears have turned translucent and are cool enough to handle, about 1 hour. (Pears and liquid may be transferred to nonreactive bowl or container, cooled to room temperature, covered, and refrigerated for up to 3 days.)
  11. Remove from liquid and serve pears as desired, additionally slicing if necessary. If preparing a tart, dry pears on paper towels to prevent tart from becoming soggy.

Sunday, December 18, 2011

Menu: Christmas Party Menu

Another  year, another holiday party. This is the one party that we have taken to throwing every year, partially as an excuse to buy a Christmas tree. Partially because this time of the year just makes me want to make cookies, cookies, and yet more cookies. Yet again, we were a little insane in the amount of food we prepared, but there are so many things we've started looking forward to as "something we'll do for the holiday party" that it's just hard to stop yourself. We'll be posting recipes as we find the time, recover from our hangovers, and look with horror at the mess we made.
This year, we added a spicy nut mix, homemade liver mousse, and a second vegetarian option of spicy sweet potato (a recipe I made up and am still working on perfecting). We also made pignoli cookies, which I had for the first time during our recent Tuscany trip. I insisted on trying to replicate them. These aren't quite as good as the ones I had in Italy but were an excellent first attempt and stand up on their own. In addition, we had our old favorites. You just can't go wrong with this beef recipe, or with bacon wrapped dates that matter. There's bacon. There's date. It's perfect.


So enjoy, and have a happy holiday season!


Appetizers -
Chicken "Faux Gras" Mousse with Cucumber Gelee
Truffle Butter Popcorn
Pistachio and Cranberry Stuffed Brie with Raw Honey

Main Courses -
Spanakopita Triangles (Vegetarian) We made these smaller than the dinner-sized portions we usually make. Just cut the phyllo six ways horizontally instead of in half vertically.
Chipotle Sweet Potato Pockets (Vegetarian)
Ginger and Vodka Cured Beef Tenderloin

Cookies -
Molasses Crinkles
Holiday Rice Krispie Treats

Beverages -
Mulled Wine
Egg Nog

Sunday, August 21, 2011

Osso Buco

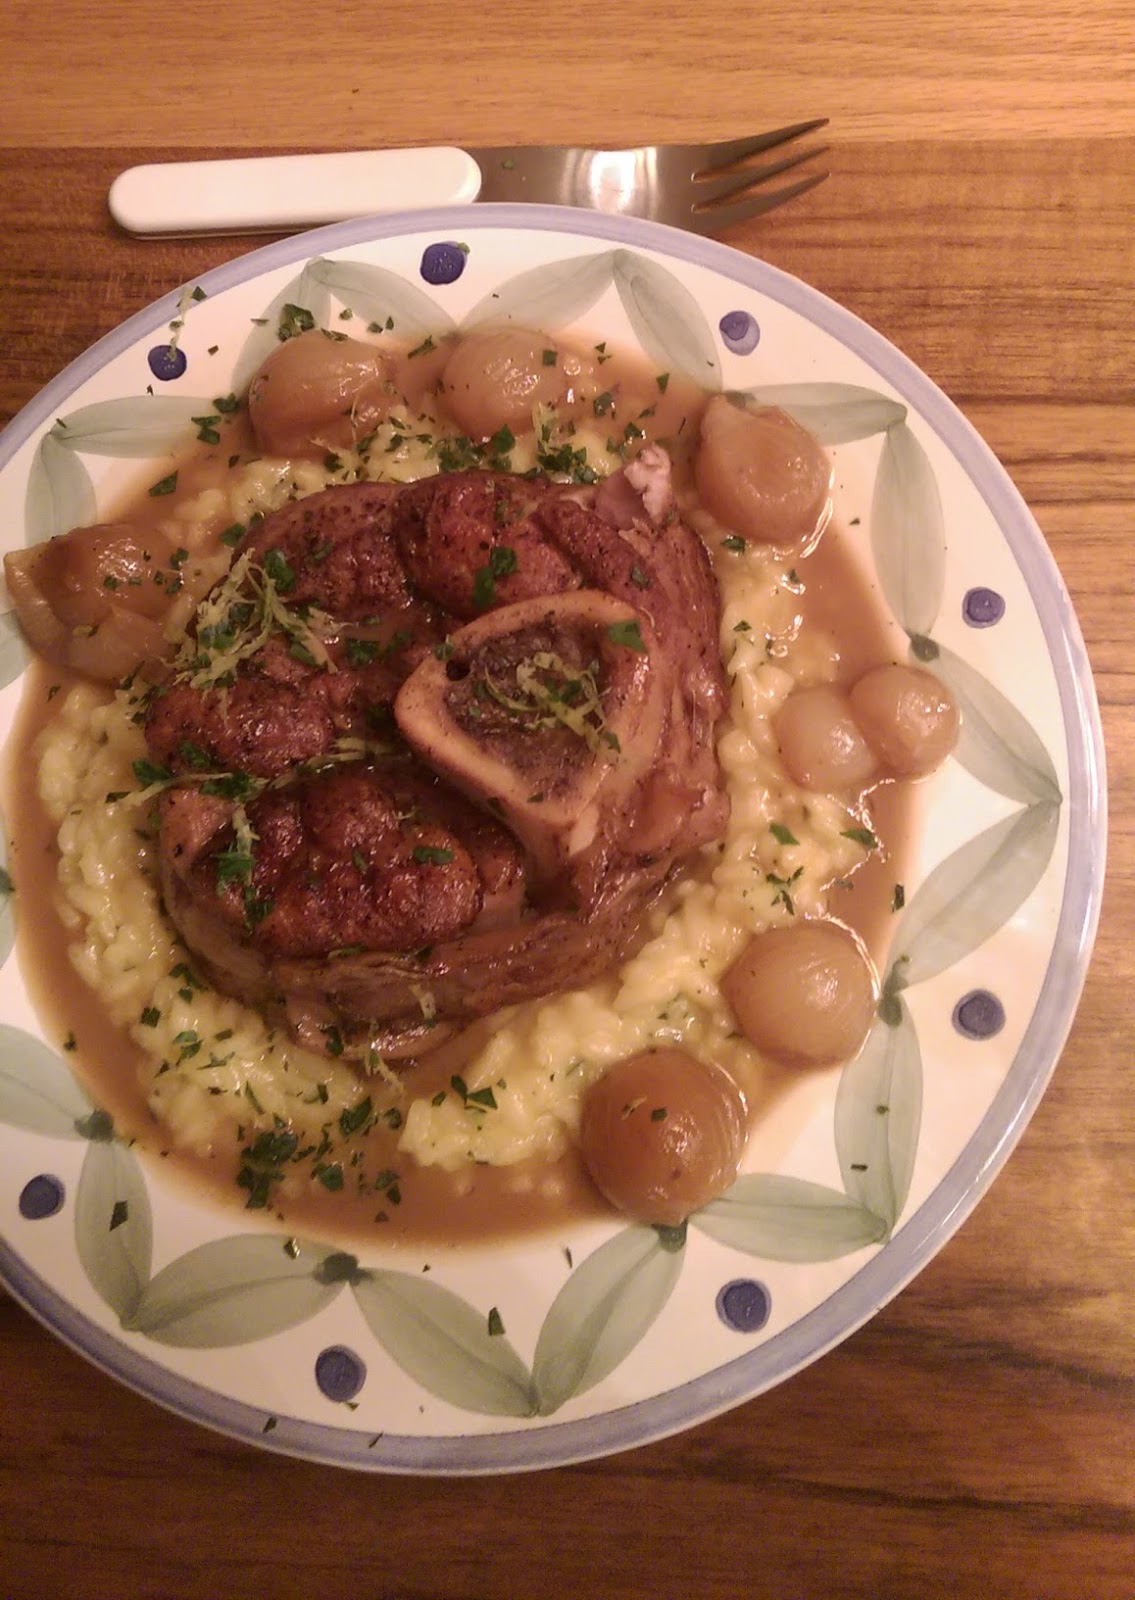
My relationship with this dish began when I was only a small child. My parents had taken me out to eat at an Italian restaurant. When the waiter came to the table he announced osso buco as one of the night’s specials. I remember thinking the name sounded silly, and asking my dad what it was. “Veal braised in wine,” he said. Like a fool, I wasn’t impressed. I suppose that’s what prompted him to order it. When it came to table he showed me how the hole in the middle of the bone was filled with marrow. He spread some onto a piece of bread for me to taste, and my life was never the same again.

Osso buco, which literally translates to ‘bone with a hole,’ is a thick slice of veal shank, traditionally braised for many hours in white wine and aromatics. Slow cooking transforms the tough shank meat into fall-off-the-bone deliciousness. Oh, and did I mention the bone marrow? Sometimes, it’s hard to decide which to eat first.

These days, I like to make osso buco for guests because I can throw it into the oven two hours ahead of time and forget about it. It also never fails to impress. When I’m lucky, E.S. will make risotto to accompany the osso buco, but simpler starches like egg noodles or mashed potatoes are equally delicious. I finish the dish with a sprinkling of gremolata, a mixture of parsley and lemon zest, which helps to brighten the dish and cut through the sweetness of the veal.

I recommend using slices of veal shank that are at least 1½ inches thick for this recipe. If you only see thinner piece in the case, ask your butcher if he can cut you some thicker pieces (2 inches is ideal). As with my braised lamb shank recipe, I finish the osso buco in the oven, which allows the meat to re-brown and helps the shank to hold their form on the plate. Serve with crusty bread for soaking up the extra braising liquid and, of course, for the bone marrow.

Osso Buco


Ingredients

4 slices veal shank, 1½ to 2 inches thick
Kosher salt
Black pepper
2 tablespoons olive oil
1 medium carrot, chopped
1 medium onion, chopped
½ celery rib, chopped
6 garlic cloves, chopped
5 sprigs parsley
1 sprig thyme
2 bay leaves
10-12 black peppercorns
3 whole cloves
1 cup dry white wine
2 cups veal or chicken stock
1 tablespoon chopped parsley
1 tablespoon grated lemon zest from one lemon


Instructions

1. Preheat oven to 325F. Cut four pieces of kitchen twine, each about a foot long. Place a length of twine on a cutting board and lie a piece of veal shank on its side on top of twine, making sure to center the shank on the twine. Lift the ends of the twine up around the shank and tie as tightly as possible. Pat the shanks dry with paper towels and season generously with salt and pepper.
2. Heat oil in a Dutch oven large enough to hold the shanks in one layer over medium-high heat. When the oil begins to shimmer add the shanks and brown well on all sides, about 6 minutes. Brown the shanks in batches if necessary. Remove to a plate.
3. If the pot looks dry, add a little more oil. Reduce the heat to medium and add the carrot, onion, celery and garlic. Cook the vegetables, stirring frequently, until softened.
4. Place the parsley sprigs, thyme, bay leaves, peppercorns and cloves in a small coffee filter to make a bouquet garni (see pictures). Fold the filter over itself and tie shut with a piece of kitchen twine.
5. When the vegetables are cooked add a little bit of the wine to the pot and, using wooden spoon, scrape up any browned bits from the bottom of the pot. Arrange the shanks over the vegetables in a single layer, along with the bouquet garni. Add the wine and stock to the pot. The liquid should reach about halfway up the shanks. Increase the heat to high and bring to a boil. Cover and place in the oven for 1 hour.
6. After one hour, flip the shanks over and add additional stock to the pot if needed to keep the level halfway up the shanks. Return to the oven and cook for 1 hour more.
7. Remove the pot from the oven and place on the stove top. Increase oven temperature to 400F. Remove shanks from liquid and place on a baking sheet. Once the oven has come up to temperature, place shanks in oven and allow to re-brown. Meanwhile, finish the sauce.
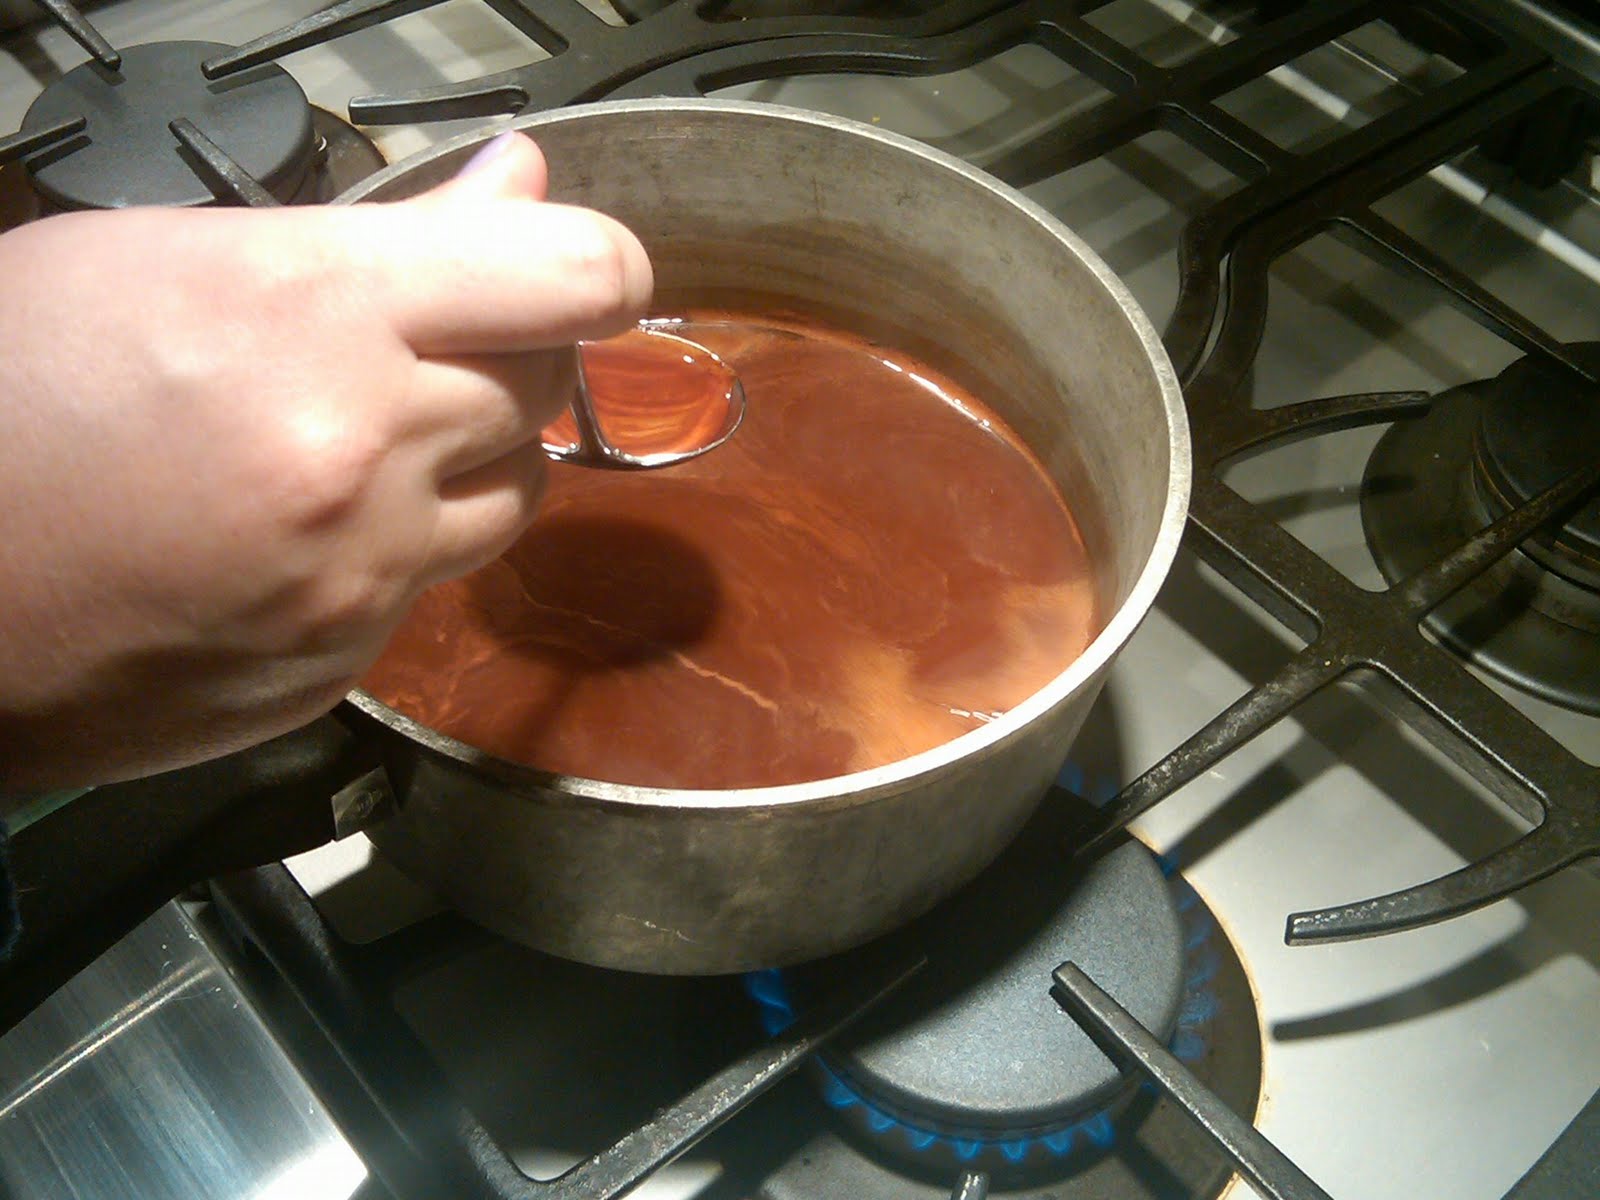
8. Strain the braising liquid into a medium saucepan and bring to a simmer over medium heat. Simmer the sauce until thick and velvety, about 10 minutes, skimming off any fat that rises to the surface. Once thickened, season to taste with Kosher salt and freshly ground black pepper.
9. Combine the chopped parsley and lemon zest in a small bowl.
10. To serve, remove the string from each shank and ladle some of the reduced sauce over the top. Finish with a sprinkling of the parley and lemon zest mixture.

Monday, March 21, 2011

Spring Vegetable Risotto

This risotto is a giant bowl of Spring and freshness. It's beautiful to serve and to look at, with the bright green asparagus and green peas poking out of the cheesy, smooth risotto. And the done-up broth and lemon add a level of freshness that just really brings the whole dish together. It's also a recipe of not-wasting, as you use the leftover stems, rough leek greens, asparagus ends, and other leftover bits from prep to infuse the broth with even more freshness. It's not in the recipe because its not a mushroom risotto, but if you have any mushrooms stems to add from another project, you should do so, as it adds a nice umami flavor to the veggie broth (if you are doing this vegetarian). This recipe is pretty much a testament to the wonders of making your own broth, so be sure not to skip this step!

I tend to not put as much mint as the original Cooks Illustrated recipe calls for. I like the stems in the broth, but I'm just not a fan of the raw texture of mint in much anything. I am however, a fan of garlic in EVERYTHING, so I've upped the amount of garlic in the recipe. (So if you are like me and add two extra cloves of garlic to most recipes, fear not, I have added them already!) It can be a little difficult to judge when the rice has become "transparent on the sides" so I try to stick to the time estimate there. As far as when the liquid is gone, I judge that by if you drag a rubber spatula across the bottom of the dutch oven, does the cleared line remain clear or does the risotto fall back and cover it with liquid immediately? When it stays dry, it's time to add more liquid or move on in the recipe. The exception is this is the last time, where you want to keep it a LITTLE wetter than you have prior just to ensure that once its off-heat and butter, lemon juice, and cheese have been added, it does not get too stiff. If it does, you can loosen it with a little more stock at the end, but be careful not to overdo it. You don't want the initial taste of the dish to be stock rather than lemon.

Cooks Illustrated includes a note on substituting onion for leek (1 for the broth, 2 for the risotto). I've never tried it, and think it would be a shame not to include the leeks because leeks marry so well and add even more green to the recipe. On the other hand, if you have no leeks, this could be an option. Be sure to remember the lemon at the end. The citrus really brings out the freshness of the veggies.

Spring Vegetable Risotto

Ingredients

2 tablespoons minced fresh parsley leaves, stems reserved
1-2 tablespoons minced fresh mint leaves, stems reserved
1/2 teaspoon finely grated zest from 1 lemon
1 pound asparagus , tough ends snapped off and reserved, spears cut diagonally into 1/2-inch thick pieces
3 medium leeks , white and light green parts halved lengthwise, washed, and sliced thin (about 4 cups), roughly chopped tough greens reserved
4 cups low-sodium chicken broth or vegetable broth
3 cups water
5 tablespoons unsalted butter
1/2 cup frozen peas
4 medium garlic cloves, pressed through garlic press
11/2 cups Arborio rice
1 cup dry white wine
1 cup grated Parmesan cheese (3/4 cup for recipe, 1/4 cup for serving)
1-2 tablespoons juice from 1 lemon

Instructions

  1. For the Gremolata: Combine minced parsley, mint, and lemon zest in small bowl, reserving the rest of the lemon for juice and the parsley and mint stems for broth. Set aside.
  2. For the Broth: Chop tough asparagus ends and leek greens into rough 1/2-inch pieces. Bring chopped vegetables, reserved parsley and mint stems, broth, and water to boil in large pot over high heat. 
  3. Reduce heat to medium-low, partially cover, and simmer 20 minutes. 
  4. Strain broth through fine-mesh strainer into medium saucepan, pressing and squishing the solids against the strainer to extract as much liquid as possible. Trash the solids. 
  5. Cover and set over low heat to keep broth warm. This can be done in advance and brought back to low heat prior to starting the risotto.
  6. For the Risotto: Heat 1 tablespoon butter in large Dutch oven over medium heat. When foaming subsides, add asparagus spears, pinch of salt, and pepper to taste. Cook, stirring occasionally, until asparagus is crisp-tender, 4 to 6 minutes. 
  7. Add peas and continue to cook 1 minute. Transfer vegetables to plate and set aside.
  8. Melt 3 tablespoons butter in now-empty Dutch oven over medium heat. When foaming subsides, add leeks, garlic, 1/2 teaspoon salt, and 1/2 teaspoon pepper. 
  9. Cook, stirring occasionally, until leeks are softened, 4 to 5 minutes. 
  10. Add rice and cook, stirring frequently, until grains are translucent around edges, about 3 to 4 minutes. 
  11. Add wine and cook, stirring frequently, until fully absorbed, 2 to 3 minutes.
  12. When wine is fully absorbed, add 3 cups hot broth to rice. Simmer, stirring every 3 to 4 minutes, until liquid is absorbed and bottom of pan is almost dry, about 12 minutes.
  13. Stir in about 1/2 cup hot broth and cook, stirring constantly, until absorbed, about 3 minutes; repeat with additional broth 3 or 4 times until rice is al dente. 
  14. Off heat, stir in remaining tablespoon butter, Parmesan, and lemon juice. 
  15. Fold in asparagus and peas. If necessary, add up to 1/4 cup additional hot broth to loosen texture of risotto. 
  16. Sprinkle each serving with gremolata and Parmesan and serve immediately. 

Thursday, March 17, 2011

Braised Lamb Shanks

The shin portion of the leg, lamb shanks are best when braised until tender and falling off the bone. As a kid, braised lamb shanks were one of my favorite things to order when my family would go out for nice dinners. I loved how the meat would melt in my mouth, and I found there to be something particularly satisfying about leaving only the giant bone on my plate. Today, when I serve this dish to guests, I like seeing them get as excited about eating it as I did when I was a kid.

Over the years I’ve made several versions of this dish, but this is my favorite. The spice mixture is based on the lamb shank recipe in Joy of Cooking, and includes coriander, cumin, cinnamon and allspice, all of which pairs beautifully with the lamb and will make your apartment smell amazing. I re-brown the shanks in the oven after braising, and then perch them on top of small-cut carrots and potatoes that cooked with the lamb. It makes for a particularly classy presentation, but you could just as easily serve the shanks over buttered egg noodles and save yourself some work.

Be patient when trimming the shanks; the more fat and silver skin you trim away, the more tender your shanks will be after cooking. You can substitute essentially any root vegetables for the carrots and potatoes used here, just make sure to cut them into equal sized pieces to ensure even cooking. If your Dutch oven isn’t large enough to hold the shanks in one layer, prepare the shanks though step 3, and then transfer the shanks and prepared braising liquid to a roasting pan and cover tightly with aluminum foil to braise.

Braised Lamb Shanks with Carrots and Potatoes

 
Ingredients
2 lamb shanks
Kosher salt
freshly ground black pepper
4 tablespoons olive oil
2 medium onions, halved pole-to-pole, and cut into ¼ inch slices
4 large garlic cloves, chopped
1 teaspoon ground coriander
1 teaspoon ground cumin 
ground cinnamon
ground allspice
2 cups chicken stock or lamb stock 
1 cup dry white wine, such as sauvignon blanc 
1/3 cup tomato puree 
2 cups carrots, cut into ½ inch pieces
2 cups small yellow potatoes, cut into ½ inch pieces
1 tablespoon finely grated lemon zest
2 tablespoons parsley, chopped

Instructions


  1. Adjust oven rack to middle position, and preheat oven to 300°F. Using a long, thin knife with a semi-flexible blade, trim as much external fat and silver skin from the lamb shanks as possible. Generously season the trimmed shanks with Kosher salt and freshly ground black pepper.
  2. Heat 2 tablespoons of the olive oil in a Dutch oven large enough to hold the shanks in a single layer over medium-high heat until shimmering but not smoking. Add the shanks to the pot and brown well on all sides, 6 to 10 minutes. Remove the shanks to a plate, and pour off the fat from the pot.
  3. Reduce heat to medium, and add remaining 2 tablespoons olive oil to pot, along with the onions and garlic. Cover and cook, stirring occasionally, until the onions are quite soft, about 10 minutes. If onions begin to brown, lower the heat a bit. Add coriander, cumin, ½ teaspoon black pepper, a pinch of ground cinnamon and a pinch of ground allspice to pot. Stir well to coat the onions. Add stock, wine and tomato puree to pot. Using a wooden spoon, scrape up any brown bits from the bottom of the pot. Increase heat to high and bring to a boil.
  4. Return lamb shanks to pot, cover, place in pre-heated oven and bake for one hour. After one hour, add potatoes and carrots to pot, and continue to bake for another hour, or until the meat is falling off the bone.
  5. Remove pot from oven and place on stovetop. Increase oven temperature to 400°F. Remove shanks from pot and place on baking sheet. Once the oven has come up to temperature, place shanks in oven and allow to re-brown. Meanwhile, finish the sauce.
  6. Strain the braising liquid into a medium saucepan and bring to a simmer over medium heat. Simmer the sauce until thick and velvety, about 10 minutes, skimming off any fat that rises to the surface. Once thickened, season to taste with Kosher salt and freshly ground black pepper. Meanwhile, separate the potatoes and carrots from the onions, and discard the onions (they will have given all their flavor to the sauce at this point). Combine the chopped parsley and lemon zest in small bowl.
  7. To serve, divide the potatoes and carrots between two shallow serving bowls. Top each pile of vegetables with a lamb shank, and then ladle enough of the sauce over each shank to almost submerge the vegetables. Finish each plate with a sprinkling of the parley and lemon zest mixture, and serve.

Friday, February 18, 2011

Short Ribs Braised In Syrah

We adapted this recipe from Michel Richard’s Happy in the Kitchen. Like many of Richard’s recipes, making these short ribs is a long and involved process (it takes two days and requires 20 different ingredients). The techniques employed and the equipment required, however, are both simple and familiar. Just remember to set aside plenty of time, and this recipe can be a lot of fun, and very rewarding.

What really sets this recipe apart from your average short rib is the quality of the sauce. Smooth and rich, with complex flavor, the sauce is a thing of beauty. Syrah, which forms the base of the sauce, has plenty of depth and power to match up against the richness of the short rib. The star anise we include in the bouquet garni helps to highlight the sweet elements in the sauce. Finally, port and honey are added to the sauce at end to temper any harshness in the wine.

Skimming fat off reducing sauce
Just as important as what goes into the sauce, however, is what gets taken out of it – the fat. After refrigerating the short ribs overnight, most of the fat in the sauce will have risen to the surface and formed a hard layer. Make sure to remove as much of the fat from the surface of the sauce at this stage as you can. Be patient. After straining the solids out of the sauce, we bring it to a simmer and then move the saucepan to one side of the burner. Boiling the liquid in only one side of the pan pushes the foam that rises to the top to the opposite side, making it easier to skim off. This is a neat trick to use whenever you need to skim fat off the surface of a sauce as it reduces.

This recipe calls for browning the short ribs in clarified butter. Clarified butter is simply regular butter with the milk solids removed – and is terrific for browning meats. When heated to higher temperatures, the milk solids in whole butter can burn. By browning the meat in clarified butter, we can achieve the same deep brown crust that I associate with meats browned in butter, without all the smoke (good news for those of us with sensitive smoke detectors). I’ve included instructions on how to make clarified butter in the recipe.

Short Ribs Braised in Syrah

Ingredients

8 tablespoons (1 stick) unsalted butter
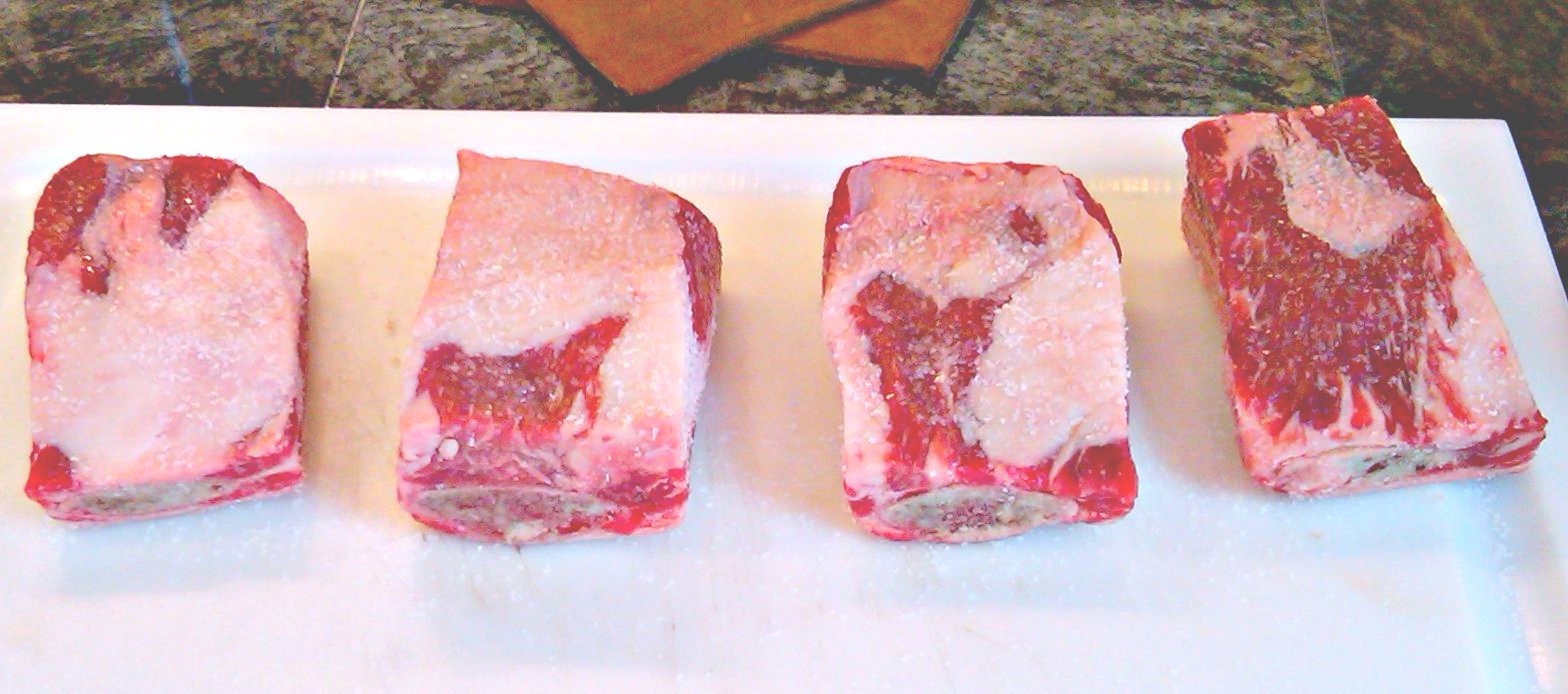
4 beef short ribs, about 7 inches long and 2 inches wide
Kosher salt
1 tablespoon olive oil
6 ounces slab bacon, cut into ½ inch pieces
1 cup diced leeks (white and light green parts)
2 cups diced yellow onions
1 cups diced carrots
6 garlic cloves, peeled
1 bottle Syrah
2 cups chicken stock
1 tablespoon black peppercorns
2 star anise
2 6-inch pieces leek green
2 bay leaves
3 sprigs thyme
2 sprigs rosemary
1 cup ruby port
1/8 cup honey
½ cup tomato paste
Freshly ground black pepper


Instructions

  1. Melt the butter in a small saucepan over low heat, without stirring. Once the butter has completely melted, skim off the foam that has risen to the surface and discard. Carefully pour off the clear yellow liquid underneath. This is the clarified butter. Discard the white milky layer left in the bottom of the pan.
  2. Position oven rack in lower middle position, and preheat oven to 275°F. Dry the short ribs with paper towels, season on all sides with Kosher salt, and let sit for about 10 minutes.
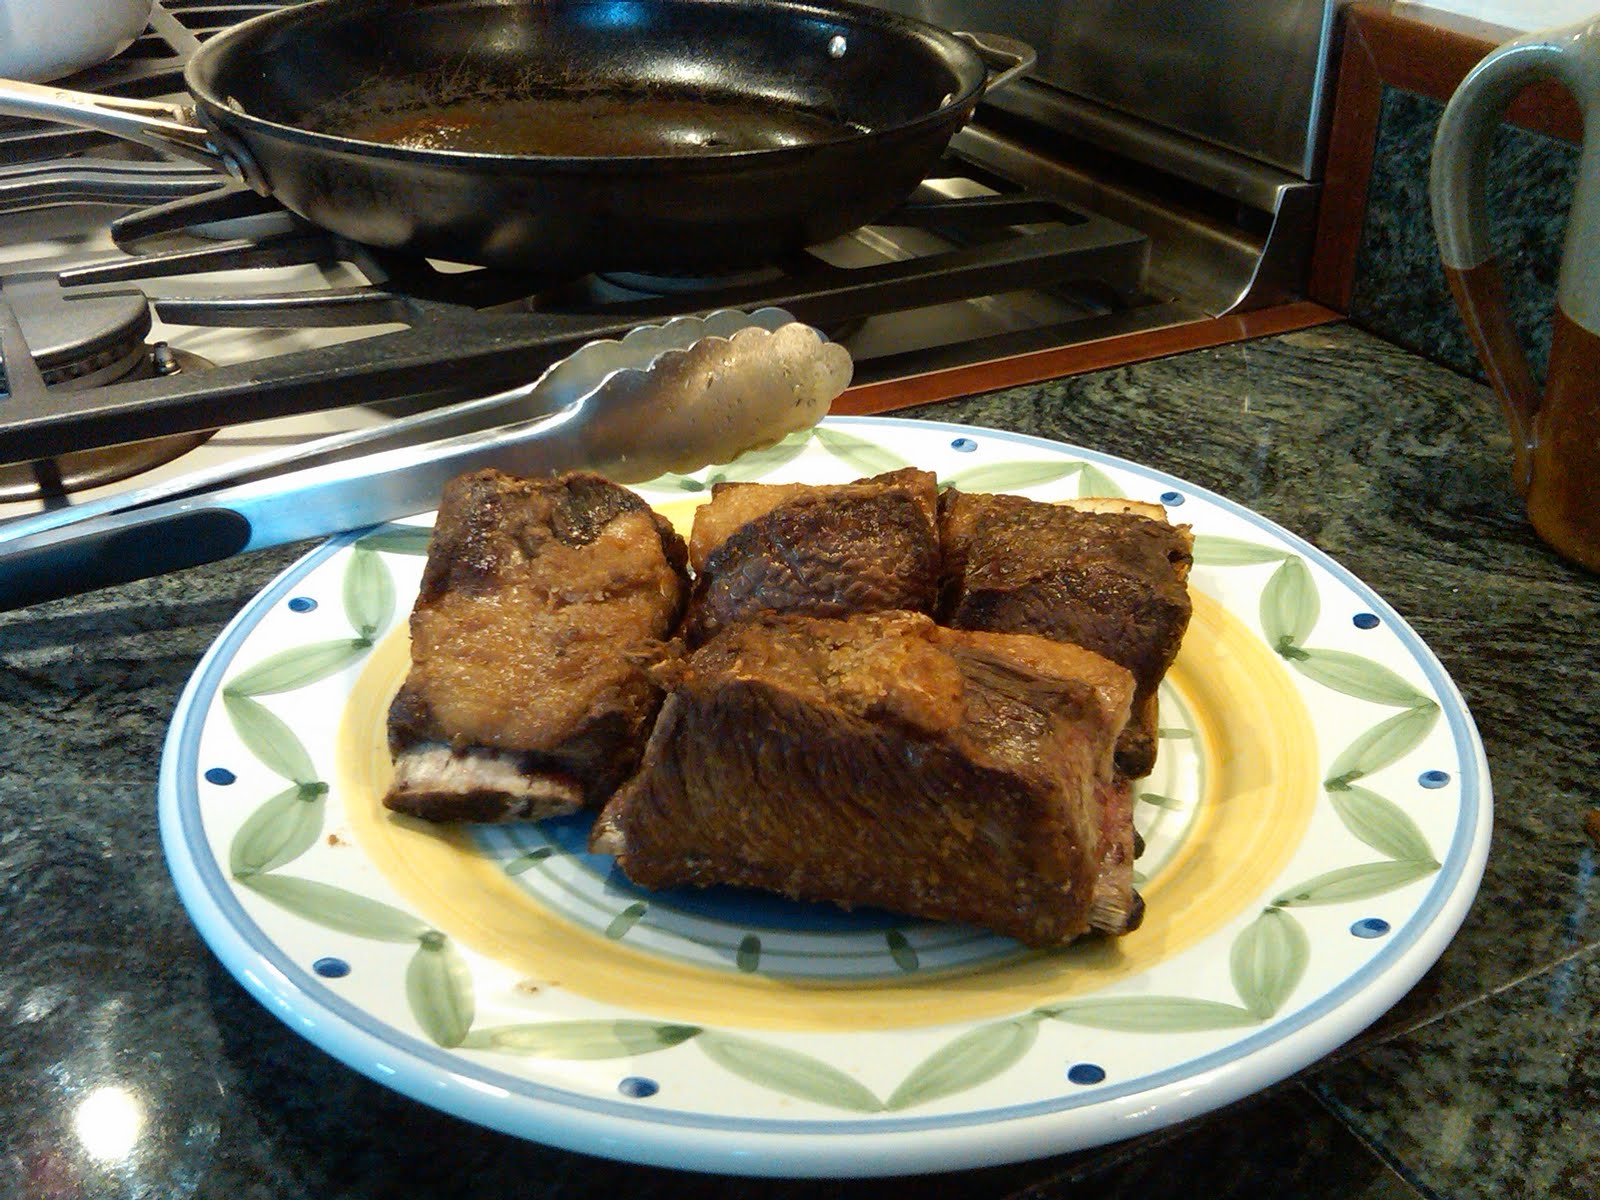
  3. Heat 2 tablespoons of the clarified butter in a large skillet over medium-high heat. Arrange as many short ribs as can fit in the skillet without touching and cook, turning occasionally, until evenly browned on all sides, about 10 minutes. Remove browned short ribs from skillet and repeat with remaining short ribs, adding additional butter to the pan as necessary.
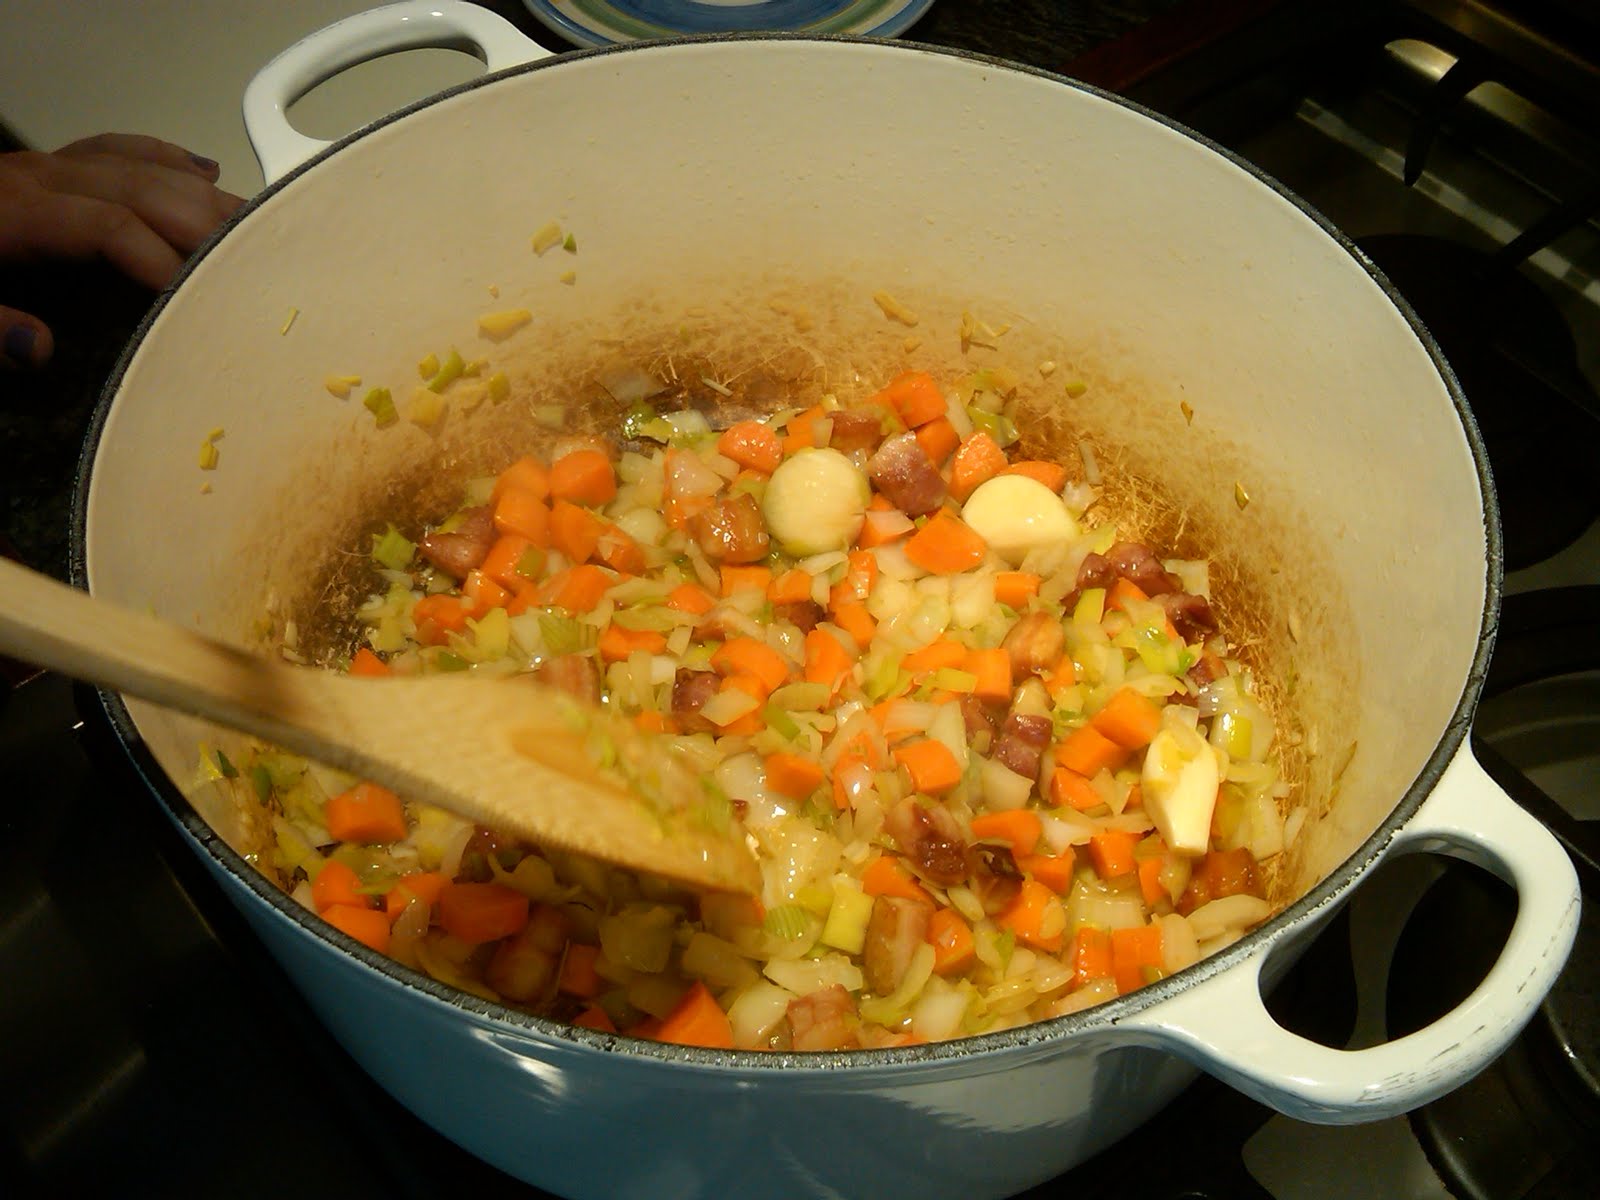
  4. Heat olive oil in large Dutch oven over medium heat until shimmering. Add the bacon and stir for about 10 minutes or until it has rendered its fat. Stir in the leeks, onions, carrots, and garlic and sauté for 10 minutes, stirring frequently, until the vegetables are wilted and lightly caramelized.
  5. Add about 1 cup of the wine and, using wooden spoon, scrape up any browned bits from the bottom of the pot. Arrange the short ribs over the vegetables, layering them as necessary. Reduce heat to medium-low, and add the remaining red wine and chicken stock.
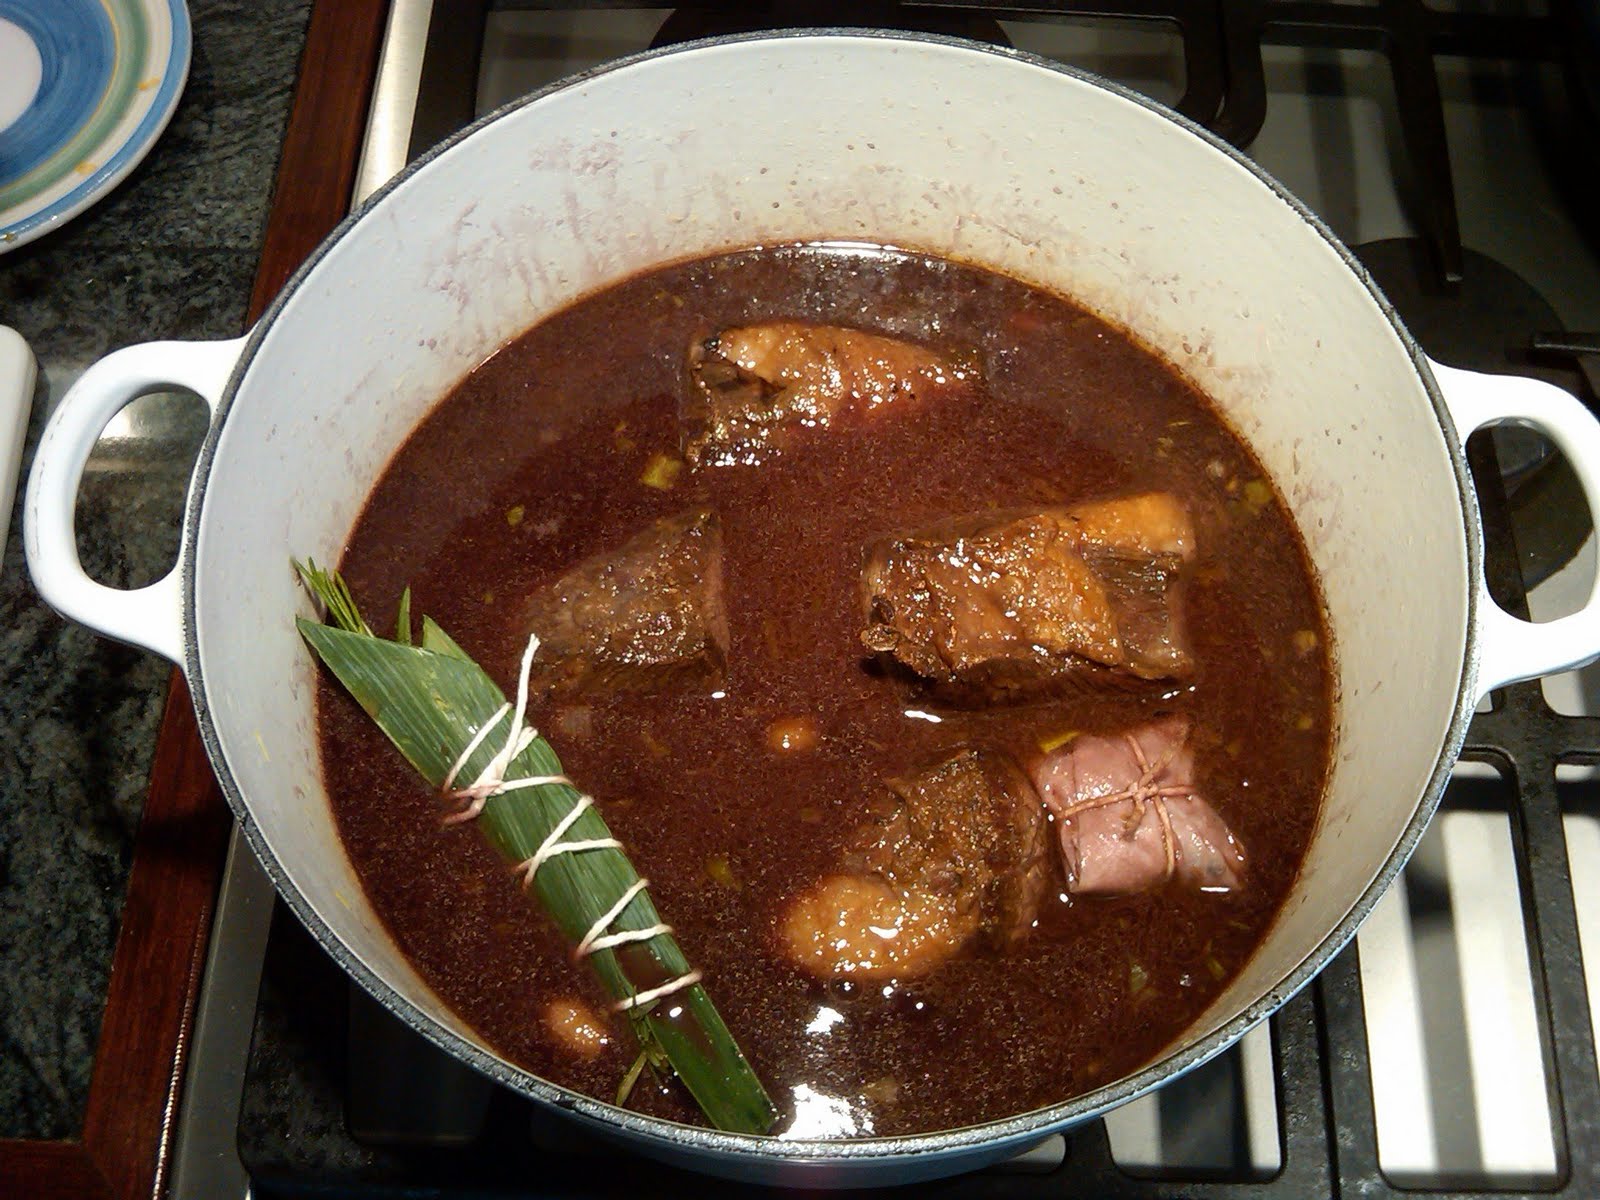
  6. Place the peppercorns and star anise in a small piece of cheesecloth or a small coffee filter, and tie with twine to form a bundle. Lay a piece of leek green flat on the work surface. Place the bay leaves, thyme, and rosemary in the center and cover with the remaining piece of leek. Tie together with twine. (See photos.)
  7. Bring the liquid to a boil, skimming off any fat and scum that rises to the surface. Cover the pot and place in the oven for about 3 hours. When the meat is done, it should be fork-tender and should separate easily from the bone.
  8. Remove the pot from the oven and let cool to room temperature, then refrigerate overnight in the pot.
  9. The next day, remove the pot from the refrigerator and preheat oven to 325°F. Remove and discard all the hardened fat that has risen to the surface. If the liquid has gelled and the meat cannot be removed easily, heat the pot over medium meat. As the liquid heats, remove the meat and bones from the pot before the meat softens. Then continue to heat he liquid until simmering.
  10. Meanwhile, place the meat on a cutting board. Cut away and discard the bones and any fat and sinew. Place the meat in a baking dish or small roasting pan.
  11. Strain the cooking liquid through a fine-mesh strainer into a large saucepan and discard the solids. Place over medium heat, add the port, honey and tomato paste, and bring to a boil. Move the pan to one side of the burner and reduce the liquid to about 4 cups, skimming off the foam that rises to the top. When reduced, season the sauce with salt and pepper to taste and pour the sauce over the meat. At this point, the meat can be covered and refrigerated for up to a day.
  12. Place the baking dish in the oven and bake for 30 minutes. If the sauce does not cover the meat, baste the meat every 5 minutes.
  13. Place the meat on serving plates and spoon the sauce over the top.