Friday, January 20, 2012

Pasta With Kalamata Olives, Garlic and Basil

This is a pretty easy way to take a simple pasta dish and make it complex and deeply layered. The acid of the tomato paste, brightness of the lemon, salt of the anchovy paste (or olive paste if preparing as vegetarian/no anchovy version), and fresh herb of the basil create flavors all around. It's a warm, flavorful meal that isn't half bad for lunch the next day, either.

To make the recipe vegetarian, just substitute kalamata olive paste for the anchovies/anchovy paste. You can also do this if you are simply scared of the anchovy, as many people are. I encourage you, however, not to fear these salty, oily fish, but embrace it. The easiest way to think of anchovy is as the X factor in a lot of things, such as this dish, or Ceasar salad. You can't fully taste it, but it adds a brine-y note that is distinct and often what people love about these dishes. Admittedly, it can be a mess to work with straight from the jar (always get the white filets). It's oily. That's why we often substitute in a little bit of anchovy paste in place of the filets to save time and clean-up. The filets are better, but so is not cleaning an extra knife and cutting board and figuring out what to do with the rest of the jar of anchovies. Like with tomato paste, we buy the tubes of anchovy paste, and keep the leftovers in the fridge for later. This way we don't feel wasteful buying a whole can of tomato paste and then only using a tablespoon. How many recipes really call for a whole can of tomato paste, anyway?

If you find the salt of kalamata olives is too strong, you can use Manzilla olives in their place. The original recipe for this had bread crumbs to thicken, but we've never really had a problem with the sauce being runny, so we've removed them, though we have continued to use the full amount of garlic. Basil can be expensive, and you can reduce it as low as half a cup if necessary.


Cooking Time: 40 minutes, Serves 4


Ingredients

1/4       cup extra-virgin olive oil
6          medium garlic cloves, minced or pressed through garlic press (about 2 tablespoons)
1          tablespoon minced white anchovy fillets (4 to 6 fillets)  
           OR 1 teaspoon of anchovy paste 
           OR 1 teaspoon kalamata olive paste (if vegetarian)
1          tablespoon tomato paste
1/4-1/2 teaspoon hot red pepper flakes
1/4        cup oil-packed sun-dried tomatoes , drained, rinsed, patted dry, and cut into thin strips
1           cup pitted kalmata olives , well rinsed and coarsely chopped (1 8 oz bottle)
1 3/4     teaspoons table salt
1           pound rigatoni (mezze) or farfalle (any short pasta will work)
2           ounces finely grated Parmesan cheese (about 1 cup)
3           tablespoons chopped fresh parsley leaves
1 1/2     cups lightly packed fresh basil leaves , roughly torn
            Ground black pepper
1           lemon , cut into wedges


Instructions

  1. Combine 2 tablespoons quality olive oil, garlic, anchovies (or paste of choice if substituting), tomato paste, red pepper flakes, sun-dried tomatoes, and olives in medium bowl. Make sure olives are well-rinsed of brine prior to chopping and adding. Set aside.
  2. Meanwhile, bring 4 quarts water to boil in Dutch oven over high heat. Add rigatoni and salt.
  3. While pasta is cooking, heat 12" nonstick skillet to medium heat and add olive mixture and remaining olive oil. Cook until olive mixture is aromatic and oil has turned rusty red, 4 to 6 minutes. 
  4. Remove 1 cup pasta cooking water from pot and add to skillet. Bring to simmer and cook for 2 minutes. Remove pan from heat while pasta finishes cooking.
  5. When pasta is just shy of al dente, drain pasta, reserving 1/2 cup of pasta cooking water, and transfer back to Dutch oven. 
  6. Add olive mixture to pasta and toss over medium heat until pasta absorbs most of liquid, about 2 minutes. Stir in 1/2 cup Parmesan. Adjust consistency of sauce with reserved pasta water. (Sauce should cling to pasta but not be too loose or runny.) 
  7. Remove pot from heat and stir in parsley and basil; adjust seasoning with pepper. 
  8. Sprinkle with parmesan and serve with lemon wedges to be added prior to eating.

Saturday, January 7, 2012

Peppermint Mocha Cookies

These cookies are almost like a tiny little brownie topped with peppermint butter cream. I make them every year for Christmas as my official "festive" cookie. They're a bit more unusual than your standard sugar cookie or gingerbread cookie, but feel right at home among their more traditional holiday brethren, and round out any good cookie exchange with a rich chocolate option. And if you want them outside the month of December, just omit the food coloring, or go with red or blue instead of the admittedly Christmas driven green. They're not that hard to make. They look adorable, and you get to play around with a mallet. Who doesn't want to play with a mallet?

Speaking of which, when crushing your candy canes, try and really crush them down into a fine crumb of candy cane. You want the cookies to have a bit of texture and crunch, but not have such large pieces that they get caught in your teeth while eating. The color of the candy cane will still be evident against the butter cream backdrop. Make sure to ice then top immediately, instead of icing a large number then going back to top with candies. The frosting will start to harden very quickly, and once that happens, the peppermint won't stick. It is easiest to just got frost, top, plate. Frost. Top. Plate. If pressed for time, the cookies can be made the day before you frost. Store in an air-tight plastic container along with a slice of torn up sandwich bread. The sandwich bread prevents the cookies from drying out and keeps the chew. They may stick together very slightly when stacked. This is fine. Remember, you are frosting the cookies, so small blemishes on the top will be washed a way in a delicious layer of mint frosting. Frosting covers all. Be generous with the frosting. It's meant to be a thick, almost cake-like layer of frosting.

The cookies will not spread very much in the oven. They are meant to be about the size of a silver dollar.

Cooking Time: 30 minutes active, 30 minutes inactive Makes 24-30 small cookies

Ingredients

Cookies
1 3/4 cups
all-purpose flour
1/2   cup
cocoa powder
1/2   teaspoon
baking soda
1/2   teaspoon
table salt
8      tablespoons
unsalted butter (1 stick), softened but still cool
3/4   cup
granulated sugar
1/2   cup
brewed espresso or strong coffee, cooled
1/2   teaspoon espresso powder (optional)
1      teaspoon
vanilla extract

Frosting
6     tablespoons
unsalted butter , softened
2     cups
confectioners' sugar
2     tablespoons
milk
1/2 to 3/4 teaspoon
peppermint extract (or to taste)
3 to 4 drops green or red food coloring 
4      peppermint candy canes (or about 10-12 peppermint wheels), crushed into crumbs

Instructions


  1. For the cookies: Adjust oven racks to upper-middle and lower-middle positions and heat oven to 350 degrees. Line 2 large (18 by 12-inch) baking sheets with parchment paper.
  2. Sift flour, cocoa, baking soda, and salt together into medium bowl.
  3. In a separate bowl, beat butter and sugar with an electric mixer at medium speed until light and fluffy, about 5 minutes. Scrape down sides of bowl with rubber spatula.
  4. Dissolve espresso powder into cold coffee. (If coffee is warm, dissolve espresso powder, then place measuring cup of coffee in a larger measuring cup serving as an ice water bath to cool quickly.
  5. Add cooled espresso and vanilla and beat at medium-low speed until combined. Don't worry if it looks curdled, that will fix itself when you add the dry ingredients. Scrape down bowl.
  6. Don't worry, it'll work itself out.
    It may curdle when coffee is added
  7. With mixer on low speed, gradually add dry ingredients and mix until just combined.
  8. Roll dough into thirty 1-inch balls. Place 15 balls on each prepared baking sheet, spacing them about 2 inches apart. 
  9. Bake until just set, rotating sheets from front to back and top to bottom halfway through baking, 8 to 11 minutes. 
  10. Cool cookies on sheets for 2 minutes; transfer with metal spatula to wire rack to cool completely, at least 30 minutes. (Cookies can be stored in airtight container with a torn piece of sandwich bread or a couple of sugar cubes for up to 4 days.)
  11. For the frosting: Take the candy canes, and place inside a gallon ziploc bag. Seal the bag tightly, then place on a cutting board and strike with the smooth, wide side of a mallet until the candy canes become a fine powder. Set aside while you make the frosting.
  12. With an electric mixer, beat butter at medium-high speed until smooth, about 1 minute. 
  13. With mixer running, add confectioners' sugar a 1/4 cup at a time and beat at medium-low speed until most of the sugar is moistened, about 45 seconds. 
  14. Scrape down bowl and beat at medium speed until mixture is fully combined and starting to cream, about 3 minutes. Scrape down bowl.
  15. Add milk, peppermint extract, and food coloring and beat at medium speed until incorporated, about 10 seconds, then increase speed to medium-high and beat until light and fluffy, about 4 minutes, scraping down bowl once or twice. 
  16. Frost a cooled cookie with a rubber spatula or angled spatula and immediately sprinkle with crushed mints. Place on a plate for the frosting to harden, and continue frosting the rest of the cookies. (Once frosted, cookies are best served within 3 days.)


Sunday, January 1, 2012

Brown Sugar and Citrus Cured Salmon

This salmon has become a staple at our holiday party and is always one of the first things to get eaten. It makes an elegant and impressive hors d'oeuvre, but it's simple to make and can be prepared days ahead of time and sliced just before the party.

The salmon can cure for anywhere from 24 to 48 hours. I prefer lightly-cured salmon, which is melt-in-your-mouth tender and still has prominent salmon flavor, so I only cure my salmon for 24 hours. If you prefer your cured salmon to have firmer flesh and saltier flavor, leave your fish in the cure for the full 48 hours. If you're squeamish about serving raw-ish fish to your guests, I would recommend curing your fish for longer than 24 hours.

This recipe will work well with any variety of salmon, but it has to be very fresh. Ask your fishmonger which salmon is the freshest, and choose that one. Try to begin curing the salmon on the same day you purchase your fish. This recipe will make enough fish to serve 6 as an appetizer. For larger parties, simply use a larger filet and increase the amount of curing mixture to maintain the correct ratio of fish to cure.

Ingredients 
1 pound very fresh salmon filet, skin on
1 cup Kosher salt
1 cup dark brown sugar
1 tablespoon black peppercorns
1/4 cup citrus zest from any combination of lemons, limes, oranges and grapefruits
several sprigs dill
creme fraiche


Instructions
  1. Combine the salt, sugar, peppercorns and zest in a medium bowl.
  2. Line the bottom of a glass baking dish with the dill. Pour a third of the curing mixture over the dill and smooth.
  3. Place the salmon, skin down, into the dish and pour the rest of the curing mixture over the fish. Smooth the curing mixture to form an even layer. The salmon should be completely encased in the curing mixture.
  4. Place a layer of plastic wrap directly onto the curing mixture, and place another glass baking dish on top of that. Weight with cans and place in the refrigerator for 24 to 48 hours.
  5. Remove the salmon from the curing mixture and rinse thoroughly under running water. Dry the salmon with paper towels and remove the skin using a filet knife. Slice as thinly as possible and serve with creme fraiche.

Tuesday, December 27, 2011

Braised Pork Belly (Fresh Bacon)

Anyone who knows me, knows that I love bacon. Pork belly, also known as "fresh bacon," is simply uncured slab bacon. It's where bacon comes from, so it follows that I would love it just as much as I love its smokey, crispy, mouth-watering relative. To no one's surprise, it turns out that I do.

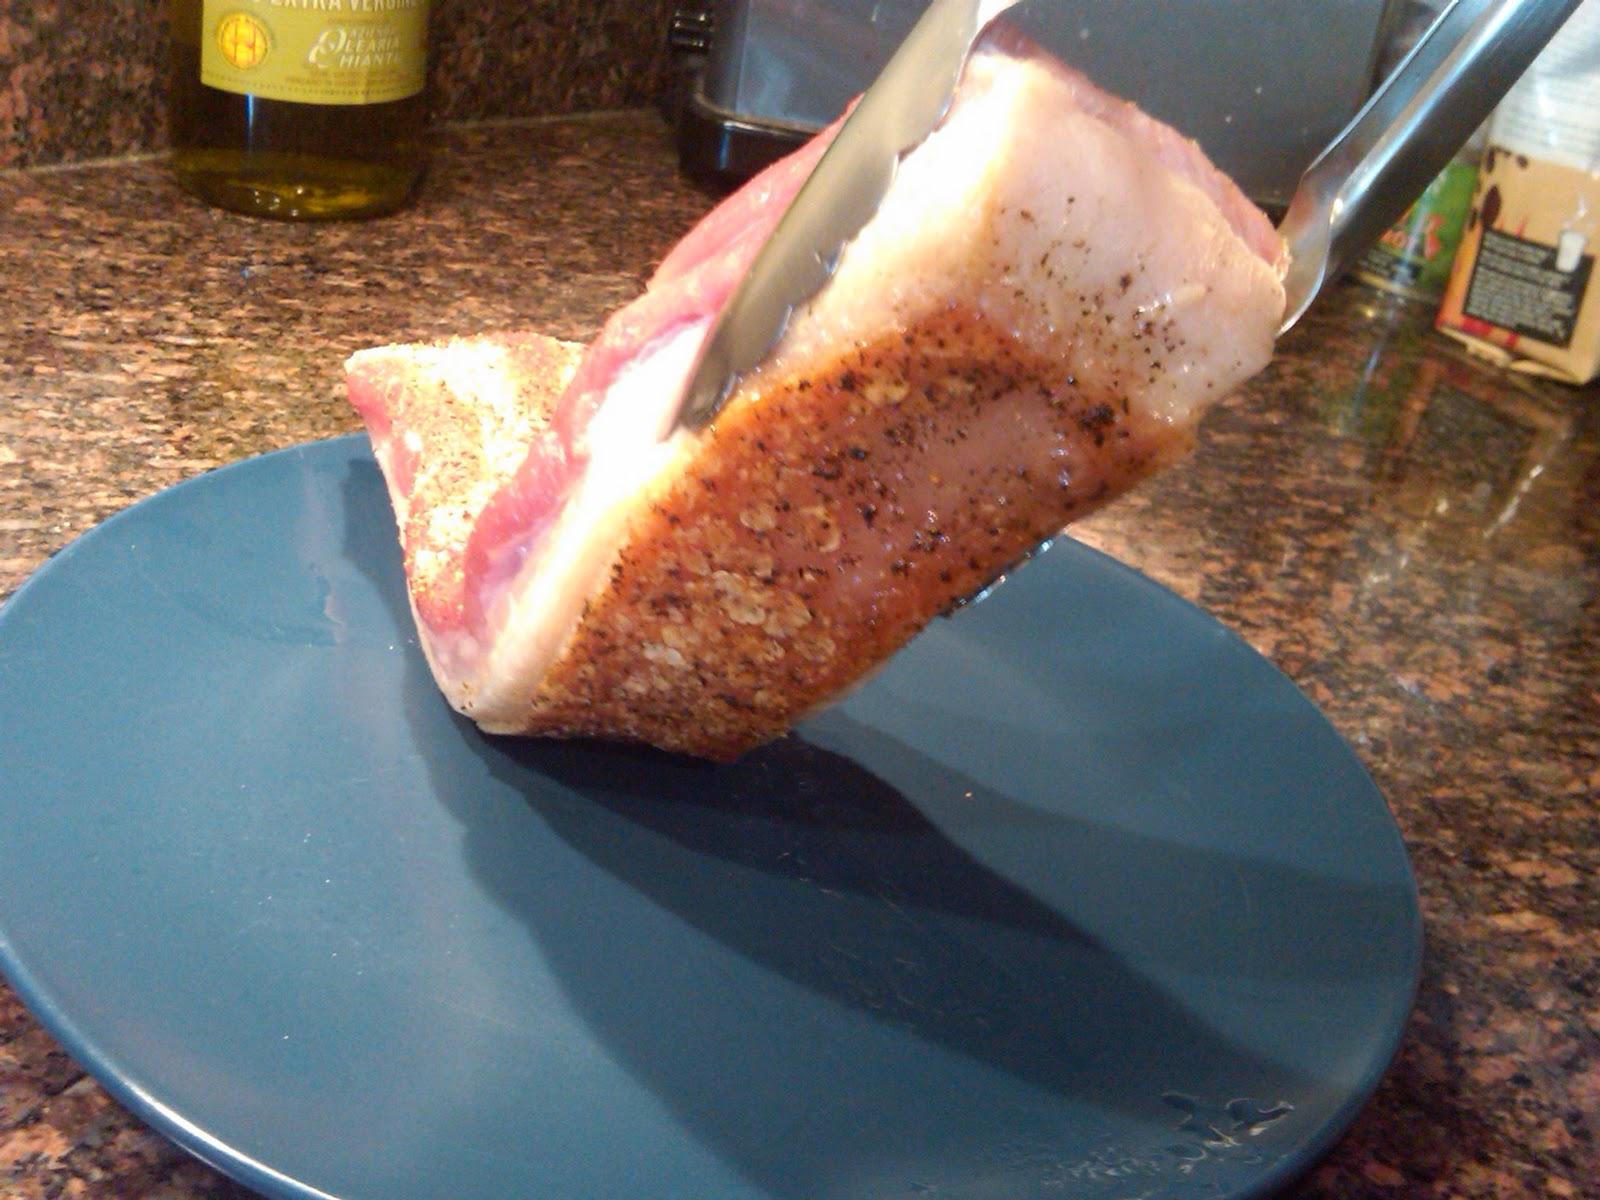
Braised for hours in stock and aromatics, pork belly can be as tender as fillet of beef, but with so much more flavor. Just like a strip of bacon, the belly is composed of layers of fat and meat. Slow cooking helps to soften the tough layers of meat, while also infusing the tender layers of fat with the flavors of the braising liquid. When I buy belly, I try to look for pieces that have a good balance of fat and meat. Too much fat can be overwhelming in the mouth, and too much meat can result in a dry final product.

This recipe is based on Tom Colicchio's recipe for fresh bacon in "Think Like A Chef." The first few times I attempted Colicchio's recipe, I was always happy with the belly itself but couldn't quite nail the sauce. The original recipe finished the belly by browning it in a hot oven with the braising liquid still in the skillet. Something about putting that beautiful sauce in a hot oven ruined it every time. As a solution, I strain my braising liquid into a small sauce pan and gently reduce on the stove top until I get it just right. Meanwhile, I brown the belly with a little bit of extra stock, instead of my precious sauce.

The belly can be prepared through step 3 and held for several hours before completing. When buying pork belly, be sure to ask your butcher to leave the skin on. Also, try to pick a piece of belly that is relatively uniform in thickness. Pork belly is so cheap, don't be afraid to buy more than you need and trim it down to the choicest pieces at home. Serve with mashed potatoes, soft polenta, or our polenta cakes.
 

Ingredients

1 tablespoon canola oil
Kosher salt
Freshly ground black pepper
2 pounds pork belly, skin on
1 onion, roughly chopped
2 carrots, roughly chopped
2 celery stalks, roughly chopped
1 leek, white and light green part only, roughly chopped
6 garlic cloves, peeled
 
4 cups chicken stock


Instructions
  1. Heat oven to 350°F. Heat the oil in a large ovenproof skillet over medium heat until shimmering. Generously season the pork with salt and pepper. Add it to the pan, skin side down, and cook until the skin is well browned, about 15 minutes. Transfer the pork to a plate.
  2. Pour off all but about 2 tablespoons of the fat and add the onion, carrots, celery, leek, and garlic to the skillet. Cook the vegetables, stirring occasionally, until they are tender and beginning to brown, about 20 minutes. 
  3. Return the pork belly to the skillet, skin side down and fat side up, and add about 2 cups of stock (it should surround but not cover the meat). Bring the stock to a simmer, then transfer the skillet to the oven. 
  4. Gently simmer the pork, uncovered, for 1 hour, then add another cup of stock. Continue cooking until the pork is tender enough to cut with a fork, about 1 hour longer.
  5. Remove the skillet from the oven and allow the pork to cool in the braising liquid. This will take at least one hour.
  6. When ready to complete, increase the oven temperature to 400°F. 
  7. Remove the pork from the liquid, then gently lift off and discard the skin (use a small knife to separate any pieces that don’t come away from the fat easily). Score the fat, making crosshatch incisions, then cut the pork into 4 portions. This is rich stuff, so I recommend serving no more than one, 2-inch square piece to each guest.
  8. Strain the braising liquid through a fine mesh strainer into a small saucepan and discard the solids. Bring to a simmer over medium-low heat and reduce to a sauce-like consistency, skimming off any fat that rises to the surface. 
  9. Meanwhile, return pork, scored side up, to the skillet. Pour the remaining 1 cup of stock around the pork and transfer to the oven. Allow to cook, without basting, until the pork is heated through and the fat nicely browned, about 20 minutes.
  10. Serve the pork in shallow bowls with some of the sauce ladled over the top and around the meat.

Thursday, December 22, 2011

Pignoli Cookies (Pinenut Cookies)

Recently, TK and I got to go on the trip of a lifetime to Tuscany. This was my first time in Italy, and now, NOW, I get why everyone talks about Italian cookies and why they are the best things in the world. Now I understand why they are not the same as the powdered sugar balls you get every Christmas, and that deceptively simple looking cookies pack a ton of surprising and wonderful flavor. The answer, boys and girls, is almond paste.

I dislike Marzipan. I think it is overly sweet and somehow texturally off. So perhaps it is not surprising that I have shied away from almond paste. Maybe I just needed to grow into it. You can't always expect a nine-year old to get a subtle thing like almond paste. But now, I have figured out that almond paste is both what makes my favorite coffee cake from Germany delicious AND the secret behind pine nut cookies. You don't necessarily look at the pine nut, flavor enhancer to pestos everywhere, as a sweet thing. But it really works in combination with the sweet almond paste and meringue of the egg whites.

You would be amazed at how difficult it is to find good Italian recipes. There is a glut on the market for all things Italian, but so many of them are based off of what Americans consider Italian food to be, or even worse, as easy food for people who don't know how to cook. Every corner than can be cut is cut. This is not to say that my quest for a good Italian cookbook can't be met. I'm just really really intimidated by what happens when you search for "Italian cookbook" on Amazon, and the reviews are no help because so many of the people looking are not really looking what I'm looking for. I don't want easy Italian food. I'm not really interested in the best marinara. I want to learn how to make that delicious pear and ricotta cake that blew my mind.

So here is my first attempt at pignoli cookies. There are both crispy and chewy varieties of pignoli cookies. I fell in love with the chewy, straight up almond paste ones that were a ball of pine nuts. It seems much easier to find recipes for the crispy and more meringue ones. This are the other, more chewy cookie. I am pushing it away from the original recipe and towards my goal by adding more almond paste and cooking for less time (the main difference between a chewy pignoli cookie and a crispy one). So just trust me on this one, and try this recipe. 


Make sure you get pure almond paste, not marzipan, and NOT almond filling. Also lean towards the almond paste that comes in a can or tub rather than the tube, which tends to be dryer. This is surprisingly easy to make, as it is a food processor recipe. The dough will be extremely sticky. it'll stick to your fingers, everything. The pine nuts will give it its shape and cookie-ness. Don't worry if it sticks to your hand. These cookies mean business, and are a messy affair.

Pignoli (Pine Nut) Cookies

After blending with sugar/flour
Chunky from the can
Ingredients
12 oz of pure Almond paste (NOT Almond filling and NOT Marzipan)
1/2 cup granulated sugar
1/2 cup of powdered sugar
1/4 cup of flour
3 egg whites, lightly beaten
10-12 oz Pignoli (Pine Nuts)


Cooking Time: 30 minutes active, 40 minutes inactive Makes 24-30 cookies


Instructions
  1. Add almond paste to food processor. Paste will break up in chunks. Pulse processor several times then grind until chunks are completely broken up. 
  2. Pulse the powdered sugar and the flour into the almond paste. Blend until mixture looks like very rough sand. 
  3. Beat egg whites lightly for 1-2 minutes in small bowl with whisk.
  4. Add egg whites and process until dough comes together.
  5. Scoop out a small piece of dough (about a small spoon). It will be very sticky. Slide off of spoon and roll in pine nuts till completely covered, and place 2" apart on cookie sheet lines with parchment paper. 
  6. Bake 300 degrees about 25 min. Remove to wire racks to cool, then keep covered. 
  7. Freeze cookies if you're not going to use them right away, then take out as needed.

Happy Baking!!!

Sunday, December 18, 2011

Bacon Wrapped Dates with Honey Mascarpone

These dates are the hit of our holiday party every year. I first made them after learning that Talula's in Arlington had stopped serving bacon wrapped dates. This was unacceptable, so I had to learn how to make my own bacon-date combination. This is what I have come up with. My first attempt I used thick-cut bacon. Despite being better in most circumstances , it throws off the proper bacon-to-date-ratio in this recipe. I choose mascarpone because of the texture, mild sweetness, creaminess, and because it handles heat well. Letting the cheese warm to room temperature really made filling the dates much easier and resulted in fewer broken bags, as it requires less squeezing. If your ziploc bag starts to ooze out the edges try cutting around the leak and placing a new bag over the old one to keep the spout small. This is much less messy then dealing with an increasing number of bag leaks or trying to change bags.

A word on selecting your dates: The easiest thing to do is buy the box of pre-pitted dates, but often the pitted organic dates are superior in size and deliciousness. The soft ones are really easy to pit as you slice them open. If your dates are a bit harder (such as the ones my parents bring me back from West Coast date country), they can be obnoxious to pit. I have no specific solution to this. The pre-pitted packages are the easiest to wrap and less dependent on tooth picks, but the awesomeness of a nice, plump date is worth noting. We use raw honey in this recipe. If you haven't stopped by an Appalachian road stand recently, regular honey works just as well.

It's warmth and friendliness makes this concotion a perfect candidate for a winter holiday treat. After all, the salt of the bacon and the sweet of the date combined with slightly sweet cheese is a perfect little bite, and great for grazing. Because you can make them ahead and they are relatively to churn out assembly line style once you get going, you can make as many as you want. I try to budget 2-3 dates per person. Some will eat more, some will eat less.

Bacon Wrapped Dates with Honey

Ingredients
2 Bacon Packages (thin sliced, about 32 slices) cut in half
2 lbs Medjool Dates (pref. pitted, better if large, and soft)
1 lbs Mascarpone cheese (2 8 oz tubs), at room temperature
1/3 cup Honey (raw honey if available)
      Olive Oil
      Coarse Sea Salt (such as Fleur de Sel)

Cooking time: 1 hour prep, 25 minutes to cook. Makes 64 dates.

Instructions
  1. Mix together softened mascarpone cheese with 1/3 of a cup honey until soft, smooth and creamy.
  2. Add cheese to gallon ziploc bag, placing cheese as close to one corner as possible. Snip the very edge (1/8") of the corner of the ziploc bag to create an impromptu pastry bag. If you have an actual pastry bag, use it.
  3. Slice dates down the center on one side, revealing the center. If necessary, remove the pit. Open the date so the center of the pit is exposed.
  4. Fill center of the dates with cheese. The dates do not have to close all the way and can have some overflow. The warmer the cheese is, the easier it will be to squeeze.
  5. Slice strips of bacon in half. Try to select bacon with minimum fat content on the edges.
  6. Place the date cheese-side down at the end of the strip of bacon and roll. Dates can be stored rolled up until ready to cook. If dates are large, pick dates with a toothpick to ensure that the bacon stays rolled prior to baking.
  7. Cook at 375 degrees for 25 minutes on a wire rack place on top of a cookie sheet.
  8. Serve immediately. If desired, sprinkle with quality olive oil and fleur de sel before serving.

Menu: Christmas Party Menu

Another  year, another holiday party. This is the one party that we have taken to throwing every year, partially as an excuse to buy a Christmas tree. Partially because this time of the year just makes me want to make cookies, cookies, and yet more cookies. Yet again, we were a little insane in the amount of food we prepared, but there are so many things we've started looking forward to as "something we'll do for the holiday party" that it's just hard to stop yourself. We'll be posting recipes as we find the time, recover from our hangovers, and look with horror at the mess we made.

This year, we added a spicy nut mix, homemade liver mousse, and a second vegetarian option of spicy sweet potato (a recipe I made up and am still working on perfecting). We also made pignoli cookies, which I had for the first time during our recent Tuscany trip. I insisted on trying to replicate them. These aren't quite as good as the ones I had in Italy but were an excellent first attempt and stand up on their own. In addition, we had our old favorites. You just can't go wrong with this beef recipe, or with bacon wrapped dates that matter. There's bacon. There's date. It's perfect.


So enjoy, and have a happy holiday season!


Appetizers -
Chicken "Faux Gras" Mousse with Cucumber Gelee
Truffle Butter Popcorn
Pistachio and Cranberry Stuffed Brie with Raw Honey

Main Courses -
Spanakopita Triangles (Vegetarian) We made these smaller than the dinner-sized portions we usually make. Just cut the phyllo six ways horizontally instead of in half vertically.
Chipotle Sweet Potato Pockets (Vegetarian)
Ginger and Vodka Cured Beef Tenderloin

Cookies -
Molasses Crinkles
Holiday Rice Krispie Treats

Beverages -
Mulled Wine
Egg Nog

Sunday, November 20, 2011

Pumpkin Spice Bread

This is part of our Christmas tradition in my household, and the making of it surrounding both Thanksgiving and Christmas is very serious business indeed, lest you forget the flour or the baking soda. (Both have been done by various daughters). Most pumpkin breads are super dense and saccarin sweet. This one, while still sweet and still moist, tries to be just a little more bread-like rather than cake-like. 

This recipe is originally called Jenean's Pumpkin Bread, and comes from a falling apart 70s era cookbook of recipes from our hometown in Virginia. However, we might have adapted Jenean's recipe a bit, reducing the amount of sugar and oil and doubling all of the spices, so really, it is just the family recipe now. For those of you who are health nuts, there is a healthier version of this recipe using applesauce that my sister has created, but this is the original version that does not take the health of one's father into account at all, knowing that said father will probably consume at least half of one loaf single-handedly over a forty eight hour period.

Because we make this in bulk every holiday, we often end up freezing a loaf or two for later by wrapping tightly in foil. It will keep for about a month in the freezer. You can also prepare the dry ingredients ahead of time to make a sort of bread mix for later, keeping in mind that for baking purposes, sugar is a wet ingredient. Serves perfectly topped with butter.


Pumpkin Spice Bread

Ingredients
2 cups sugar
1 cup salad oil
2 cups pumpkin (1 15 oz can)
4 eggs
3 cups flour
1/2 tsp salt
1/2 tsp baking powder
2 tsp cloves
2 tsp nutmeg
2 tsp cinnamon
1 tsp baking soda


Instructions

1. Grease inside of loaf pans with butter or butter wrapper. Be sure to be thorough. 
2. Blend sugar and salad oil together with hand mixer in large bowl. 
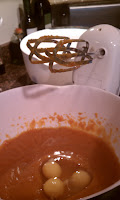
3. Add eggs and pumpkin. 
4. Sift dry ingredients together in separate bowl (flour, cloves, nutmeg, cinnamon, baking soda, baking powder, and salt) and add to pumpkin blend.
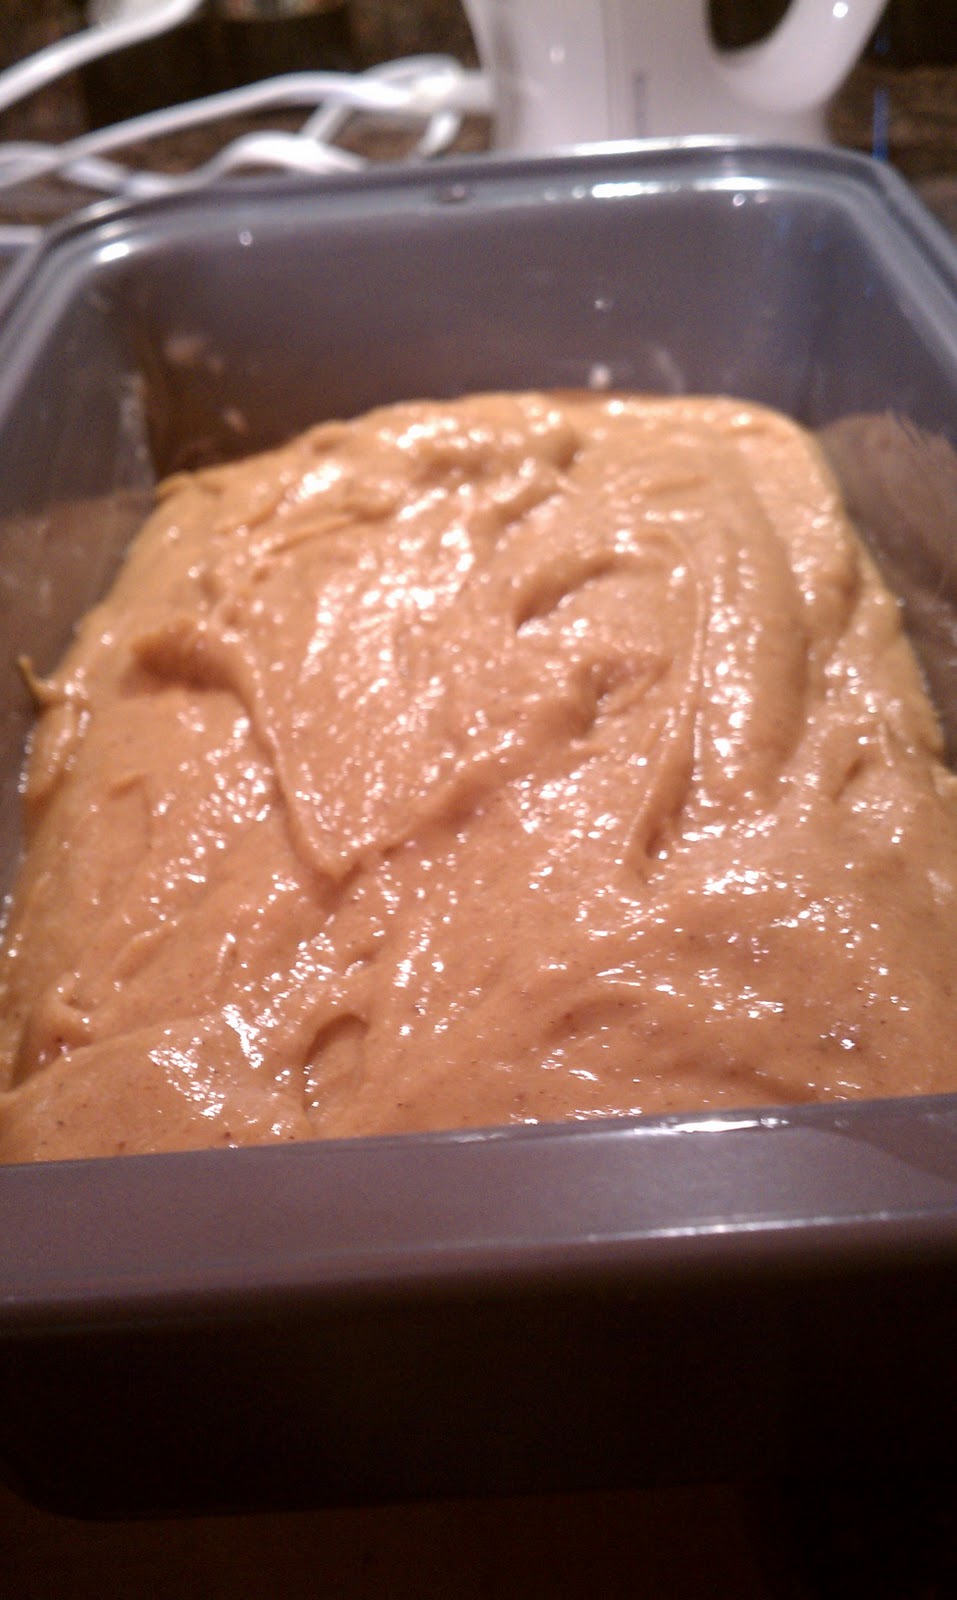
5. Mix together until well combined. Pour mixture evenly into two loaf pans.
6. Bake at 350 degrees for 1 hour 15 minutes.
7. Let cool for 30 minutes in pan, then remove and allow to finish cooling on wire racks.